The Checklist is an easy way to make sure that you've done everything you need to do while setting up a tool! After choosing which tool you'd like to create, and going through the Basic Configuration page, the checklist will appear to the left of your screen to guide you through the rest of the process!
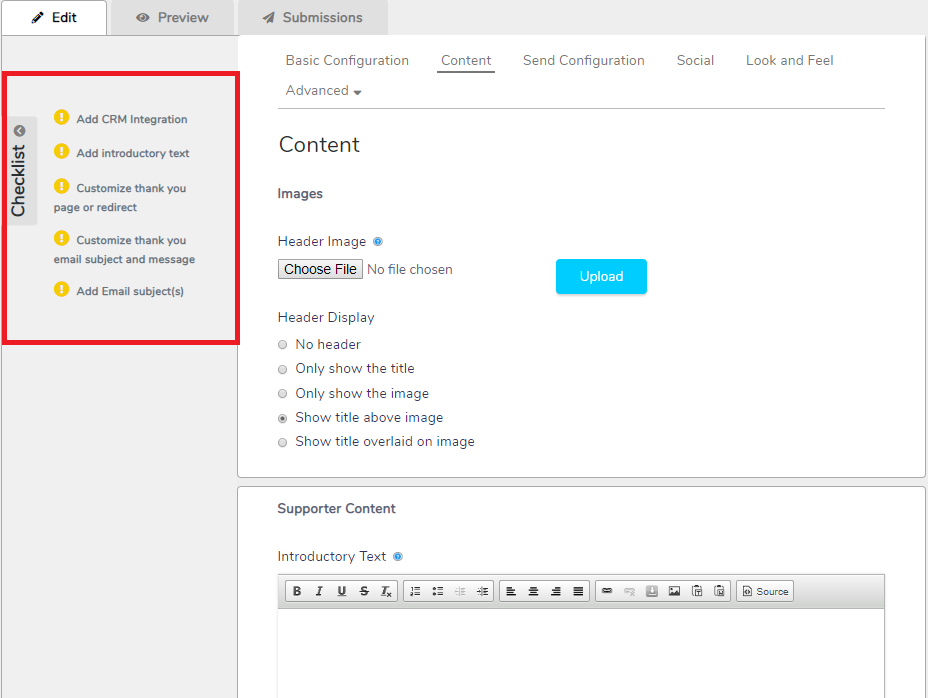
Once arriving at the Content tab, the checklist pops up. As shown in the picture, the checklist will remind you if you've missed anything in the Basic Configuration, and remind you what you need to fill out on the content page.
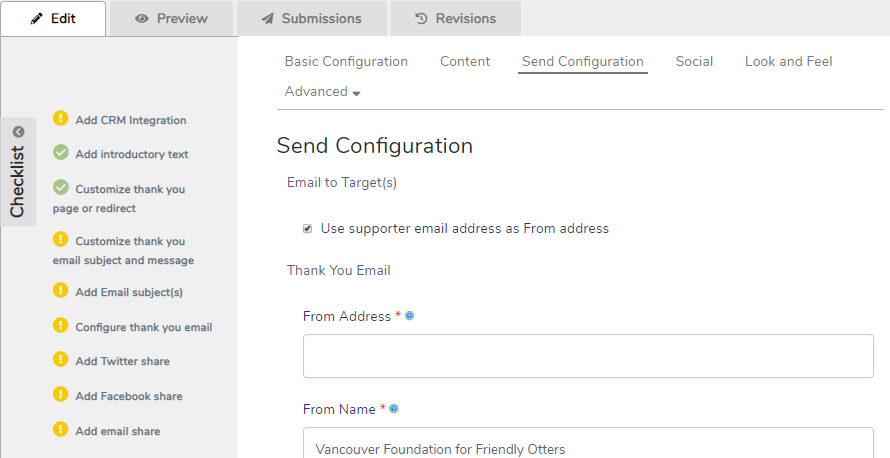
Navigating to the Send Configuration tab, the checklist will start to add items that are relevant to the current page, while keeping the items from the prior pages.
When you've successfully completed a task, the checklist will turn the yellow warning sign into a green check-mark (to remind you of the awesome work you're doing). If you've forgotten something on a past page, simply click the item on the checklist and it'll take you to the appropriate tab to address it.
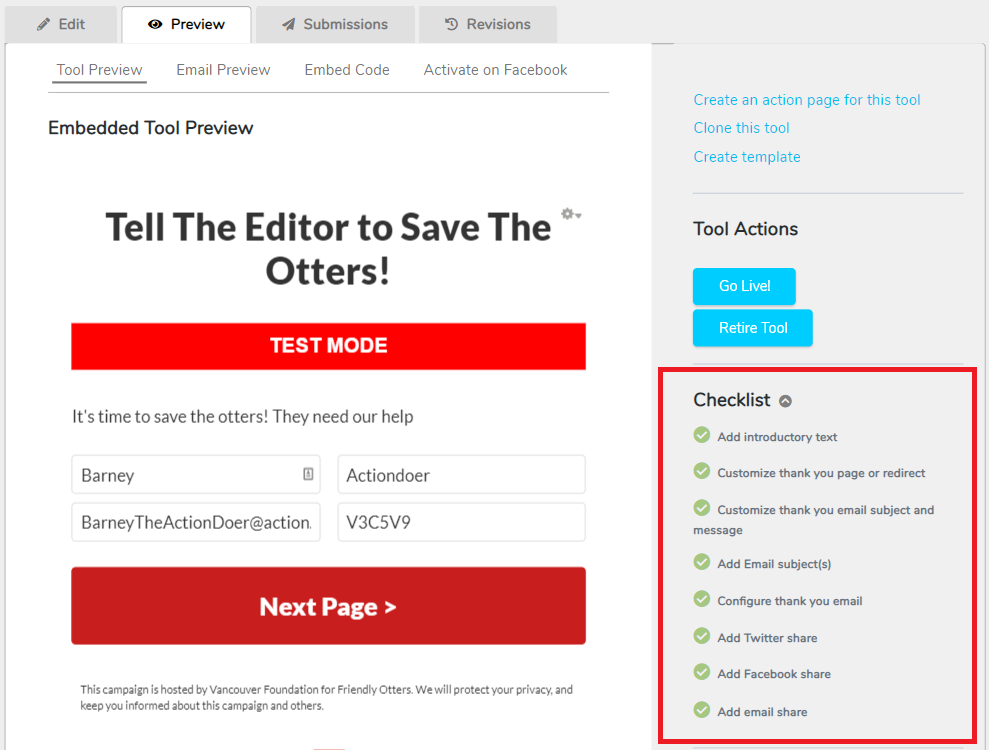
When you think you're ready to launch your tool, head over to the Preview tab. Here, you'll see a preview of what your tool will look like, with the checklist to the right of it. Here, you can have another look over of your tool, and make sure you've completed all the items on the checklist. If you think your tool is ready, press Go Live and share your work with the world! Once your campaign is over, you can return to the Preview tab to Retire your tool.
That's it! The checklist will be there to make setting up tools easier, which means you can spend more time customizing and less time stressing.