When you create a new Tweet @ Tool, you’ll be working with a basic template, so you’ll be taken to a campaign tool page that already includes some information, like the clever title "Clone of Tweet @YourRep Tool" in the example below.
Hmm. It's probably time to come up with something a bit catchier...
Step 1: Let's begin by renaming your campaign tool under the Title field. The name of your Campaign should already be correct, but you can select a different campaign being run by your Organization by clicking on the Campaign dropdown menu.

Step 2: If your organization's Default Country/Region is set as International, you'll be asked to select the Country or Region that you’ll be campaigning in. This is important because your Tweet @ Tool will identify key decision-makers (or what we call the Targets of your campaign message) based on the location of your campaign and your supporters.

Step 3: Choose your Primary Targets.
There are a few layers to this step because it’s pretty magical. The configurations you select here will determine how your campaign tool automatically targets the decision-makers that are relevant to your supporters.
Under the Target Type(s) field, you’ll have three options:
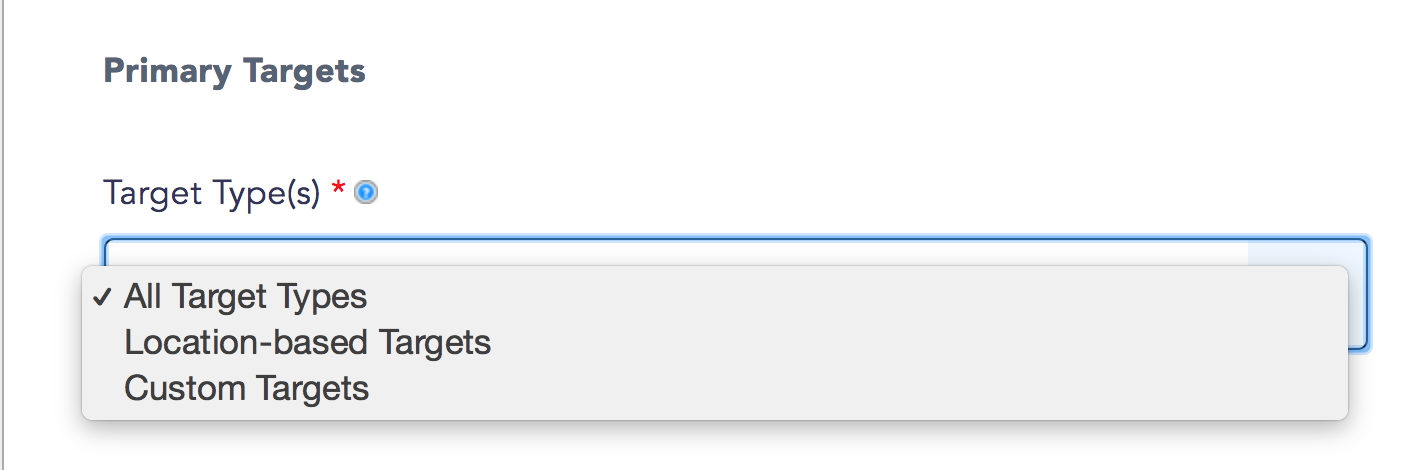
Location-based Targets will be automatically determined by the address information that your supporter enters into the campaign tool.
Learn more about setting up Location-Based Targets here.
Custom Targets can be any individual or organization with publicly available contact details (a state rep or a union leader, the CEO of a company, definitely not that jerk from Call of Duty...).
Learn more about setting up Custom Targets here.
All Target Types will allow you to use a combination of Location-based and Custom Targets. This is a great option if you would like your supporters to take action beyond their local level, or if you think you might have supporters without local representatives.
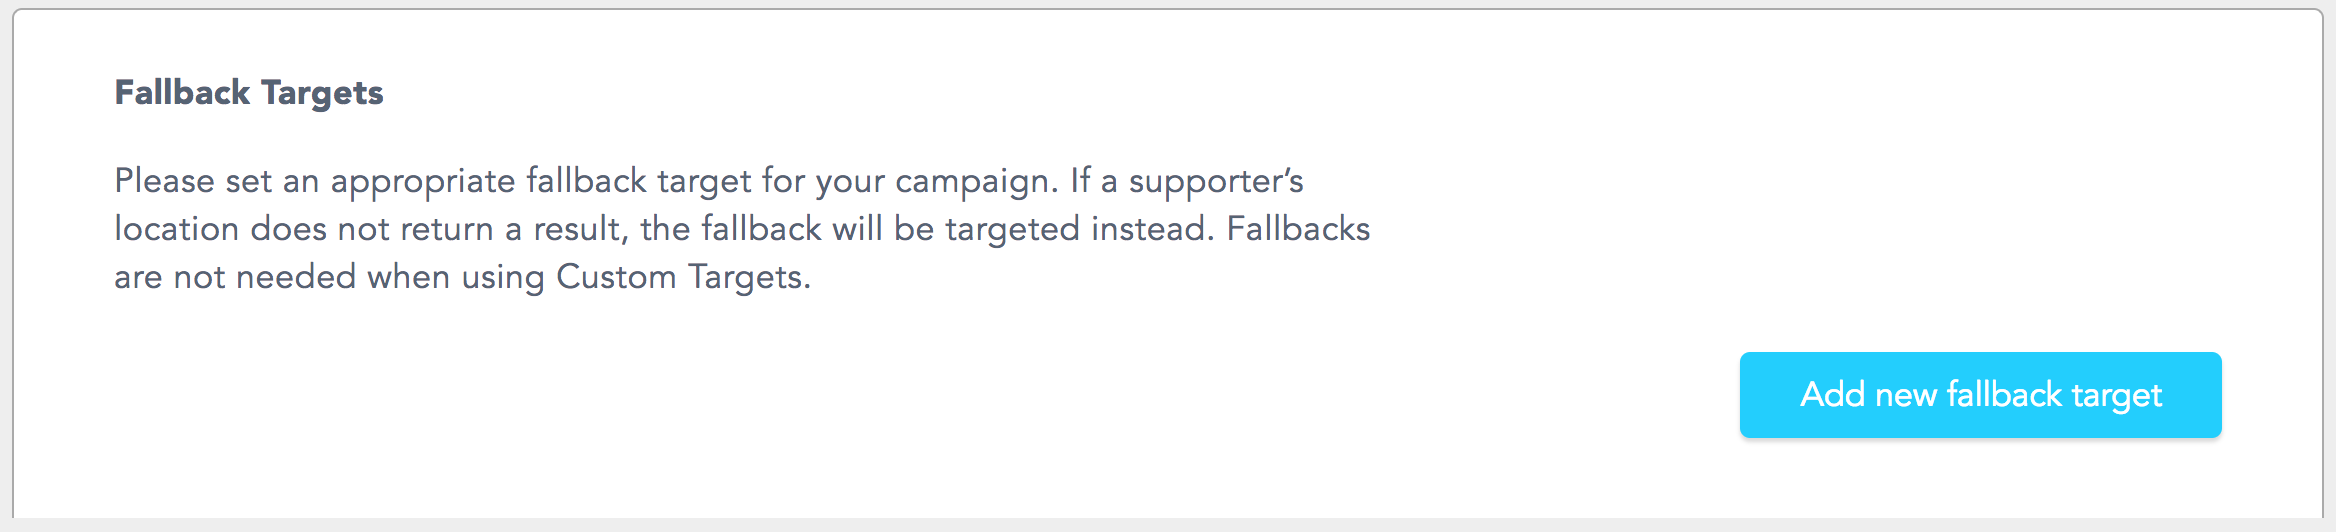
Step 4: Set up Fallback Targets
On your Basic Configuration screen, you might see an option to add Fallback Targets. This is an account that Tweets can be sent to if there's a problem automatically identifying a target based on a supporter's location:
Learn more about adding fallback targets here.
Step 5: Configure Optional Settings:
Target Checkboxes
Under Optional Settings, you’ll see three different boxes that you can click to customize how supporters see the information about the targets they’re tweeting:
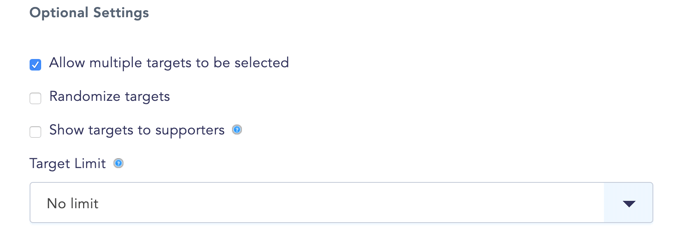
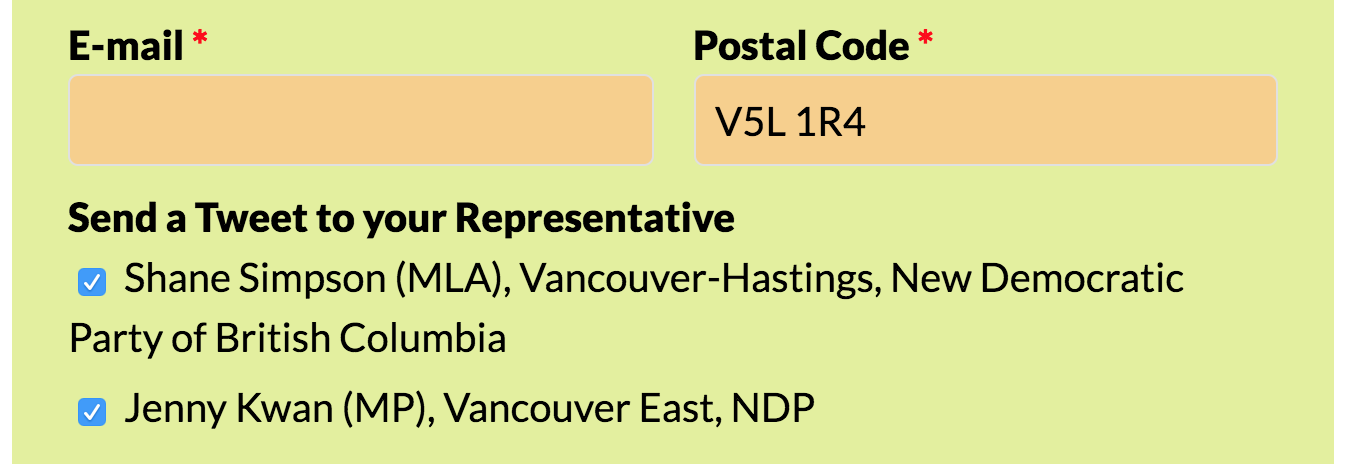
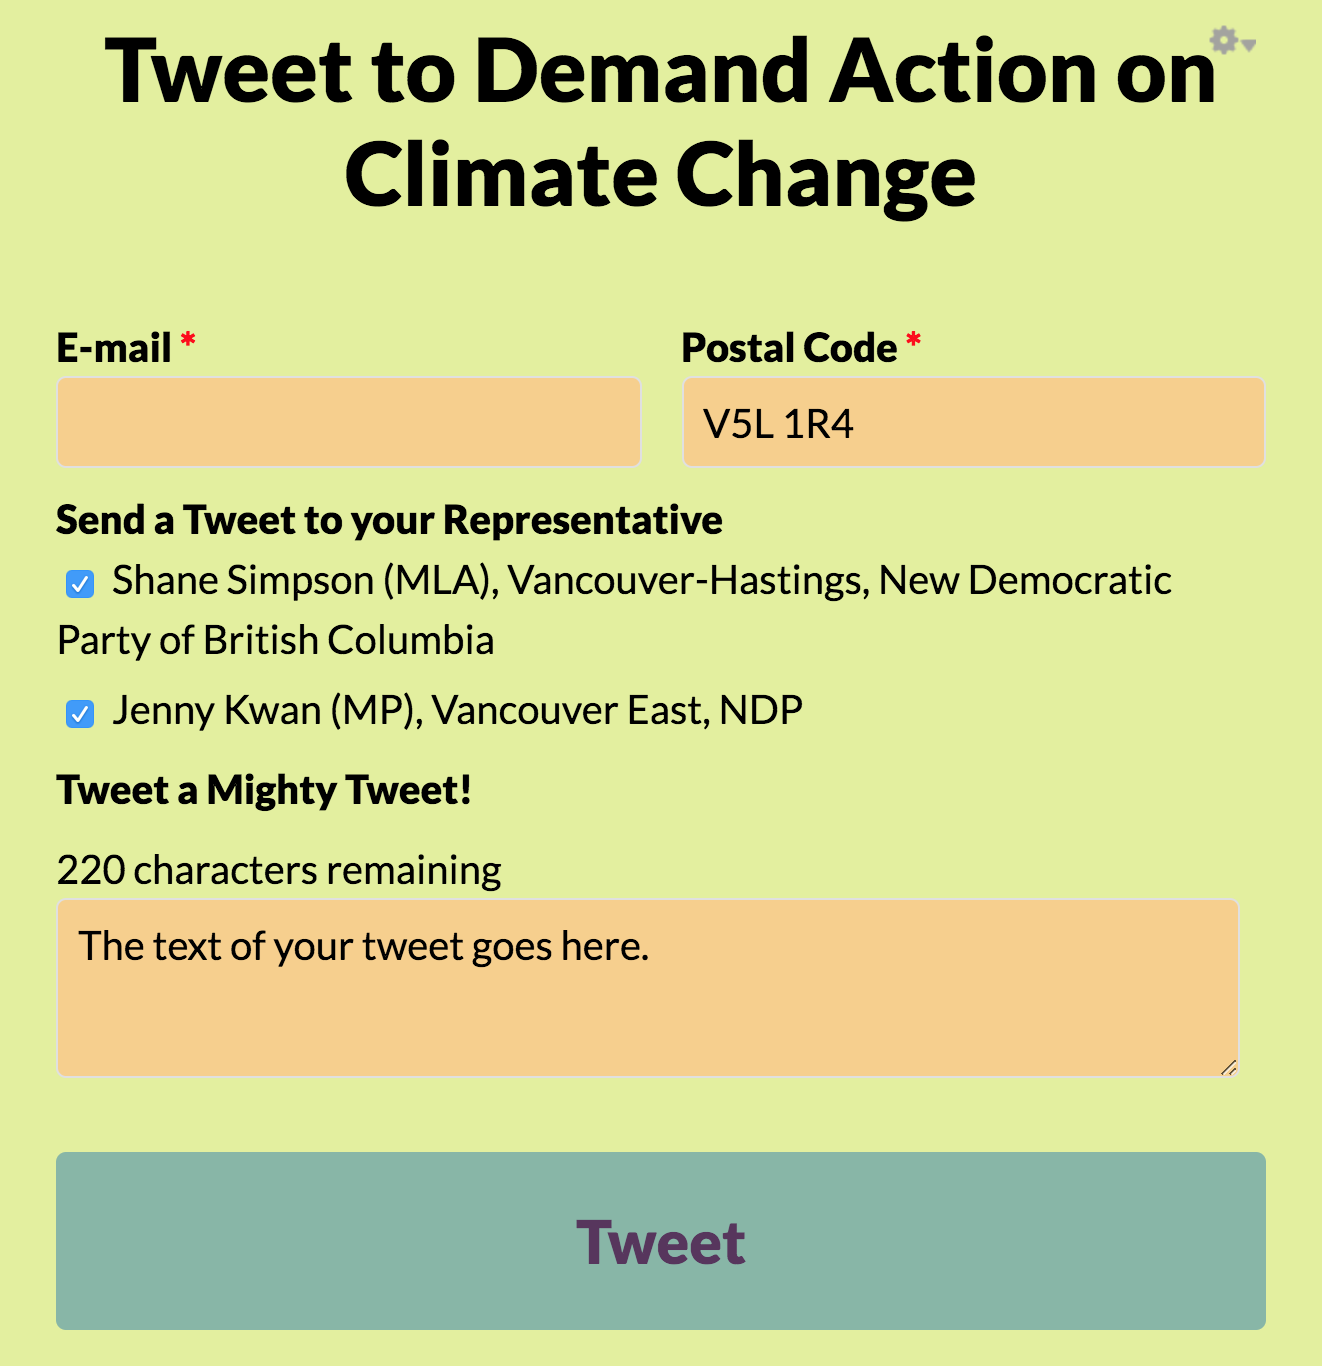
Allow multiple targets to be selected: This option is on by default. It allows your supporters to select from a list of targets to Tweet @. Once a supporter enters their address information, they’ll see a list that looks something like this:
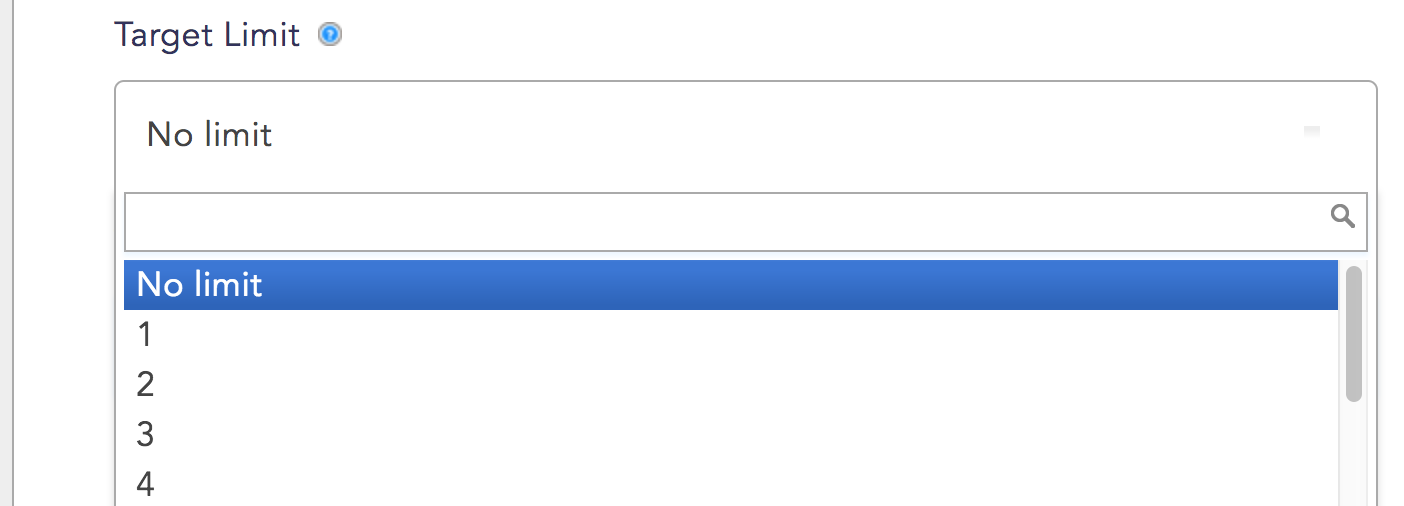
When you are allowing multiple targets to be selected, you’ll also want to set a Target Limit, which will limit the number of results that a supporter sees:
Randomize targets: Select this option so that each supporter using your Tweet @ Tool gets a different target. This is important when you’ve entered a list of custom targets, and you don’t want just the first person on that list getting all the tweets, all the time.
Show Targets to supporters: Select this option so that supporters will see a list of targets to choose from on your Tweet @ tool. By default, targets remain hidden to increase conversion rates.
Auto-Approval
Under Optional Settings, you'll see the Auto Approval feature. Auto-approval is ON by default, which means that all supporter actions will be approved and sent out automatically. If you deselect this feature, supporter actions will have to be approved under the tool Submissions tab.
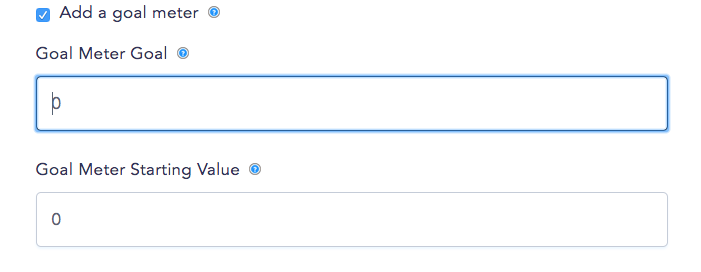
Add a goal meter
Another Optional Setting is your tool's Goal Meter. Check the goal meter box if you want to add a goal meter to your tool, then choose the Goal Meter Goal - the number you want to reach - and the Goal Meter Starting Value - the amount that will be added to your meter by default. Edit the color of your Goal Meter via your Tool CSS in the Look and Feel tab, then you're good to go!
Tool Status
Under Tool Status in Basic Configuration, you'll see that new campaign tools begin in Test Mode, which will allow you to check the experience of both your supporters and your targets from end to end. Test actions thoroughly before selecting Tool is live to make sure your tool is working properly:
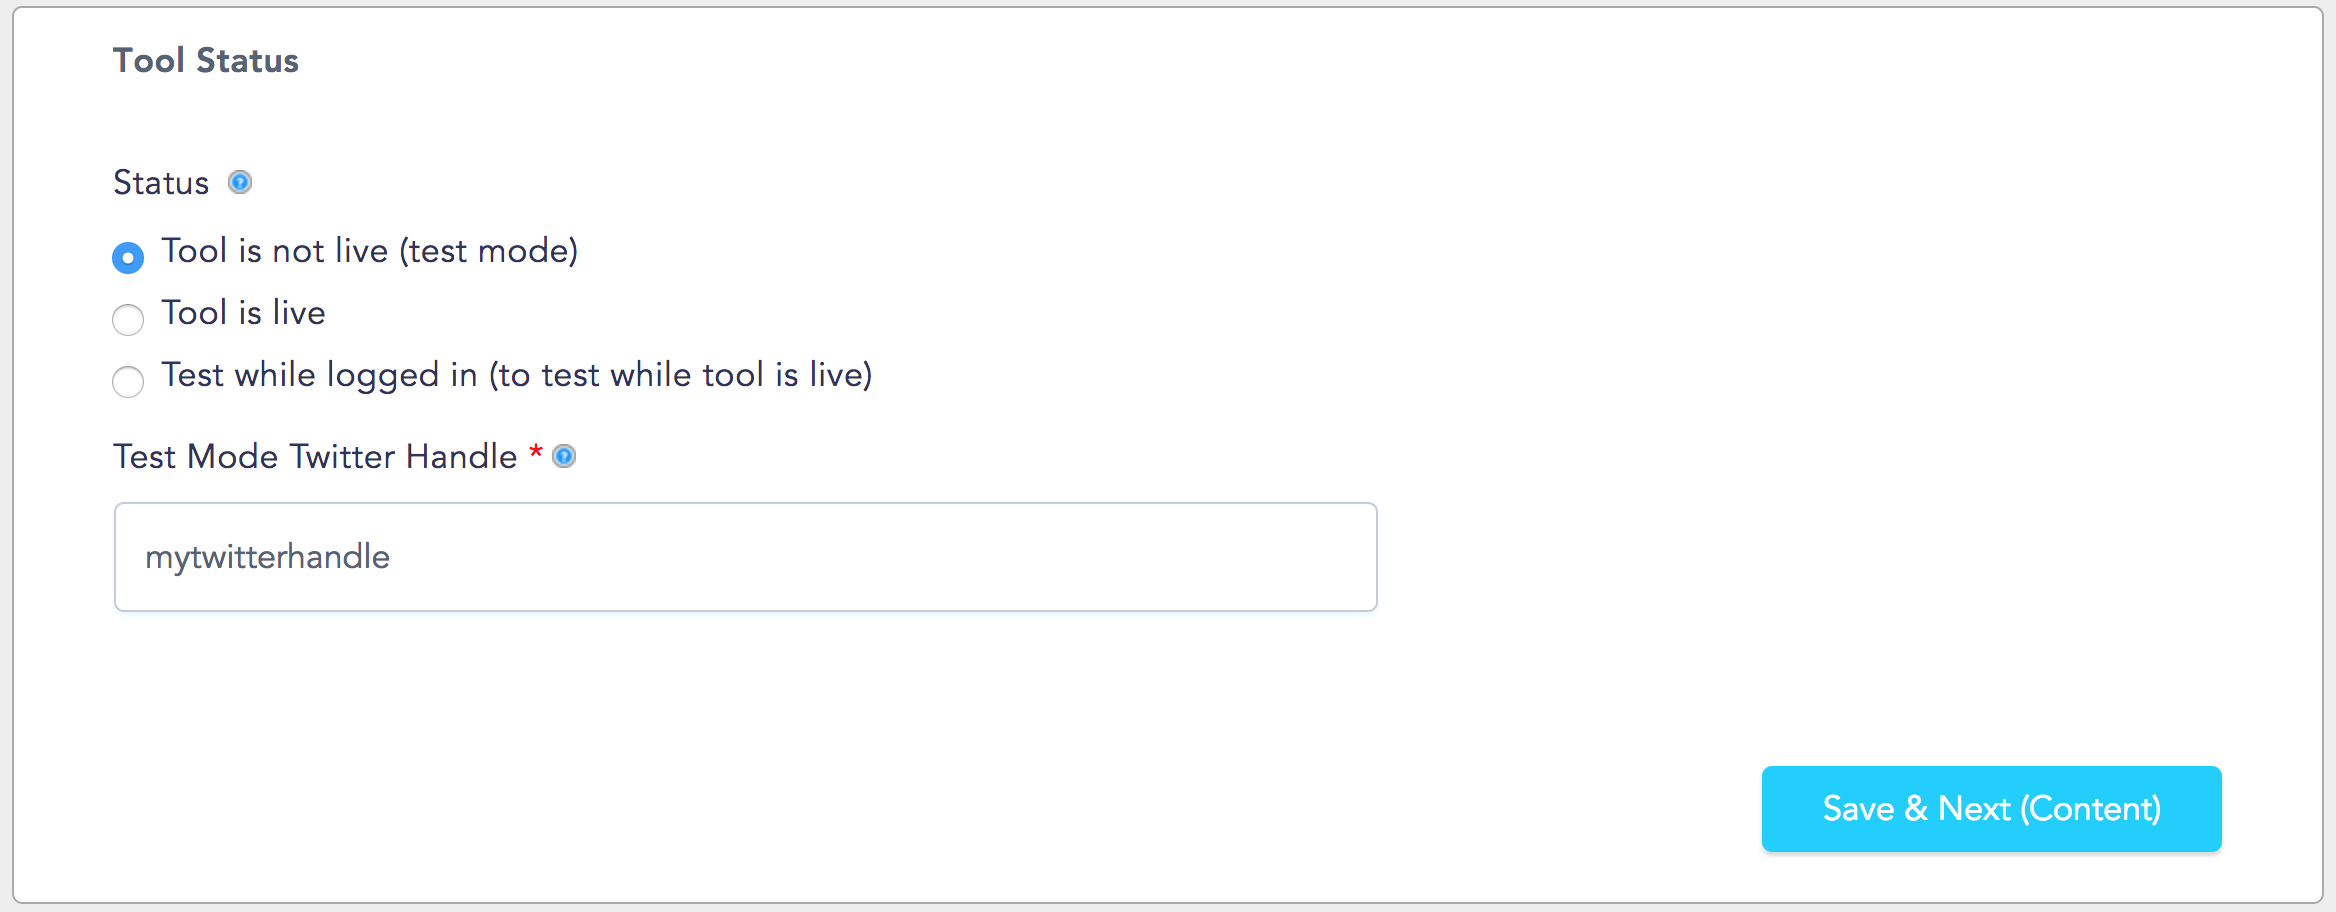
To run Test Mode, you’ll be asked to fill in a Twitter Handle for a test user. Use a throwaway Twitter account or the account of a team member. You’ll then be able to use your Tweet @ Tool and see what Tweets, the thank you page, and thank you emails look like before your tool goes live.
Learn more about using test mode here.
Step 6: If you have already followed the steps to create an Integration, you'll see a section at the bottom of the Basic Configuration page that invites you to select a service, including your CRM and Analytics accounts. Always make sure that the right services are selected when creating a new tool:
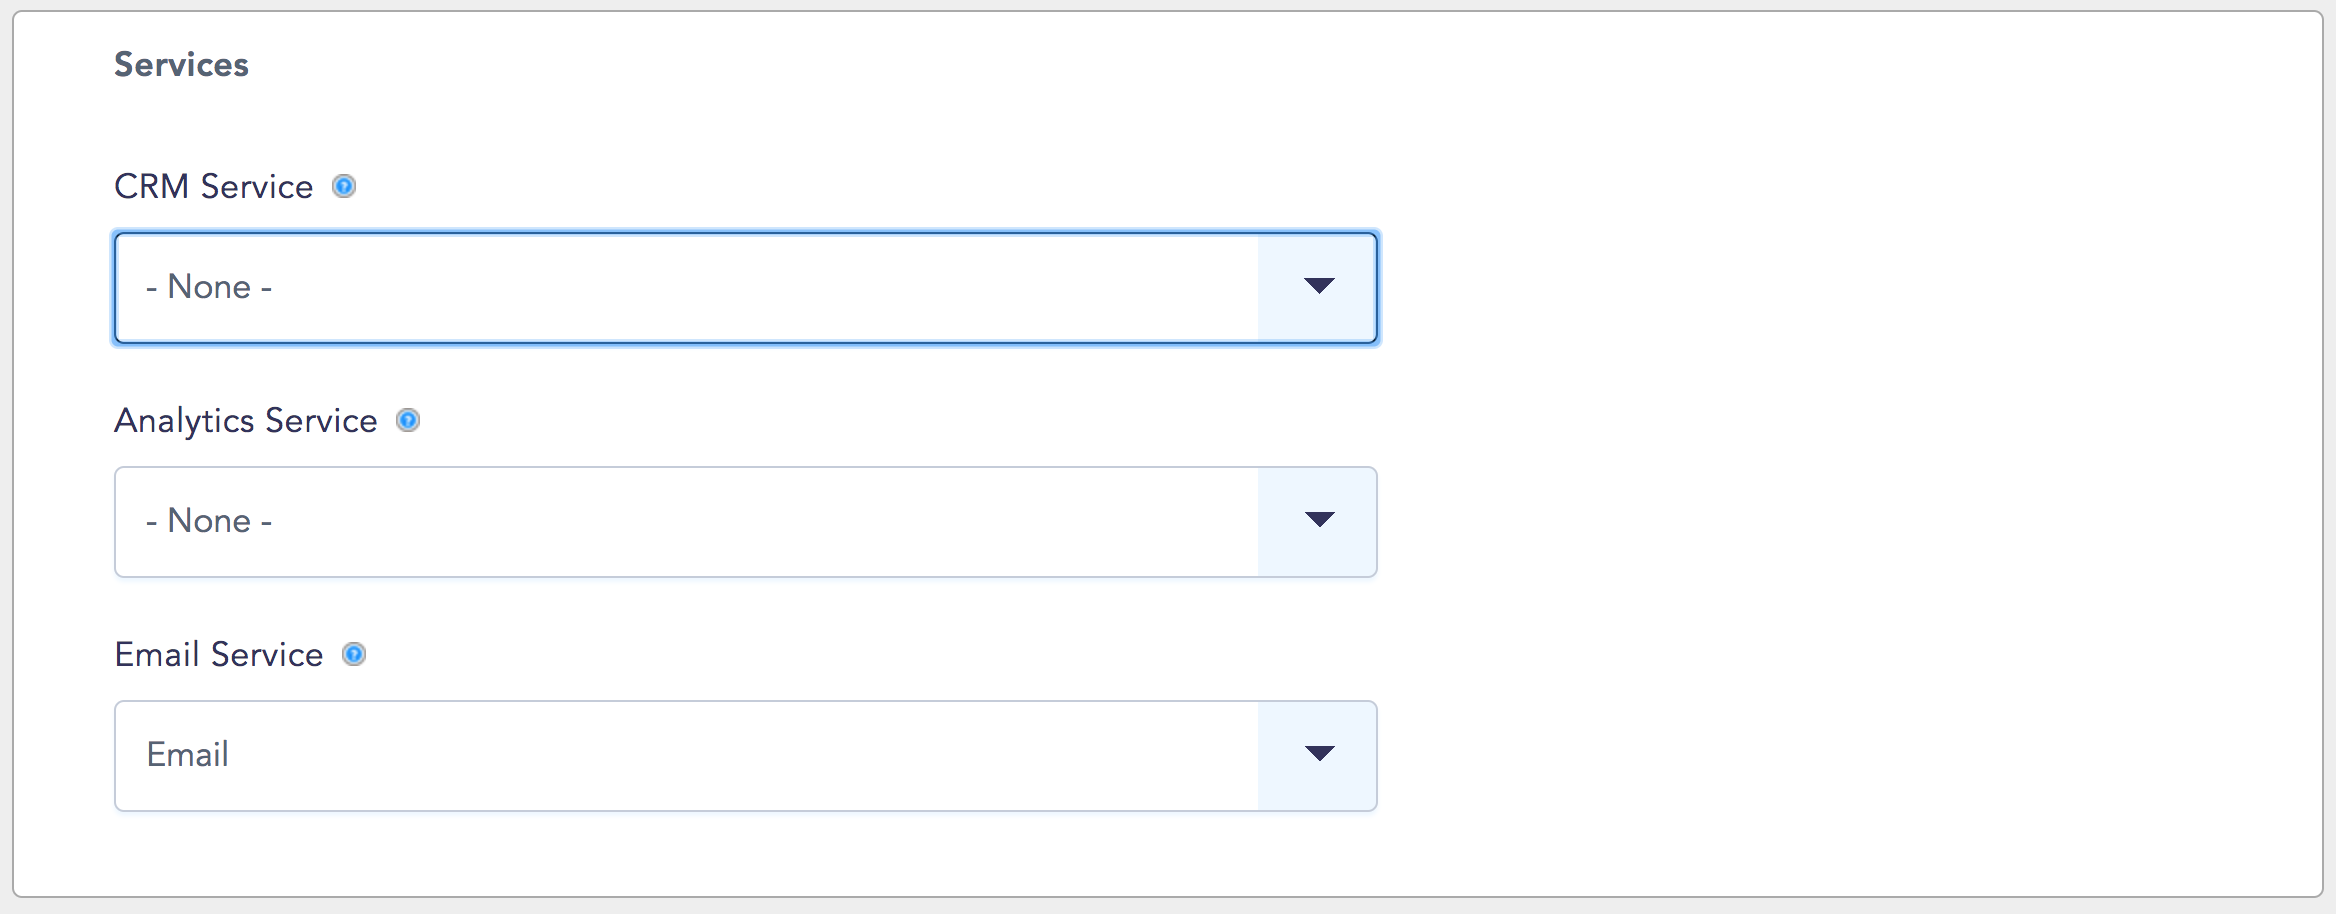
Don't worry about Email Service! Our support team sets that up for you when you first sign on with New/Mode.
Step 7: Click Save & Next to be taken to the Content page for your new Tweet @ Tool, or visit Preview to see how your tool will look live. Beautiful work!
From here, you can:
- Edit your campaign tool’s content, components, and appearance.
- Preview your tool as it will appear on the landing page.
- Manage Submissions.