Sometimes you want a good old form to let your supporters sign up for updates from your organization or pledge to engage in an offline action. Here's how you can set that up!
Set up your form
1. Create a One-Click Letter to Representatives Action.
2. On the Basic Configuration page, set the Target Type to 'Custom Targets' and the Custom Targeting Method to 'Add custom targets'.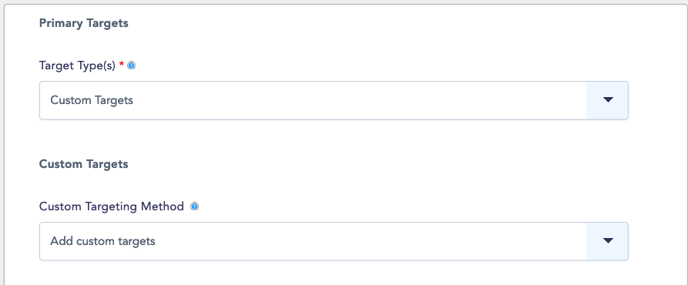
3. Enter a custom target within your organization (don't worry, they won't get flooded with emails!)
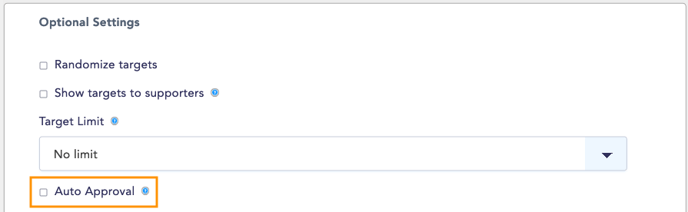
4. Uncheck the "Auto Approval" box, and click the 'Save & Next' button to save this configuration.
Customise the fields on your form
All of the customisation options available with our actions are available to you with this setup, including fields as described below.
Start by opening Advanced > Components on your actions to see all of the parts that make up your action.

Once you're on the Components page you'll be able to move your components around, hide any that you don't need, and creatte new ones.
Rearrange components
You can use the icon on the left side of each component to drag it and drop it where you want it to go. Click the 'Save' button at the end of the page to complete the process.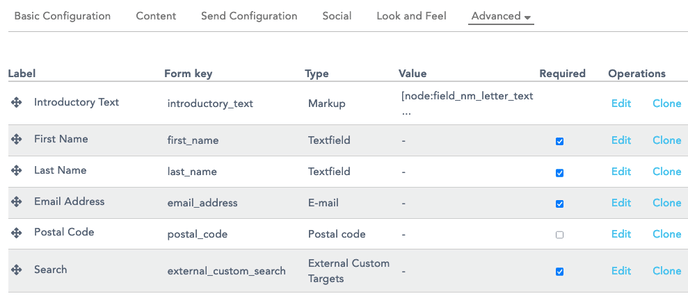
Hide components
To remove a component that you don't need we recommend hiding it instead of deleting it, as deleting certain components can delete already collected data or otherwise break your action.
First click on the component's Edit link:
 Then scroll down to find the 'Private' option, check that box, and click the 'Save component' button to complete the process.
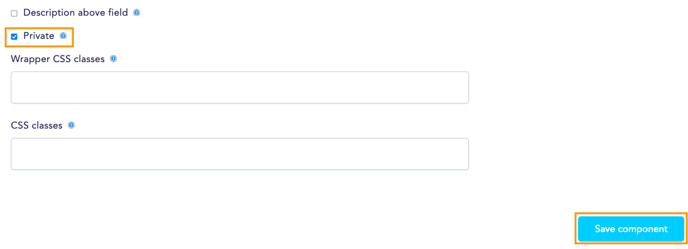
Create new components
On the Components page, scroll down to the end of the list to find a blank component:

Enter a name for your component, select a type from the dropdown menu, and click the 'Add' button.
The most common component types are:
- Textfield: for short answers that fit in a single-line field.
- Textarea: for longer answers that need more space.
- Select options: for multiple choice questions.
On the next page you'll see a few options depending on the component type that you picked:
- Textfield: enter a Label for the field, an optional Placeholder text to guide your supporters on how to fill in the field, select how the label should display, and click 'Save component'.
- Textarea: enter a Label for the field, adjust the height of the field if you'd like, enter an optional Placeholder text to guide your supporters on how to fill in the field, select how the label should display, and click 'Save component'.
- Select options: enter a Label for the field, enter the options that you want to offer your supporters, check the 'Multiple' box if you'd like them to be able to select more than one, check the 'Listbox' box if you want the options to be in a dropdown menu, select how the label should display, and click 'Save component'.
Last updated: September 11, 2023