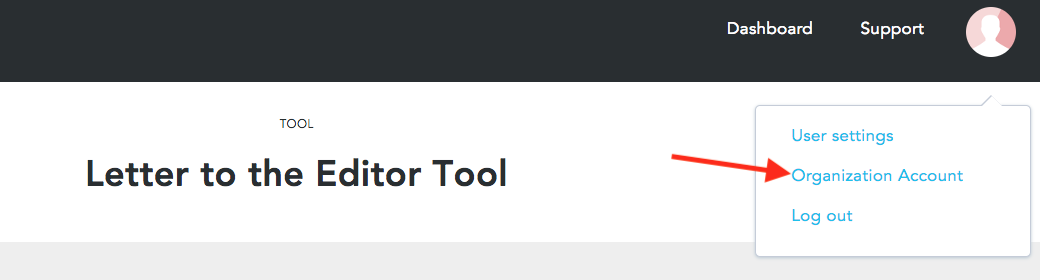
When you set up a new Organization on New/Mode, one of the first things you'll be able to do is create the Privacy Settings that will appear on each action. These include both your Privacy Policy Statement and your Email opt-in settings. You can do this on your Organization Account page under the Privacy Settings tab:
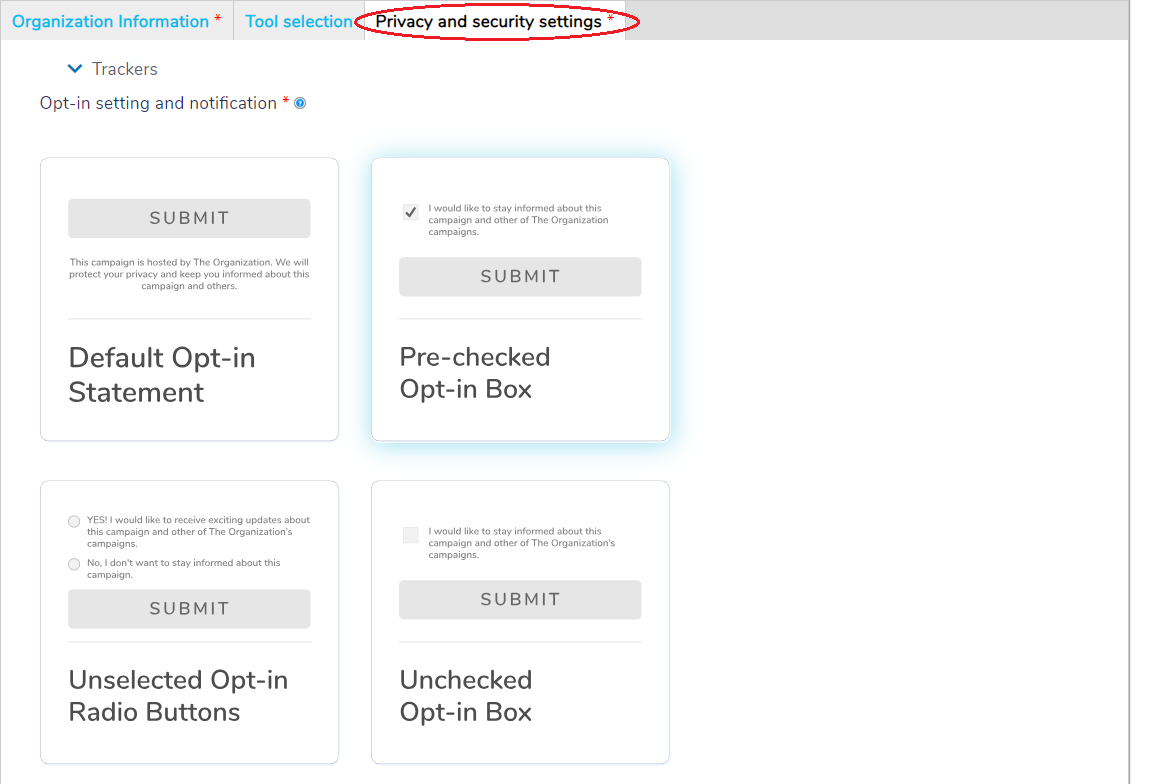
Under Privacy Settings, you'll see four different options. Select the one that works best for your campaign and your region's security and privacy policies:
Default Opt-in Statement
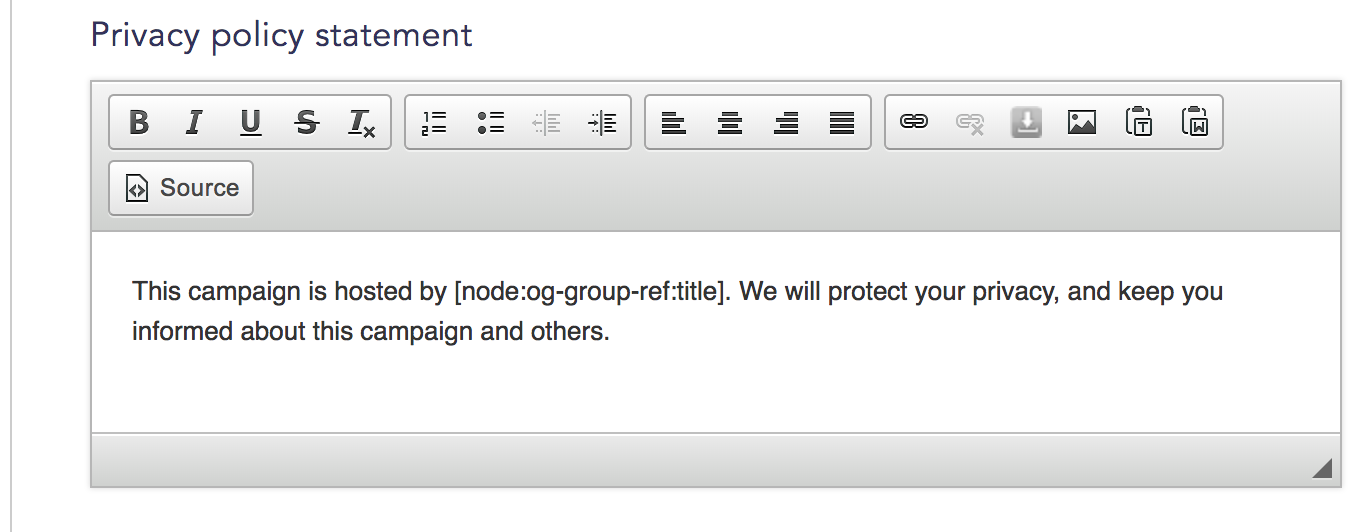
This option will display your privacy policy statement with no opt-in. Scroll down to the bottom of the page to edit our default statement. The token in the text field will automatically display the name of your Organization:
Pre-checked Opt-in Box
This option will display a single pre-checked box. If you're using this option, make sure it's in compliance with your region's privacy and security policies.
Unchecked Opt-in Box
This option will display a single unchecked box.
Unselected Opt-in Radio Buttons
This option will allow supporters to opt-in or opt-out. This setting is GDPR compliant.
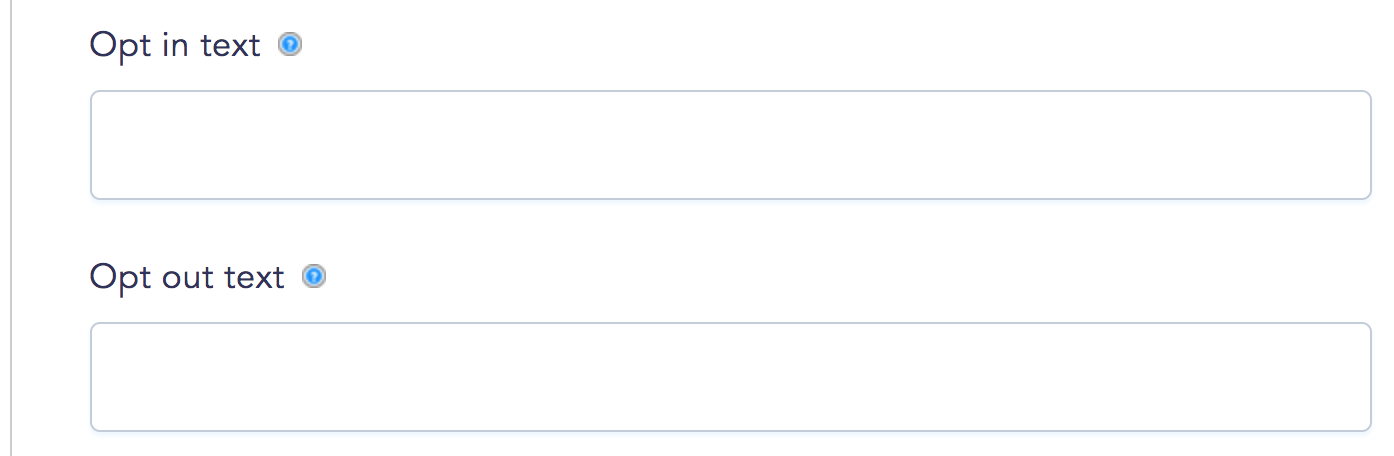
To customize the text that will appear next to your checkbox or buttons on actions, enter new messages under the Opt in text and Opt out text fields:
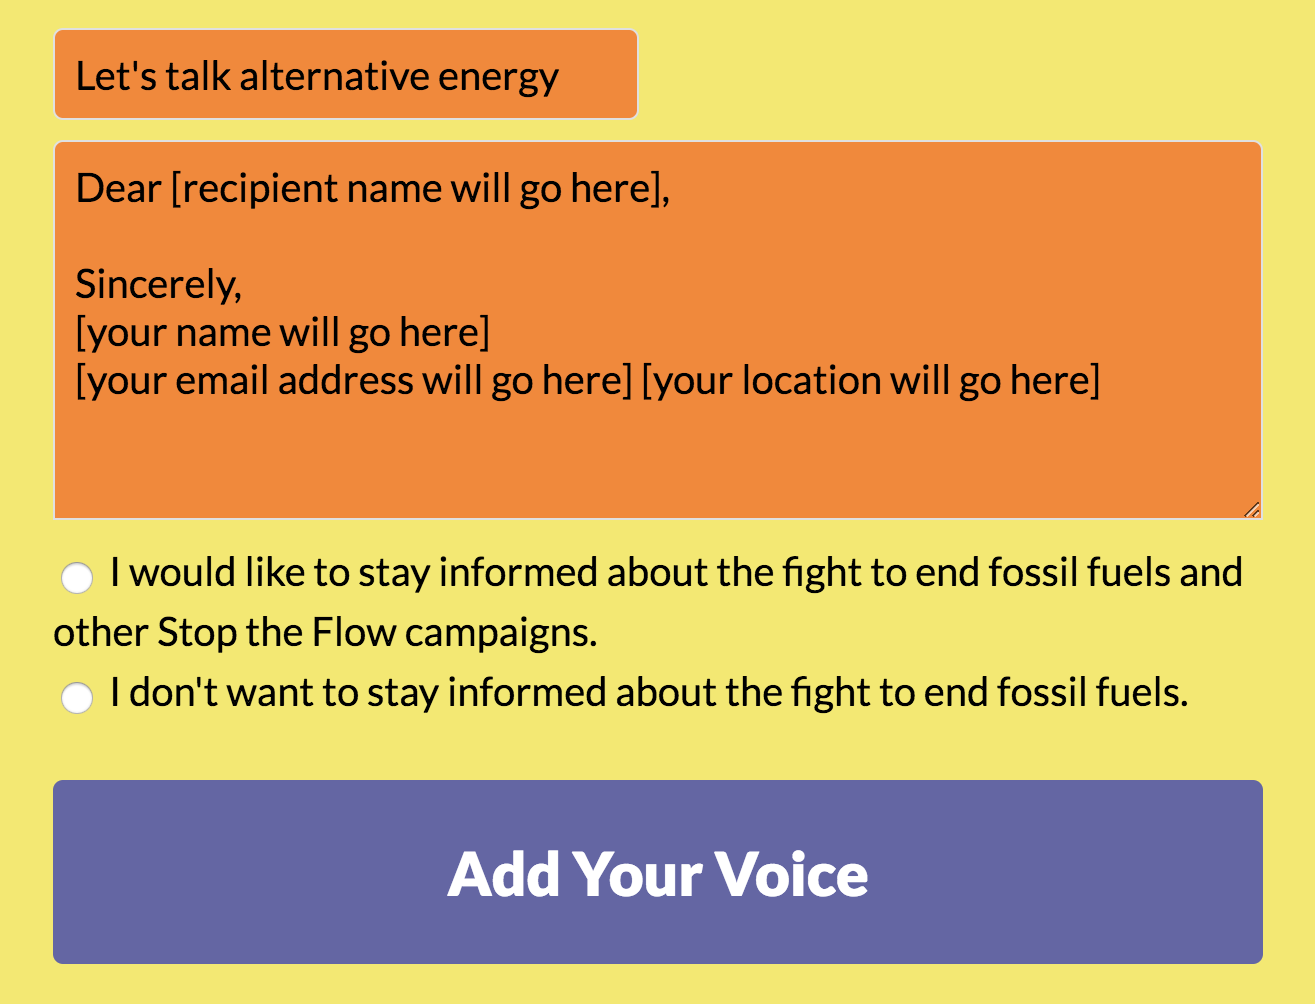
Our default messages automatically include the name of your organization. On an action your opt-in settings will look a little something like this:
How to Implement a Multi-Lingual Policy Statement
While our platform can hold only a single privacy statement, you can use the privacy policy text field to enter multiple versions of the same text in different languages. This can be done by implementing specific CSS classes for each variation of text that you hope to use! To implement this multi-lingual privacy policy text, you can follow the steps that have been laid out below!
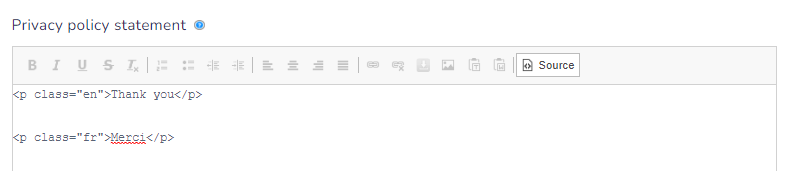
On the "Privacy & Security Settings" Page, scroll down to the privacy policy statement field and select the source button at the top of the text editor.
You'll want to create two different classes in HTML, one called "en" and the other "fr" (depending on the languages you plan to run your action in, these classes can be updated, e.g. "sp" for Spanish, etc.). Within these classes, include your two (or however many) varying privacy policy texts.
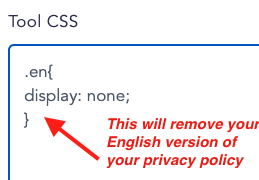
From here, head to your French action(s) and navigate to the Look and feel page. You'll need to add CSS to your action to ensure that the correct privacy policy is showing.
For French actions, the CSS will be .en{display: none;}, which will hide the set English text, and for English actions, you'll need to add .fr{display: none;}. which will hide the French text that has been added. You can use the same process if you have any other languages you hope to implement for your privacy policy!
Your action should now show only the French privacy policy that has been implemented to your account!
Make sure that you include this CSS on all actions with the appropriate class name to specify which text will be shown on each form!
Know Before You Go:
The settings that you choose here will be applied to all of your actions.
You will not see these settings in Templates, but they will appear once you've created an action from a template.
If you want a particular action to have unique opt-in settings, you will have to configure these settings in the Advanced dropdown menu for that campaign action, under Components. Learn how here.