You can define unique opt in settings on individual actions when the global privacy settings you set up at the organization level aren't a good fit.
This feature is available on the Campaign Builder, Organization, and Network plans.
Create new Email Opt In component
Update existing Email Opt In component
Create new Email Opt-In Component
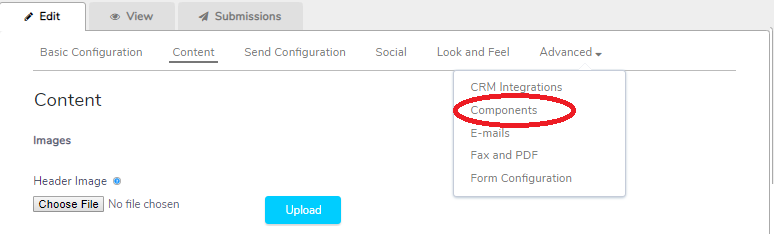
1. Under the Edit tab for the action you're setting up, navigate to the Components page under Advanced settings:
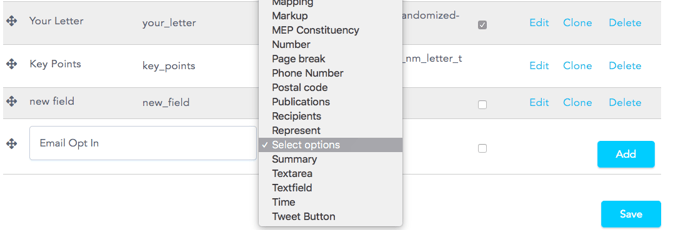
2. Scroll down to the bottom of the page. Here you'll see an option to add a new action component. In the textfield, name your component (we suggest "Email Opt In" so that our system can recognize it as an opt-in component). Then choose Select Options as the component type from the dropdown menu and click on "Add."
3. Next, you'll choose your text and configuration of your Opt-In component.
Opt-In Box
Write your Opt-In statement in the text field. Select the "multiple" checkbox. If you'd like your Opt-In Box to be pre-checked, select the checkbox under "default."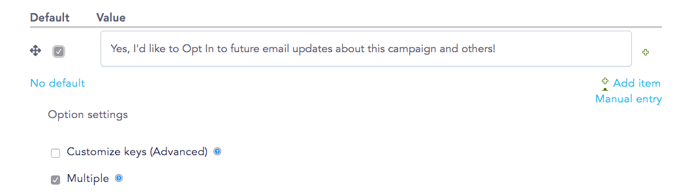
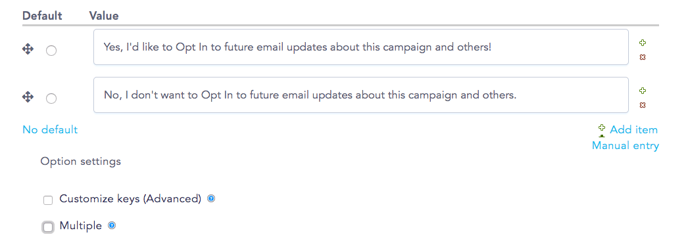
Opt-In Radio Buttons
Ensure you have two options generated. Write your Opt-In and Opt-Out statements in the provided text fields. Make sure the "multiple" checkbox is unchecked.
4. Once you've configured your Opt-In type, scroll to the bottom of the page and press save! You have created your opt-in component.
Update existing Email Opt-In Component
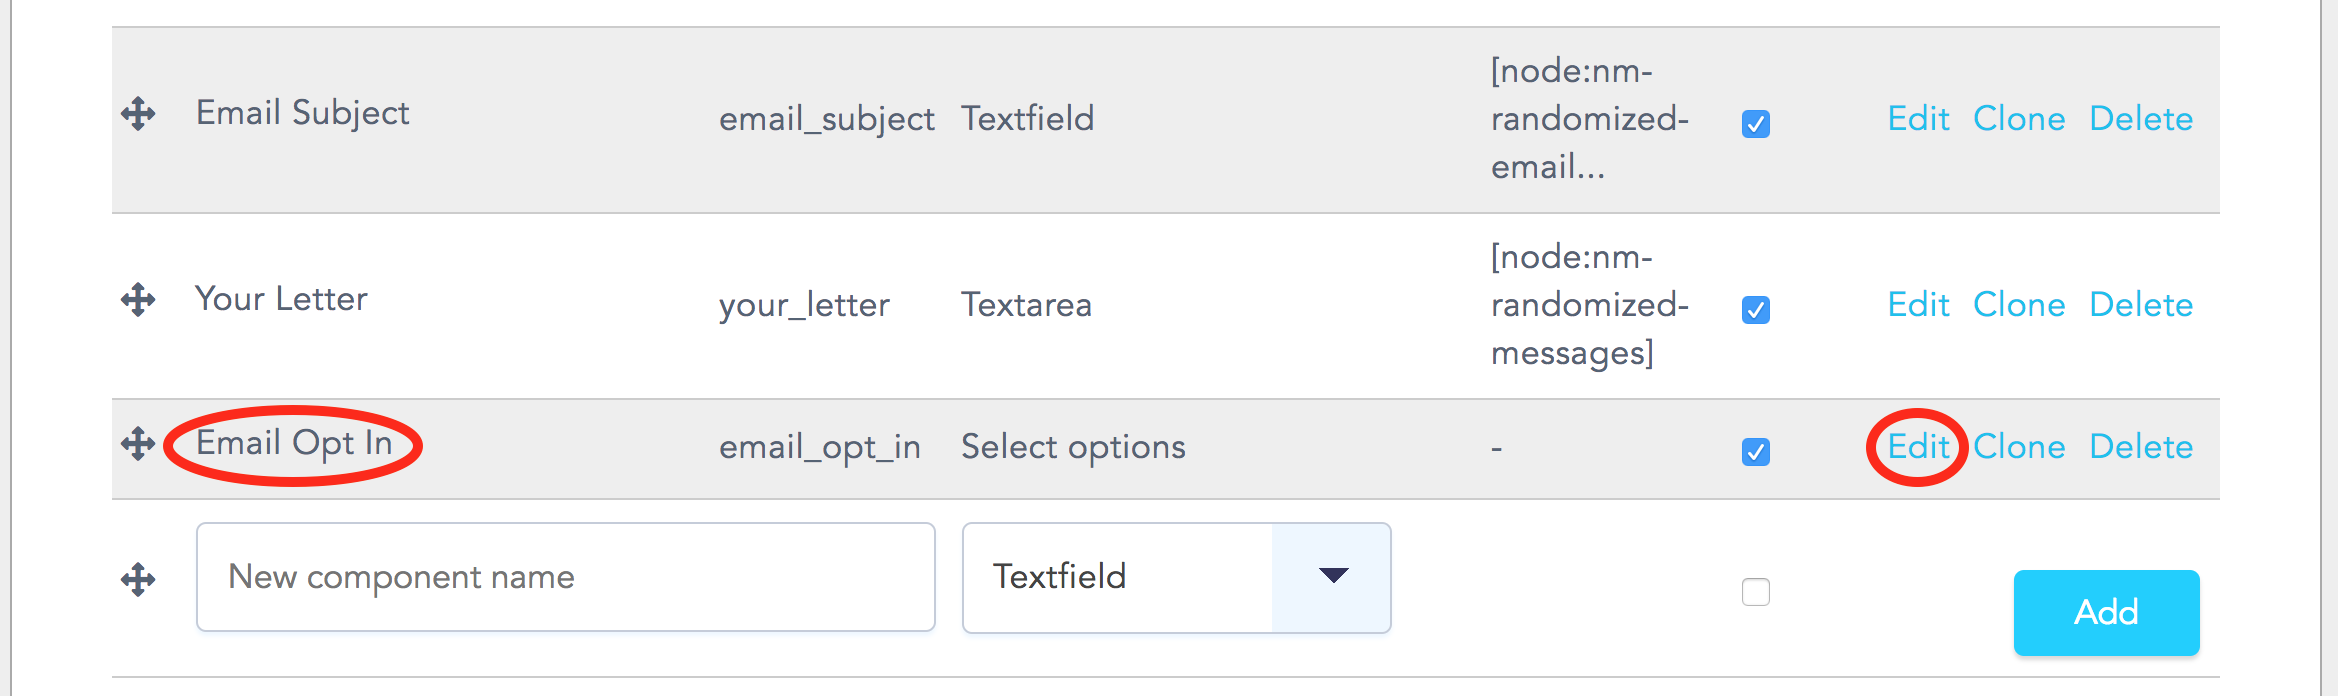
1. Under the Edit tab for the action you're setting up, navigate to the Components page under Advanced settings:
2. Scroll down to the component labeled Email Opt-In and click the blue Edit link to the right:
3. You'll be taken to the Edit Component screen. Scroll down to Options. Here, you can re-label the component, edit the text associated with each button, add additional checkbox fields, and even turn your checkboxes or radio buttons into a dropdown list:
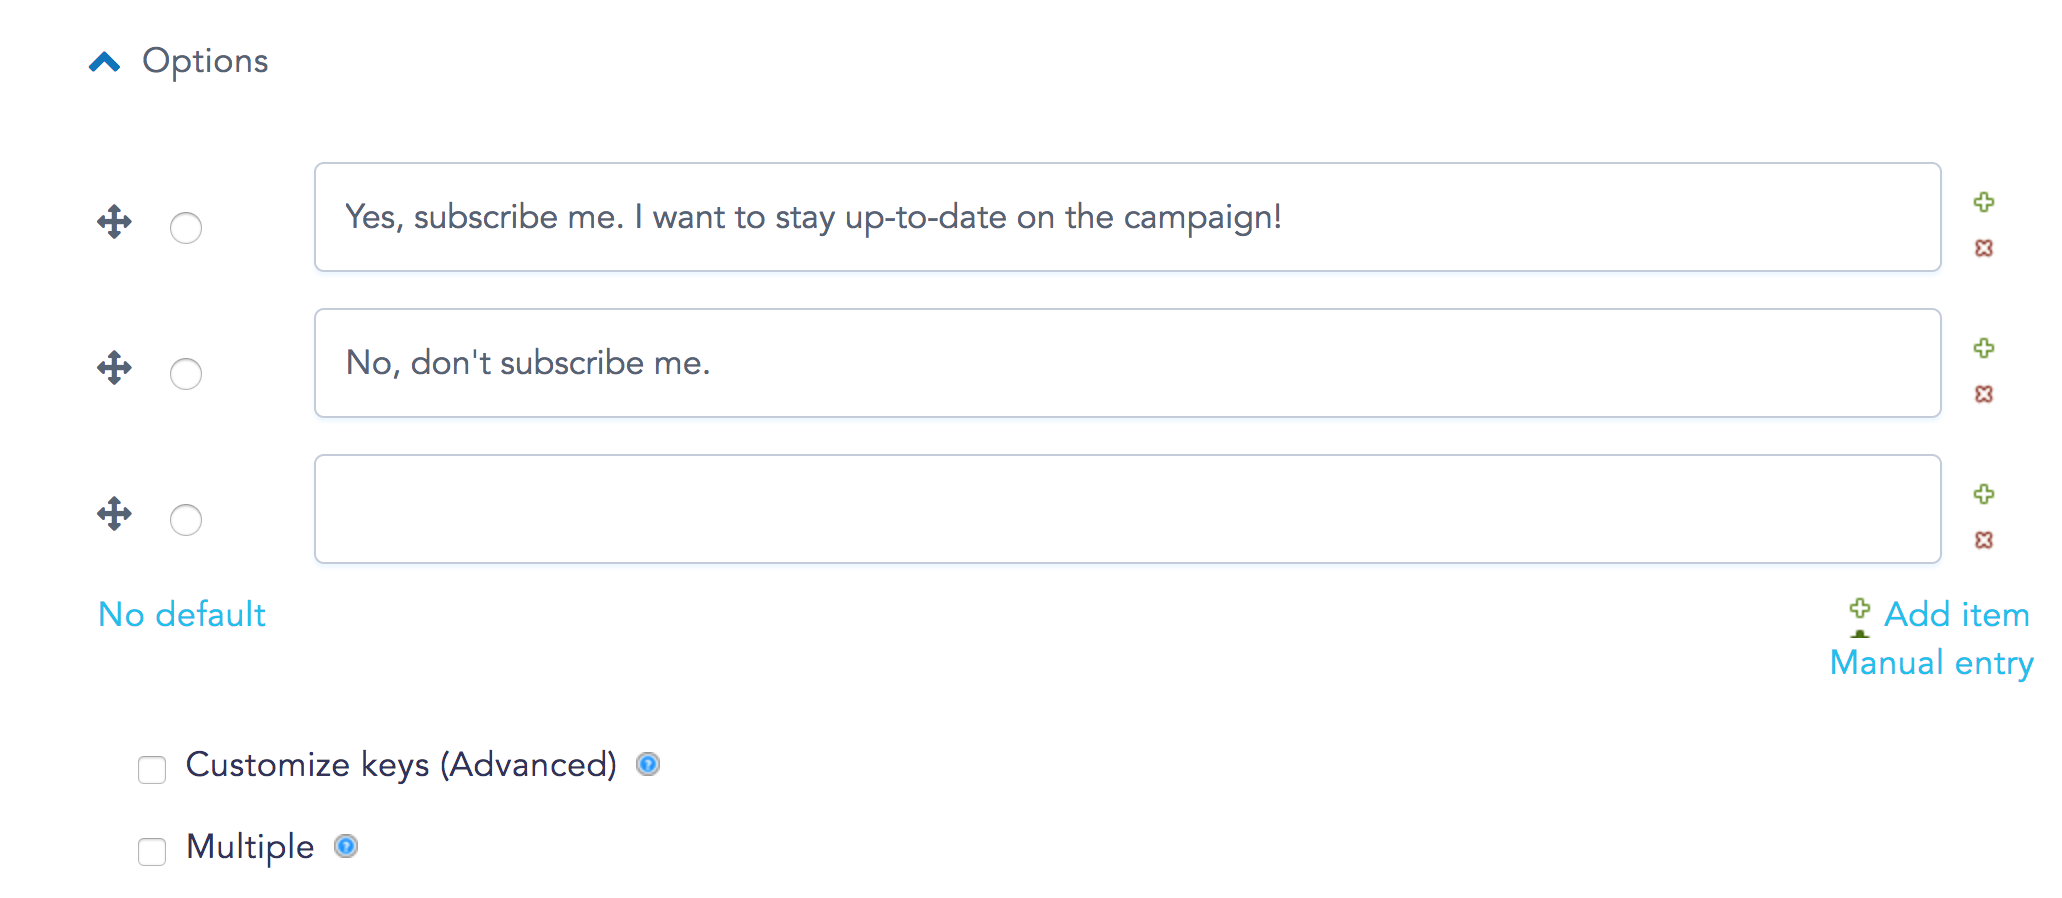
Check out this article for details on customizing your opt-in settings.
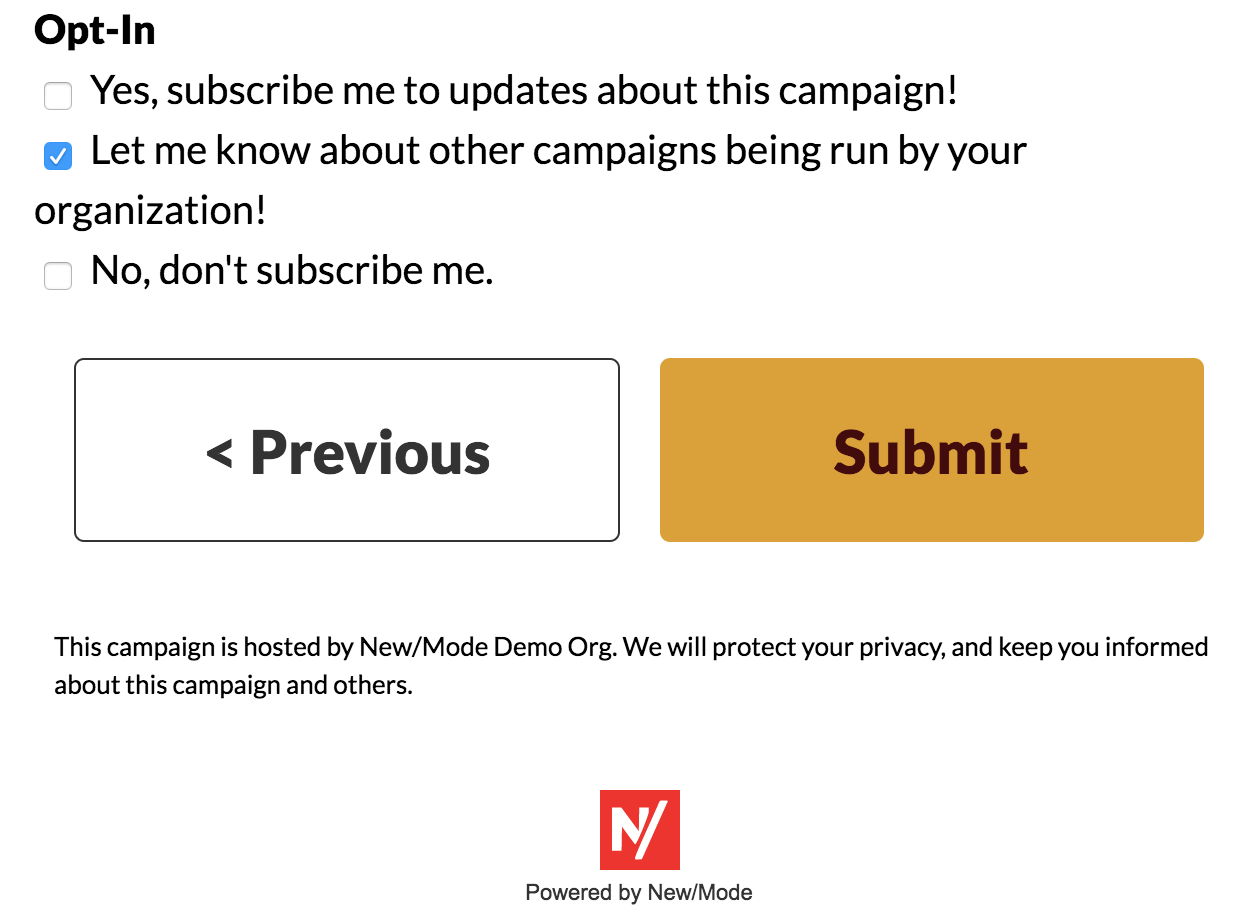
4. Any settings you reconfigure here will only apply to the action that you're working on. Your Privacy Settings will remain the same for all other actions. Once you've made changes, click the friendly blue Save Component button at the bottom of the page. Head over to the View tab to check out the look and placement of your new Opt-in component:
To change the placement of your Opt-in Component on an action, go back to the Advanced tab and rearrange components.
Last updated: November 24, 2023