This is a quick guide to syncing your New/Mode actions to CiviCRM, from creating an integration in your organization to customizing field mapping on individual actions.
Adding a CiviCRM integration to your Organization
Connecting your CiviCRM integration with an Action
Syncing the fields in your Action to CiviCRM
Add Custom Fields
Add Tags
Set up Multi-Value Upsert
Adding a CiviCRM integration to your Organization
Before you begin, make sure you have your CiviCRM
- Rest URL
- Site Key
- API Key
Step 1: Follow the steps to Create an Integration.
Step 2: Once you have selected CiviCRM as your CRM Service, you'll be asked to enter the following settings:
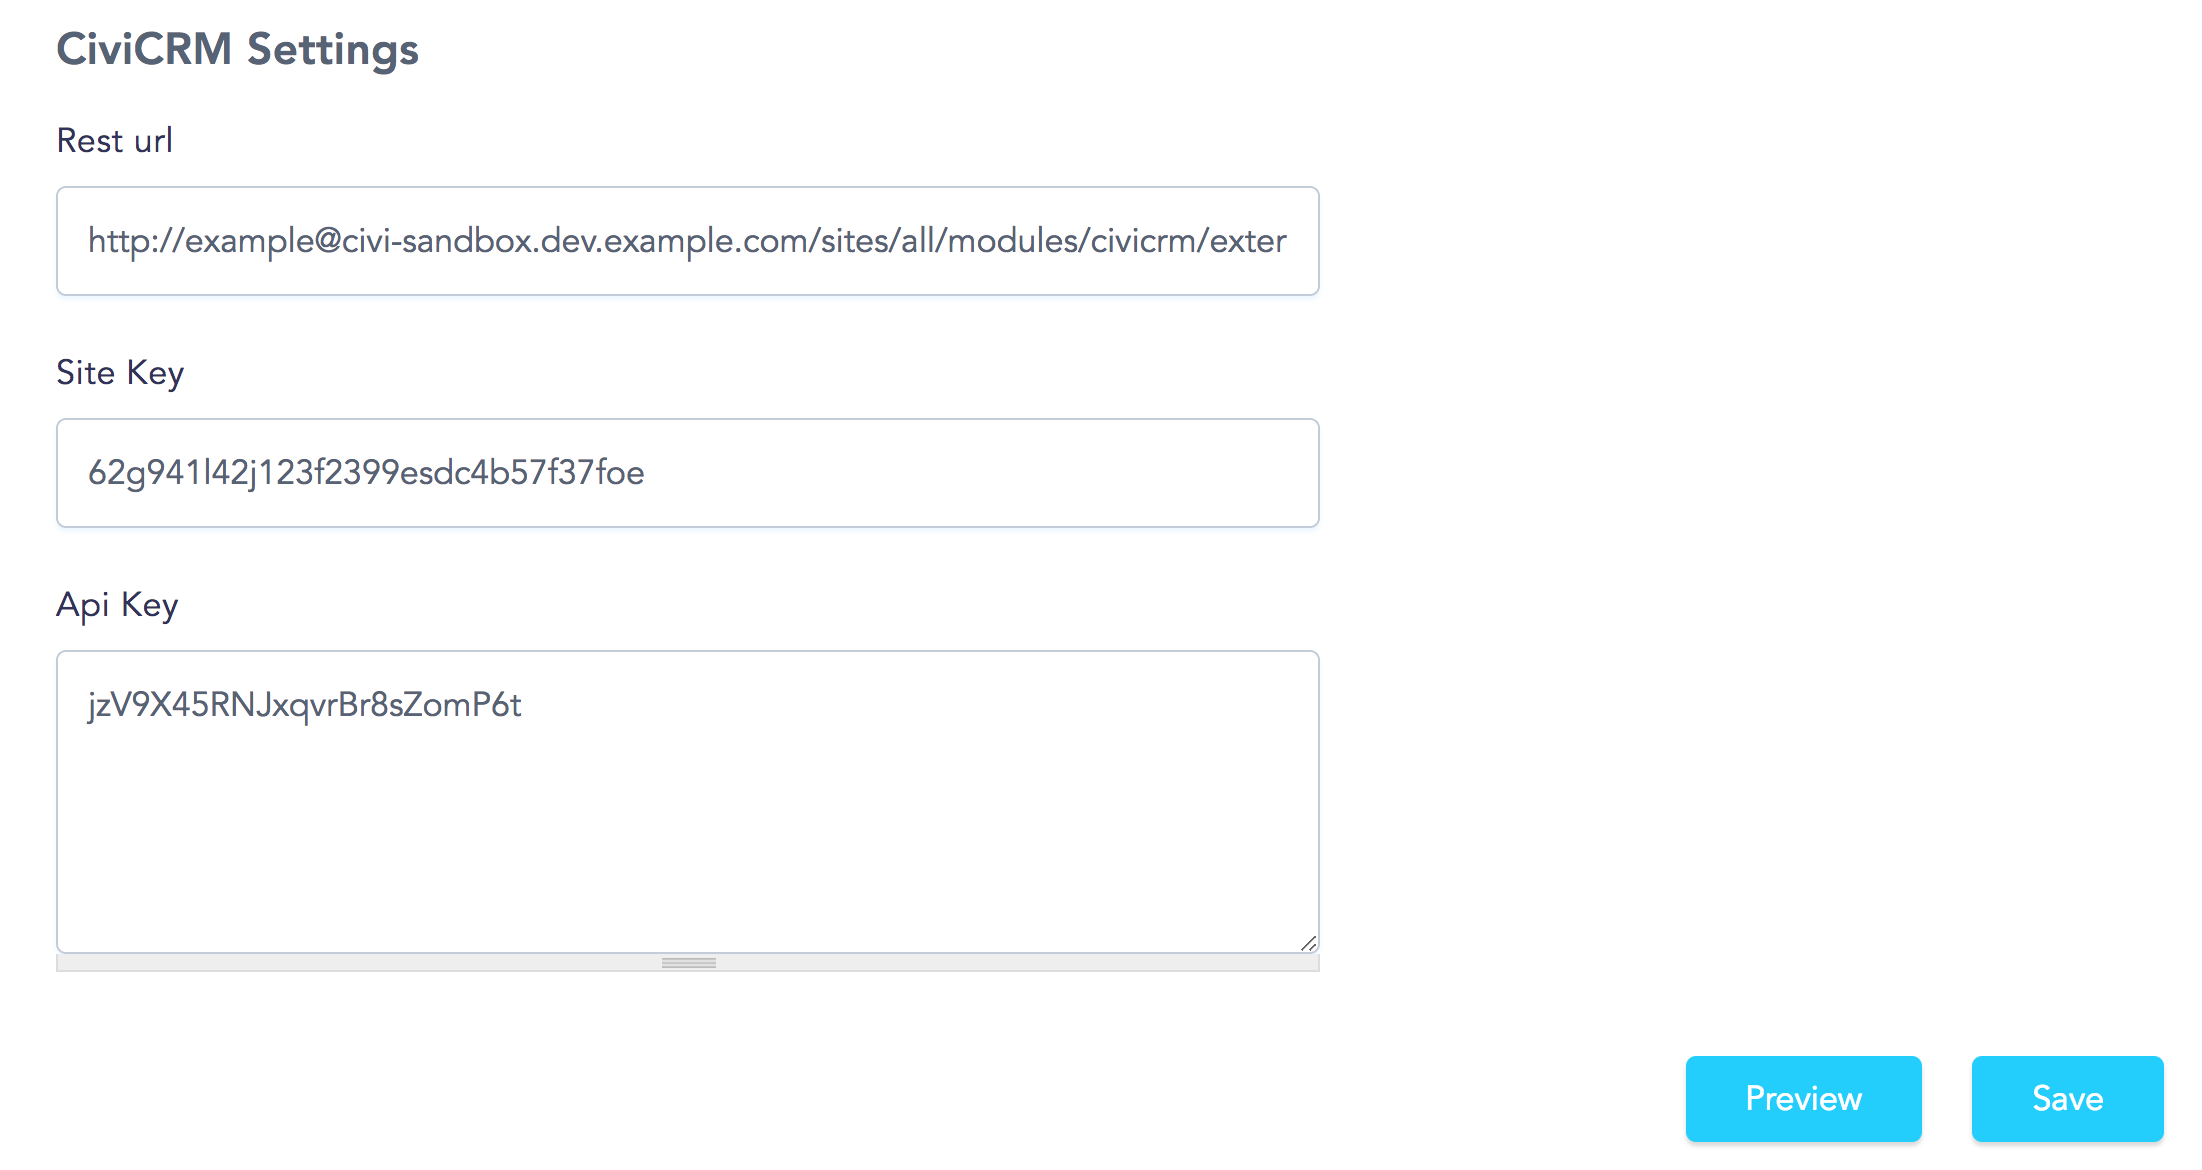
CiviCRM Rest URL (Rest API Path)
Your Rest URL should look something like this: "http://mycivisite.com/sites/all/modules/civicrm/extern/rest.php"
CiviCRM Site Key
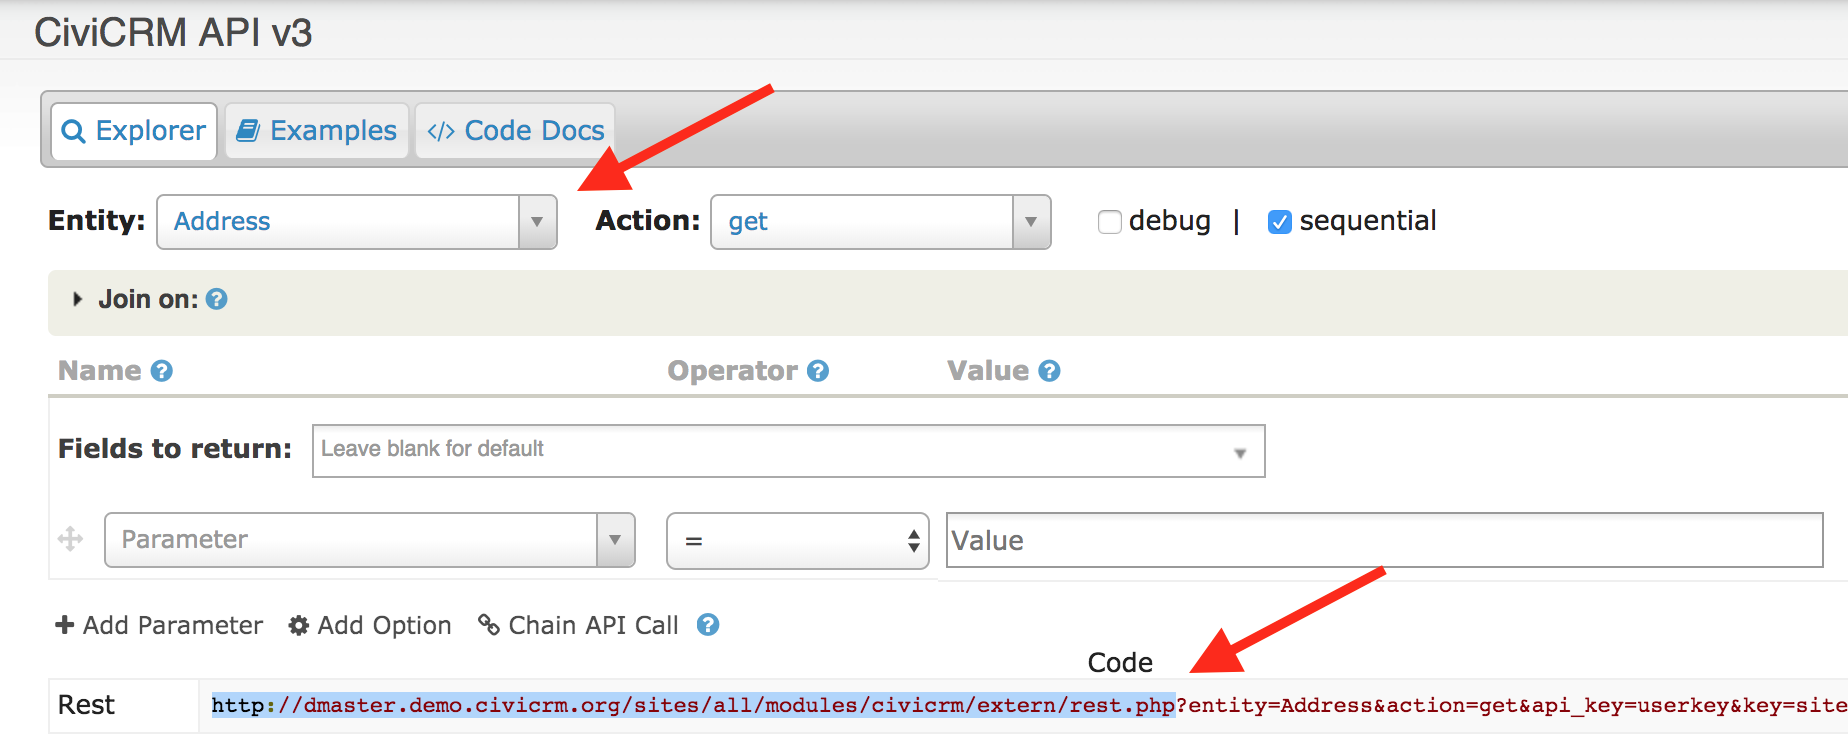
Your site key will be located in your config file (settings.php), please talk to your system administrator if you can’t locate your site key.
Click here to find out how to configure Your Site Key.
API Key:
Your API Key is associated with the CiviCRM admin user: You can set it up by following the approach outlined here or you can locate your API Key
Alternatively, you can install an API Key extension that will make it visible on contact screens:
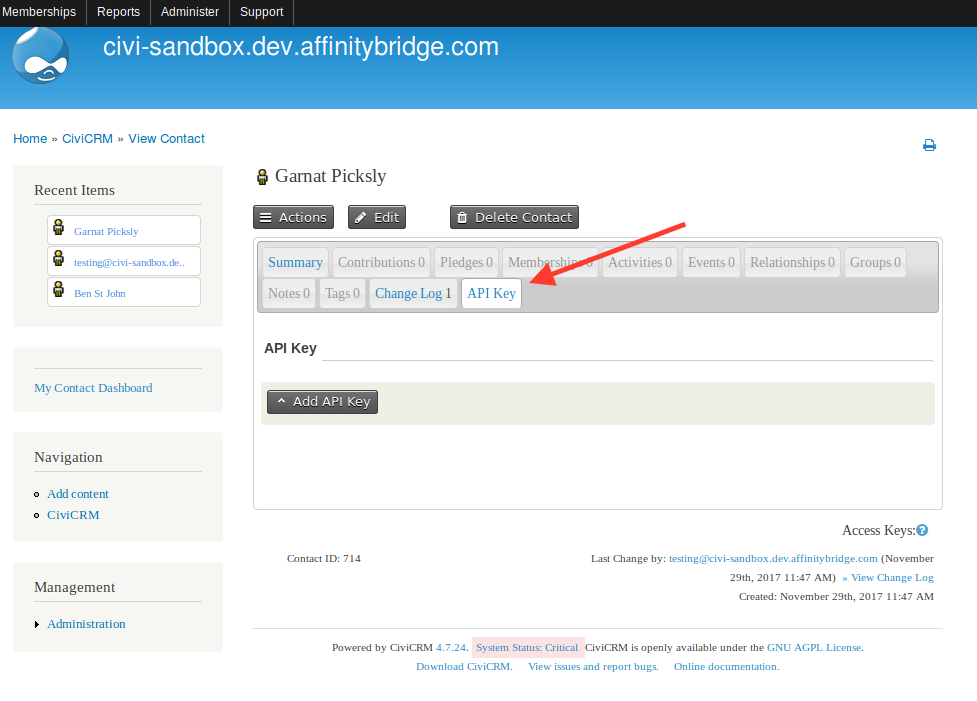
If you can’t find your API Key, please talk to your system administrator.
Step 3: Click Save at the bottom of the page.
You will be taken to your new Integration Setup page, where you'll be able to View or Edit it later:
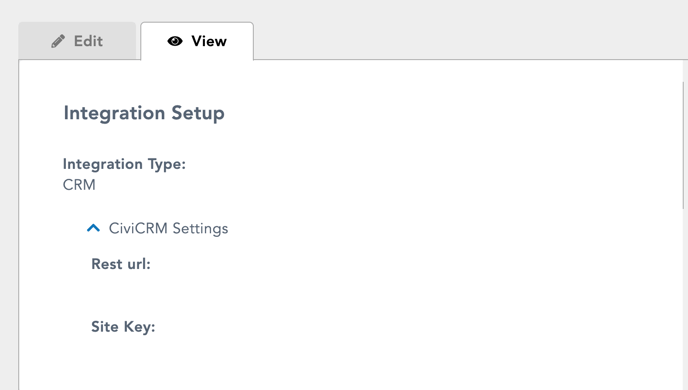
You can always get back to this page to Edit or View your Integration Setup by clicking the link that is now visible under Integrations on the right-hand side of your Dashboard:
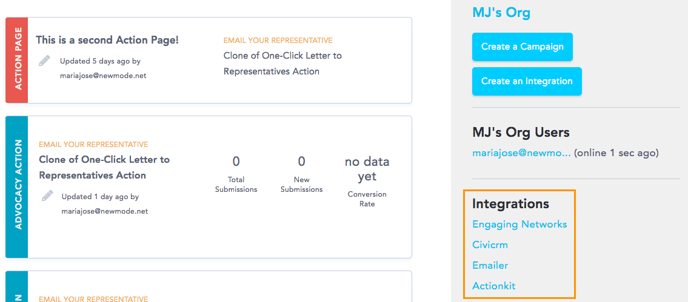
Connecting your CiviCRM integration with an Action
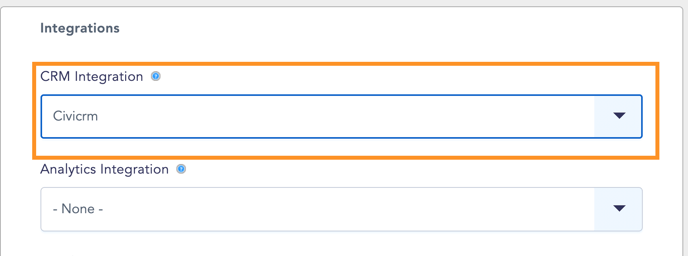
In your New/Mode action, open the Edit tab, and scroll down to the Integrations section of the Basic Configuration page. Select your ActionKit integration from the 'CRM Integration' menu and click on 'Save & Next' to complete the process.
Syncing the fields in your Action to CiviCRM
1. Start by opening Advanced > CRM Integrations to arrive at the Sync Settings page:
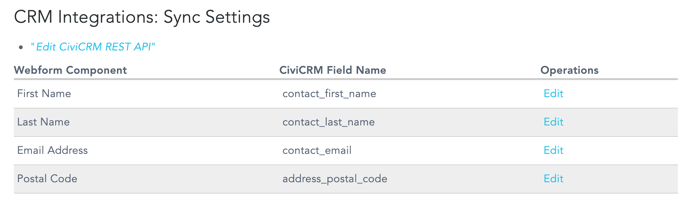
The Sync Settings page has three columns:
| Webform Component | ActionKit Field Name | Operations |
| A list of the fields that supporters fill out on your action. | A list of the user fields in CiviCRM where the data from your action will be sent. | Where you can edit your action's field to change the CiviCRM field they're linked to. |
If any of your action fields listed on the left-side column are not pointing to the field you want on the CiviCRM field column, follow these steps:
2. Click on Edit.
3. Find the CiviCRM API section and, under 'CiviCRM target field', select the right user field from the drop-down menu.
4. Scroll down to the end of the page and click on the Save button to complete the process.

Sync supporter addresses to CiviCRM using the "Full Address" field
Add Custom Fields
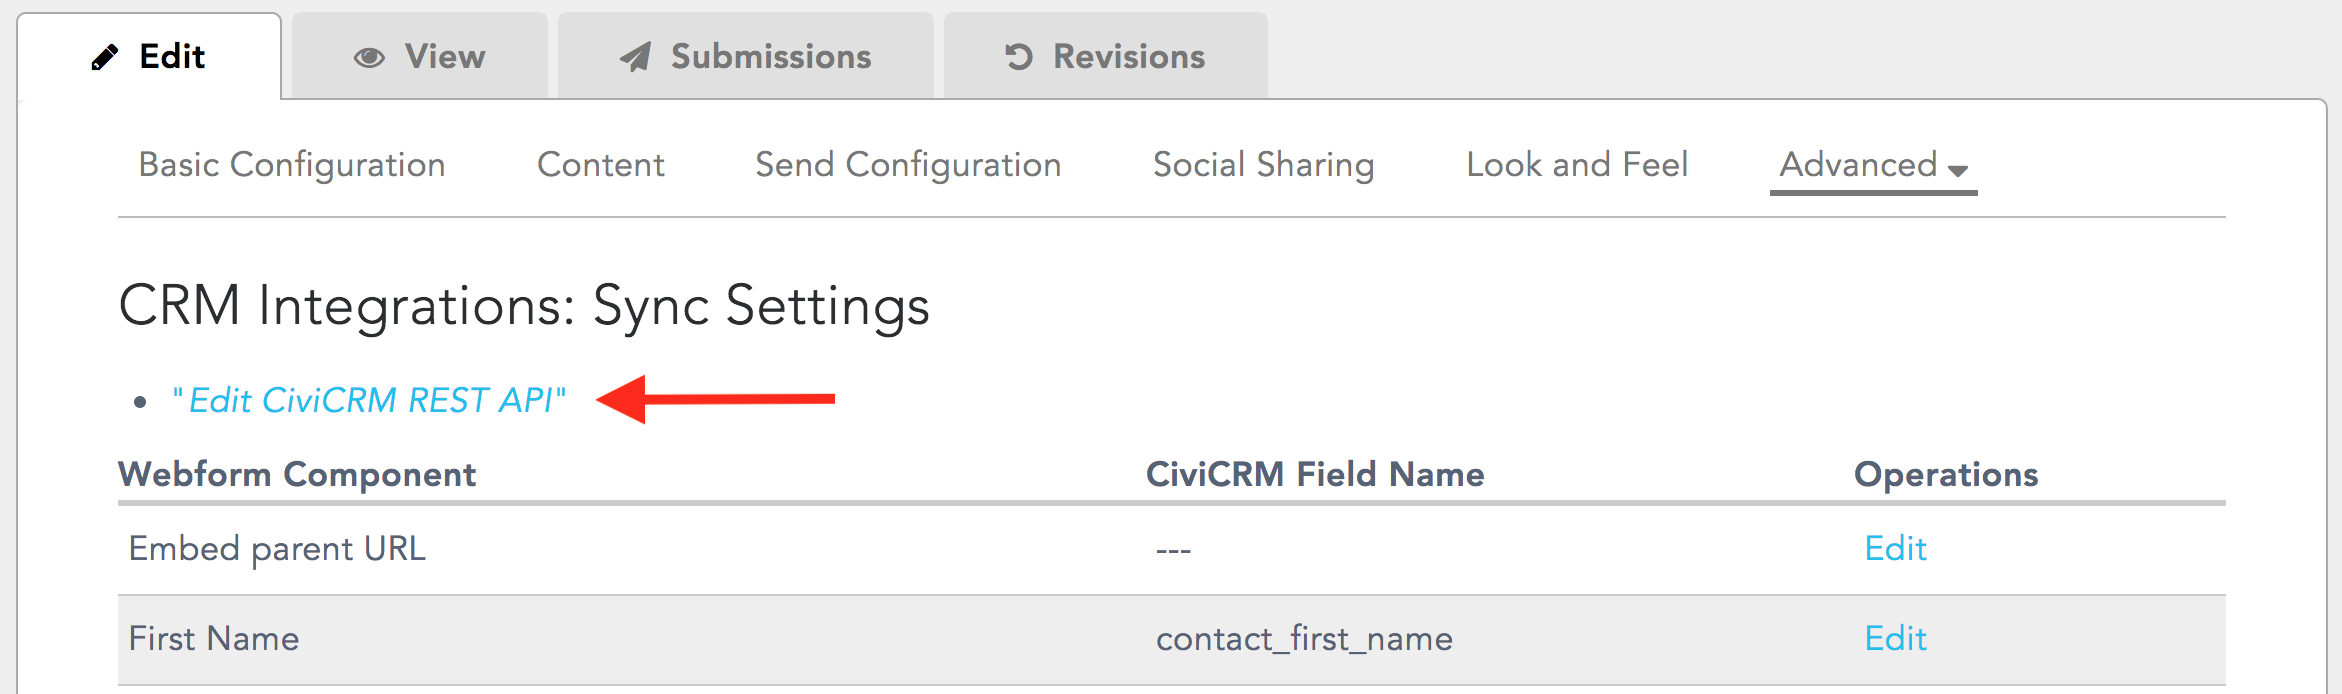
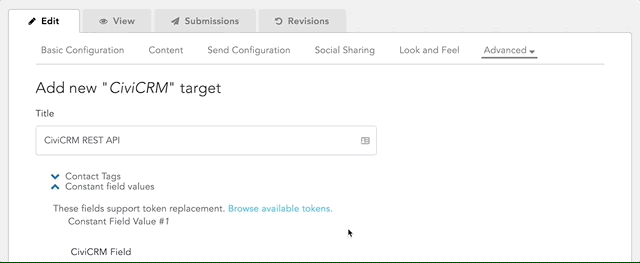
You can add additional custom fields to map from your New/Mode tool onto CiviCRM by clicking the Edit CiviCRM Rest API link under CRM Integrations:
This will take you to the Add New CiviCRM Target page, where you can search CiviCRM fields and map them onto a Constant Value associated with the CRM field, like 0/1, Yes/No, or one of our custom tokens, like so:
Add Tags
When a supporter completes an action with a New/Mode campaign tool, a tag will be created automatically to associate that action with New/Mode in your CRM. You can modify this tag or add additional tags to the data mapped from your New/Mode tool onto CiviCRM by clicking the Edit CiviCRM Rest API link under CRM Integrations:

Under Add new "CiviCRM" target, you'll see a dropdown menu for Contact tags as well as a list of the current tags you're using in your CRM:
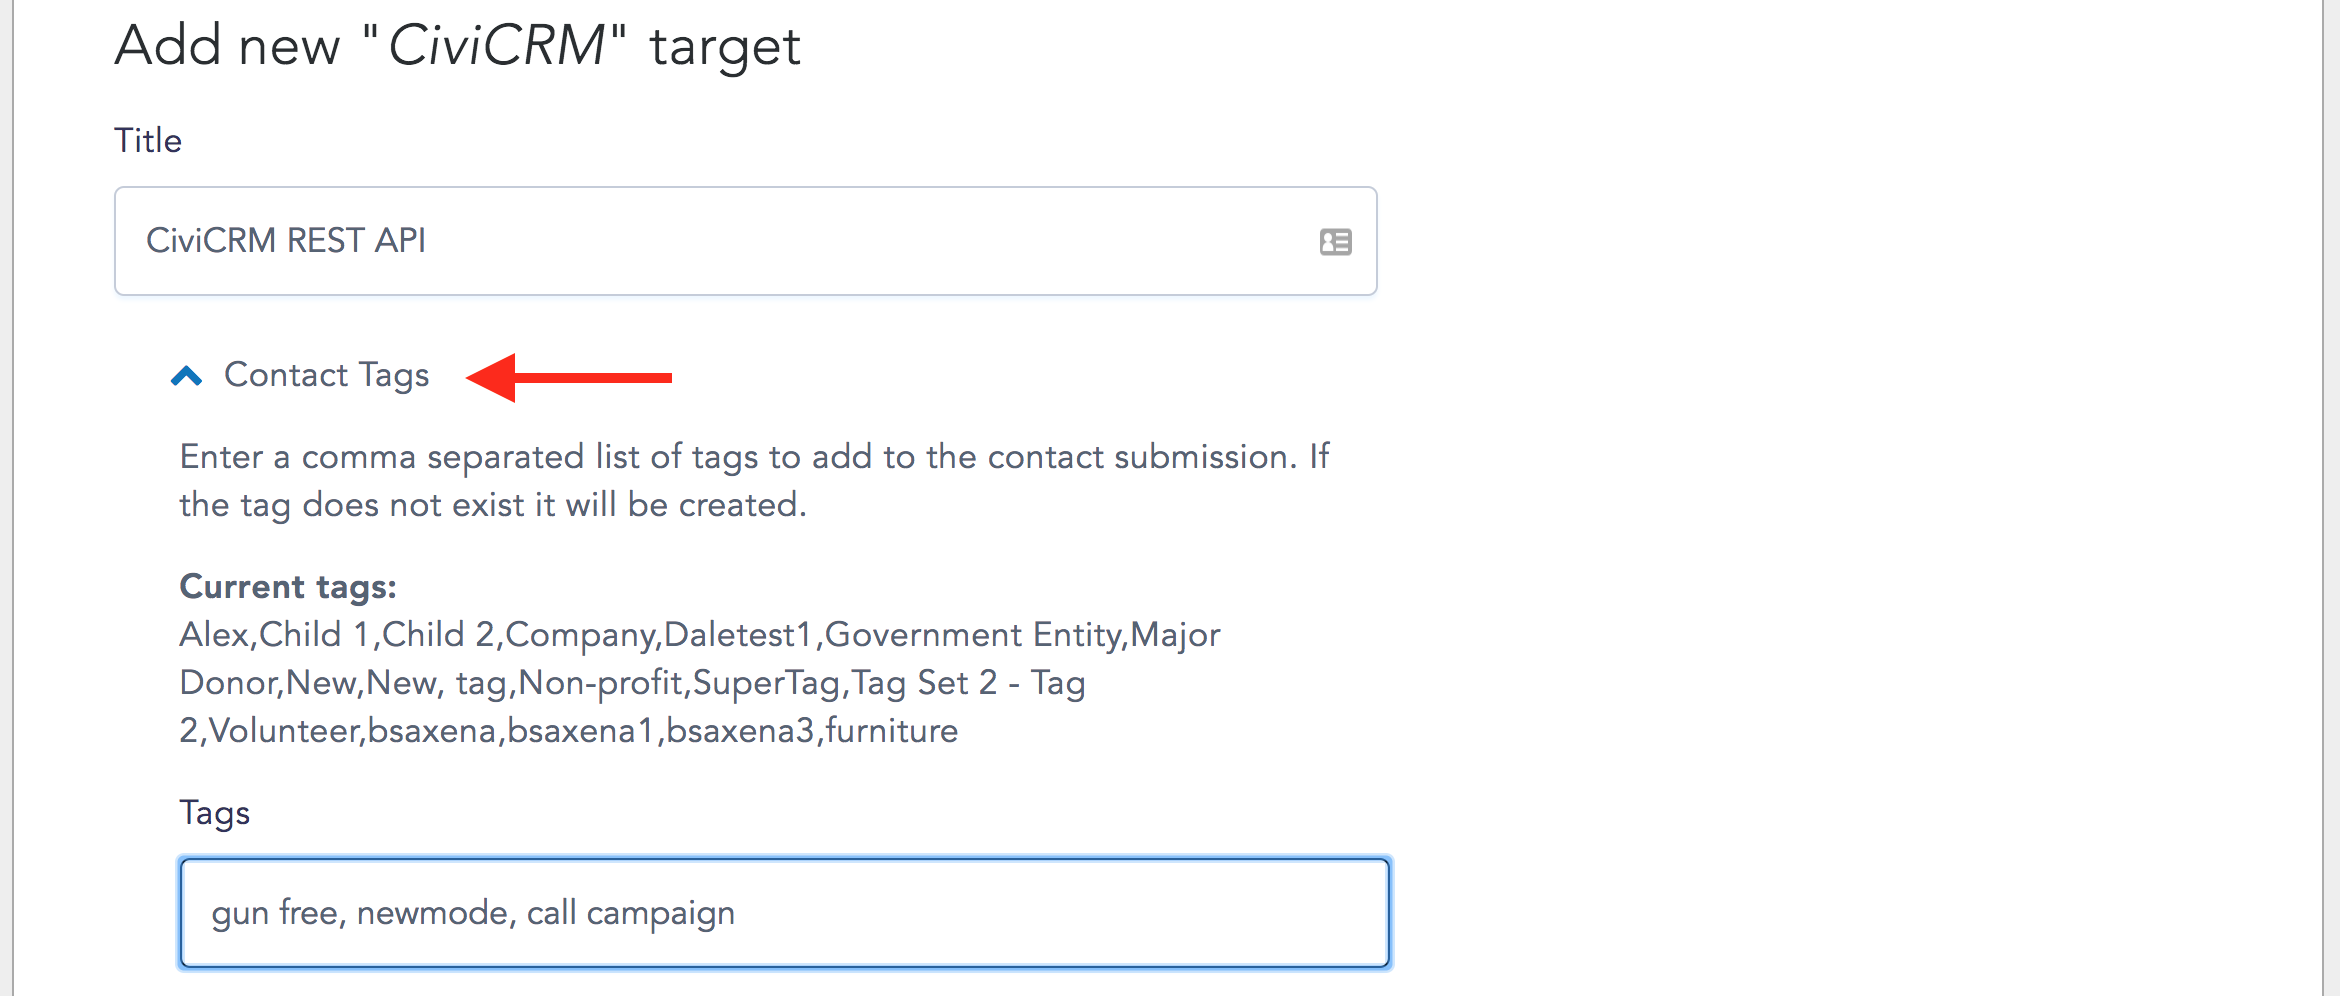
Enter tags separated by a comma. Any tags you enter here will be applied to help organize supporters that take action with a campaign tool as contacts in your CRM. If you are using tags that were created manually in CiviCRM, please make sure you are using contact tags - activity tags are not supported by our integration.
Set up Multi-Value Upsert
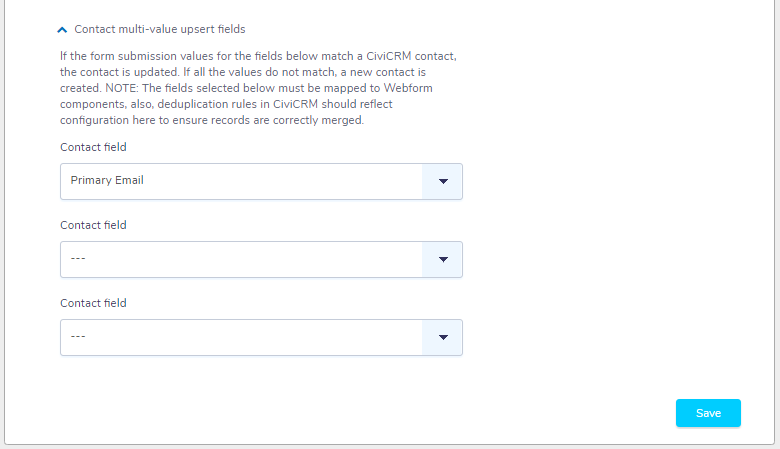
When a supporter takes action on your tool, we will either update their record on your CiviCRM instance, or create a new record. Multi-value upsert enables you to enter multiple values for defining the Contact to be updated. If values for all selected fields match, the record will be updated, and if all the values do not match, a new record will be inserted.
Last updated: April 20, 2021