This is a quick guide to syncing your New/Mode actions to Engaging Networks, from creating an integration in your organization to customizing field mapping on individual actions.
Adding an Engaging Networks integration to your organization
Connecting your Engaging Networks integration to an Action
Syncing the fields in your action to Engaging Networks
Adding an Engaging Networks integration to your organization
Before you begin, make sure to complete these steps within Engaging Networks:
- Set up your page as a Petition page type.
- Whitelist New/Mode's IP addresses separated by a "~" to follow the format required by EN. (Only users with 'super access' in Engaging Networks can create API users and whitelist IP addresses).
- Have an Engaging Networks API Key. (To generate an API key you must be a subaccount administrator, create an API user, and use that to generate an API key as described here).
1. Follow the steps to Create an Integration.
2. Once you have selected Engaging Networks as your CRM Integration, you'll be asked to enter that API Key:
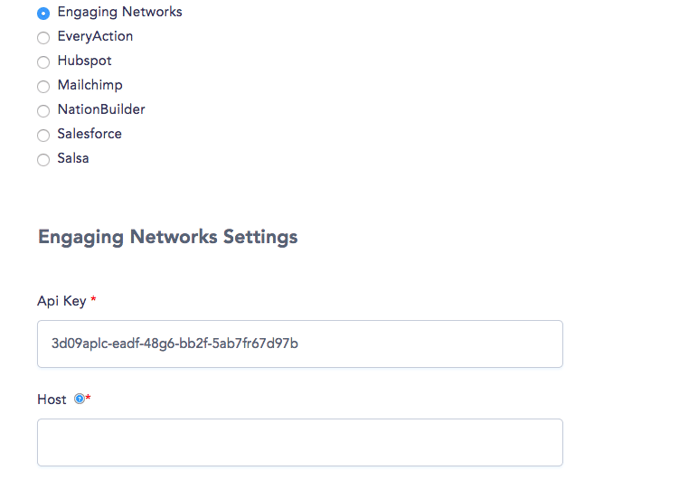
3. In the Host field:
- if your Engaging Networks account is set to Canada, you can leave the field blank or enter https://www.e-activist.com/ens/service/
- if your EN account is set to the United States, enter https://us.e-activist.com/ens/service/
4. Click the blue 'Save' button at the bottom of the page. You'll be taken to your CRM Integration page:

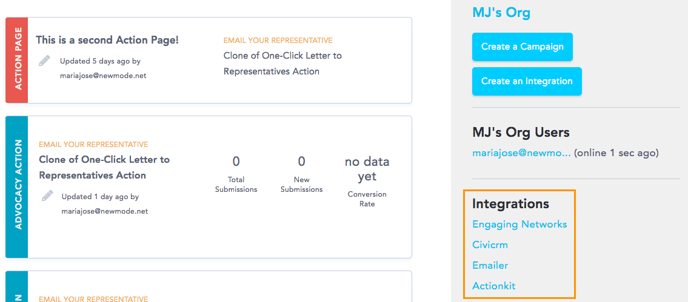
You can always get back to this page to Edit or View your Integration Setup by clicking the link that is now visible under Integrations on the right-hand side of your Dashboard:
Connecting your Engaging Networks integration to an Action
- In Engaging Networks, create a Petition Page and copy that page's Page id. Note down this Page id for later.
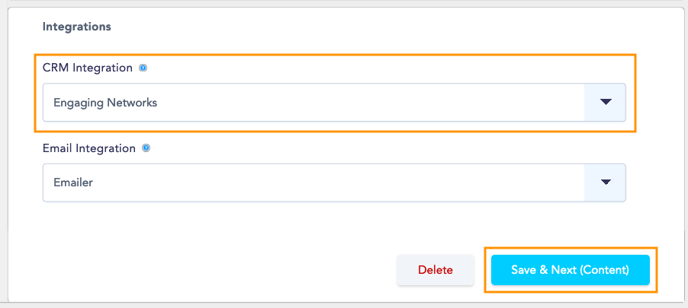
- In your New/Mode action, open the Edit tab, and scroll down to the Integrations section of the Basic Configuration page. Select your Engaging Network integration from the 'CRM Integration' menu and click on 'Save & Next' to complete the process:
-
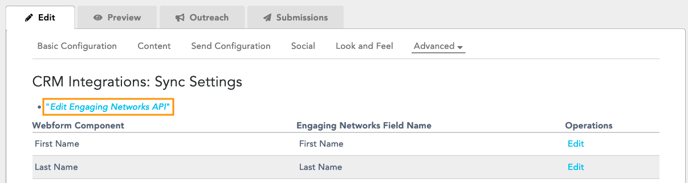
Open Advanced > CRM Integrations:

-
Once there click the 'Edit Engaging Networks API' link on the top left-hand side of the page:
- Because Engaging Networks is a per action-based CRM, each action will require a Petition Page ID for the page you're mapping to. Enter the Page id from step one in the Page id field:
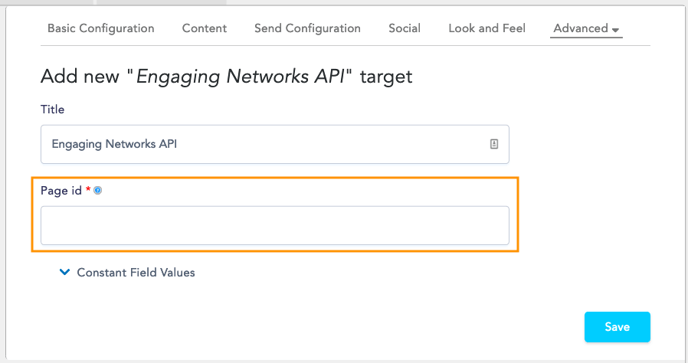
Note that the Petition Page you enter here needs to be a published page, and have the same fields that you'll be using on your New/Mode action.
You will need to repeat this final step for every action that you want to sync with Engaging Networks. If you'd like to distinguish the records coming from each action please use a separate Page ID with each action. Otherwise, feel free to use the same Page ID with multiple actions.
Syncing the fields in your action to Engaging Networks
1. Start by opening Advanced > CRM Integrations to arrive at the Sync Settings page:
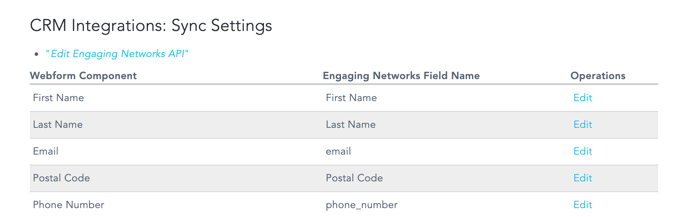
The Sync Settings page has three columns:
| Webform Component | Engaging Networks Field Name | Operations |
| A list of the fields that supporters fill out on your action. | A list of the user fields in Engaging Networks where the data from your action will be sent. | Where you can edit your action's field to change the Engaging Networks field they're linked to. |
If any of your action fields listed on the left-side column are not pointing to the field you want on the Engaging Networks field column, follow these steps:
2. Click on Edit.
3. Find the Engaging Networks API section and, under 'Engaging Networks field', select the right field from the drop-down menu.
4. Scroll down to the end of the page and click on the Save button to complete the process.

Sync supporter addresses to Engaging Networks using the "Full Address" field
Last updated: September 12, 2023