This is a quick guide to syncing your New/Mode actions to Mailchimp, from creating an integration in your organization to customizing field mapping on individual actions.
Adding a Mailchimp integration to your Organization
Connecting your Mailchimp integration with an Action
Syncing the fields in your Action to Mailchimp
Syncing Email Opt In to Mailchimp
Additional configuration options: tags, groups, skipping updates, constant field values
Troubleshooting your integration
Adding a Mailchimp integration to your Organization
1. Follow the steps to Create an Integration.
2. After you select Mailchimp as your CRM, give your integration a name.
3. Next, open a new browser tab and log into your Mailchimp account to get 3 pieces of information: your API Key, your Audience ID, and your Host URL.
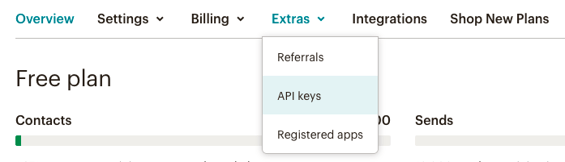
- API Key: To get the API Key for your Mailchimp account, click on your profile picture on the bottom left corner and select 'Account & billing'. Next, expand the Extras menu on the top and click on 'API keys':
Scroll to the Your API keys section. If you see one listed, click on it and copy it. Otherwise, click on the 'Create A Key' button and copy the key you create.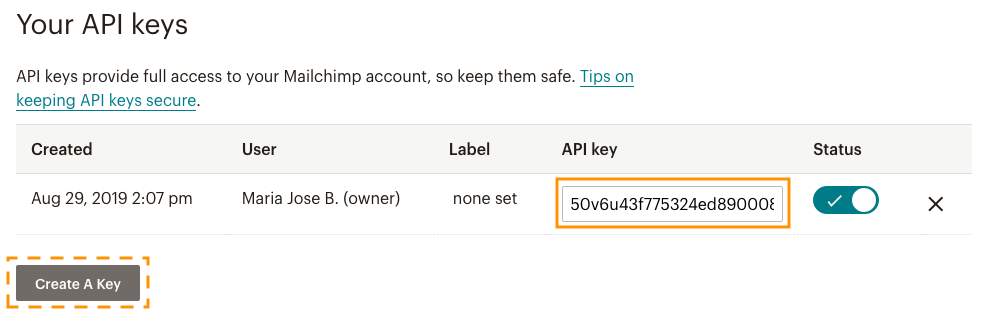
- Audience ID: To get your Audience ID, expand the Audience tab on the side menu and open the 'Audience dashboard'. Next, expand the 'Manage Audience' menu on the top right and click on 'Settings'. Scroll down to the end of the page and copy the Unique id:

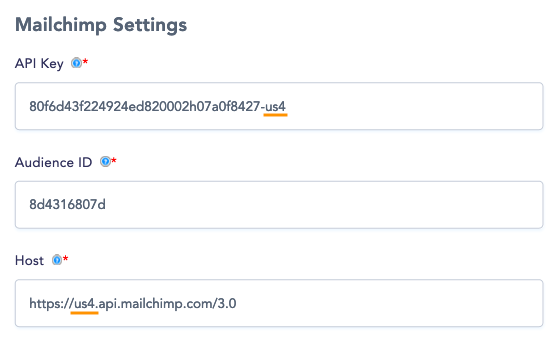
- Host: it's a URL in the format https://<domain>.api.mailchimp.com/3.0
To get this URL, look at the URL you see in your browser while you're in your Mailchimp account, and note the part that comes between the two "//" symbols and ".admin.mailchimp.com". That part is the <domain> you need for the Host.
For example, in the screenshot above the URL is https://us4.admin.mailchimp.com, so the Host would be https://us4.api.mailchimp.com/3.0
(The <domain> usually matches the characters after the dash in your API Key).
Connecting your Mailchimp integration with an Action
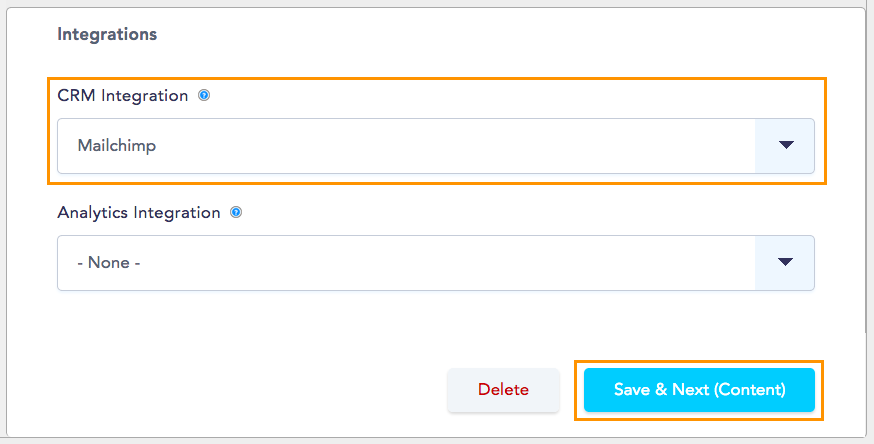
In your New/Mode action, open the Edit tab, and scroll down to the Integrations section of the Basic Configuration page. Select your Mailchimp integration from the 'CRM Integration' menu and click on 'Save & Next' to complete the process.
Syncing the fields in your Action to Mailchimp
1. Start by opening Advanced > CRM Integrations to arrive at the Sync Settings page:
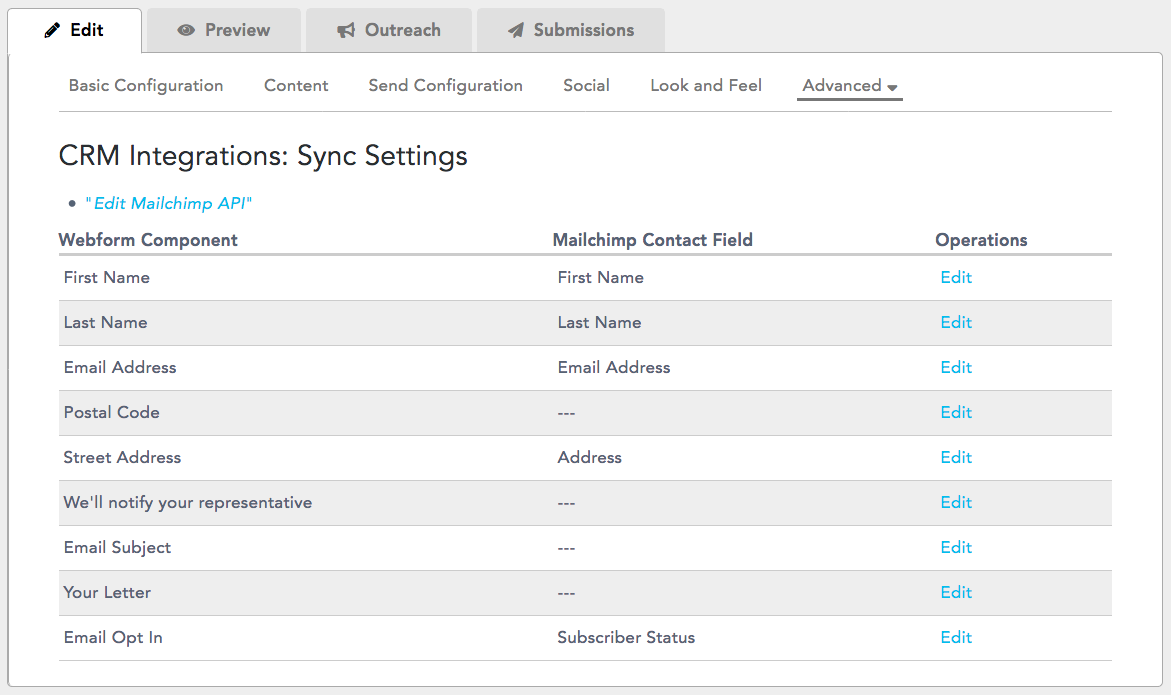
The Sync Settings page has three columns:
| Mailchimp Contact Field |
Operations | |
|
A list of the fields that supporters fill out on your action. |
A list of the user fields in Mailchimp where the data from your action will be sent. |
Where you can edit your action's field to change the Mailchimp field they're linked to. |
If any of your action fields listed on the left-side column are not pointing to the field you want on the Mailchimp field column, follow these steps:
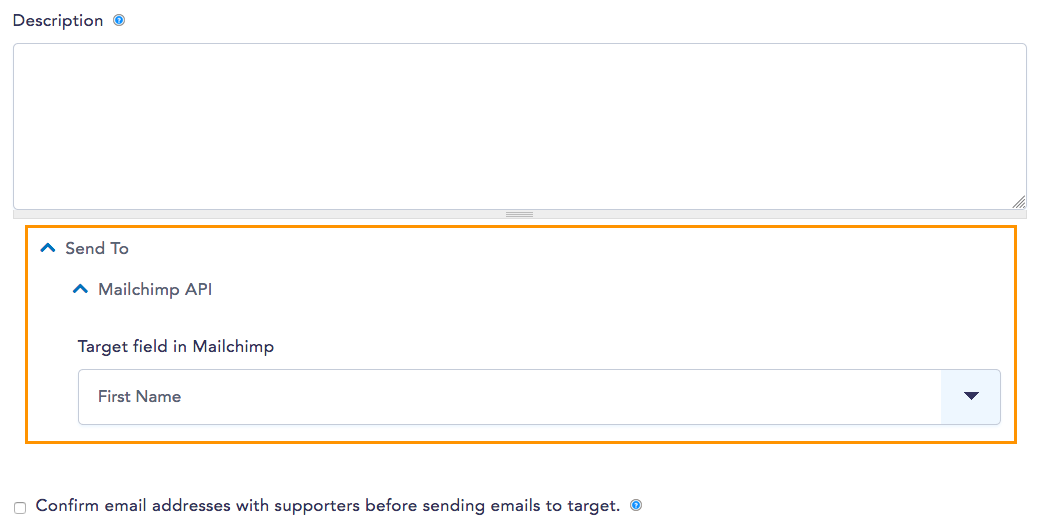
2. Click on Edit.
3. Find the Mailchimp API section and, under 'Target field in Mailchimp', select the right user field from the drop-down menu.
4. Scroll down to the end of the page and click on the Save button to complete the process.
Syncing Email Opt In to Mailchimp
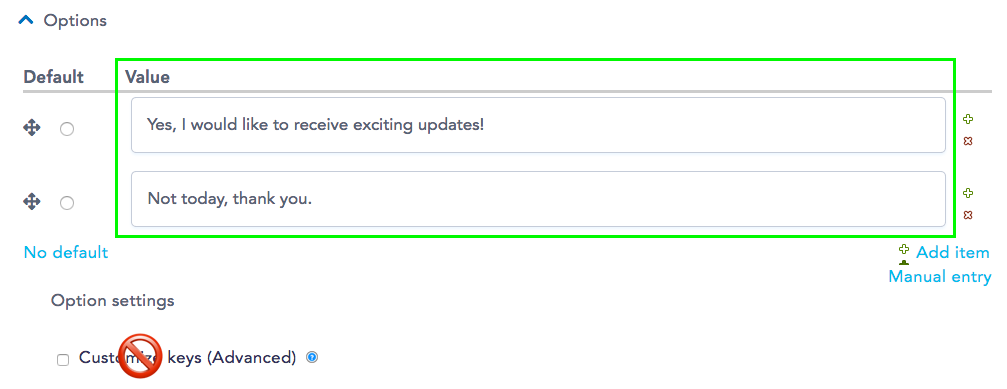
By default, the Email Opt In is set to send the correct values to the 'Subscriber Status' Contact Field in Mailchimp. This setting makes it so that the first option is received as 'Subscribed' and the second one is received as 'Unsubscribed' without you needing to do anything.
Feel free to change the values so that the two opt in alternatives are displayed differently, but be careful with the 'Customize keys' option:
- If you'll be mapping your opt in component to the 'Subscriber Status' field in Mailchimp leave the keys as they are.
- If you'll be mapping your opt in component to a different field in Mailchimp, that field may have different key requirements. Start with the default keys, try synchronizing a submission and, if you get an synchronization error, follow the error message to adjust the keys accordingly.
Additional Mailchimp configuration options
Start by opening Advanced > CRM Integrations to arrive at the Sync Settings page, then click on 'Edit Mailchimp API':
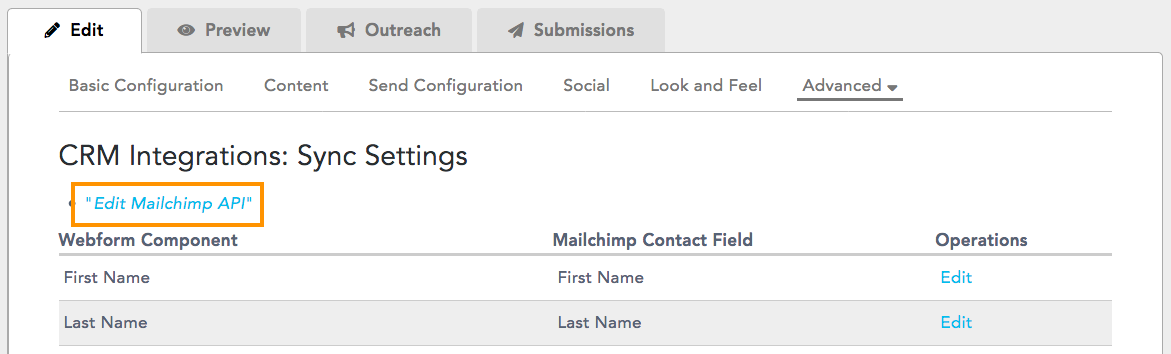
On the next page you'll see a few different optional settings:
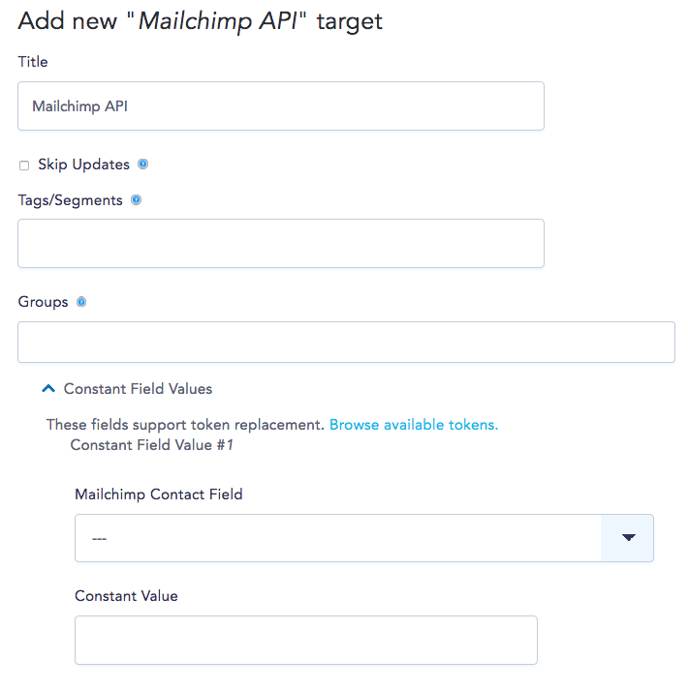
- Title: you can change the name of the integration here.
- Skip Updates: check this box if you only want Mailchimp to create new Contacts from the supporter data you're syncing, but not update any existing Contacts for those supporters.
- Tags/Segments: to add tags to the supporter data you're syncing, enter them here. Make sure to separate your tags with a comma, leaving no spaces before or after each tag.
- Groups: similarly, to add a group or interest to each Contact that gets created from this supporter data, enter the groups/interests here, separated by commas and without leaving any spaces in between.
- Constant Field Values: these are separate fields that allow you to attach other information to your supporter data beyond tags or groups:
- On the Mailchimp Contact Field drop-down menu, select the field in Mailchimp that this data should go to.
- Under Constant Value, enter the value that you'd like to be added to each Contact and sent to the field you selected above.
Make sure you save any changes!
Troubleshooting your integration
1. Check the Host: on your dashboard, find the integration on the side bar and click through to it. Confirm that the URL you're using as Host follows the format below, and that the <domain> part matches the characters after the dash in your API Key. If it doesn't edit the Host URL and save the changes.https://<domain>.api.mailchimp.com/3.0/
2. Check the field mappings: if your action has both a postal code and an address field, open the action and head to Advanced > CRM Integration. Confirm that only postal code or address is being synced to Mailchimp, as Mailchimp can't accept both. If you're mapping both fields, remove one of the mappings and save the changes.
Testing your fix
After making either of the changes above, open the Submissions tab on your action and try syncing a submission manually as shown below:
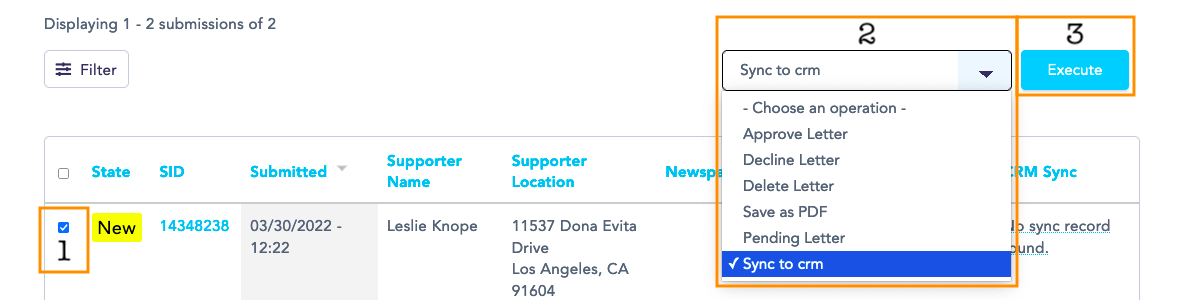
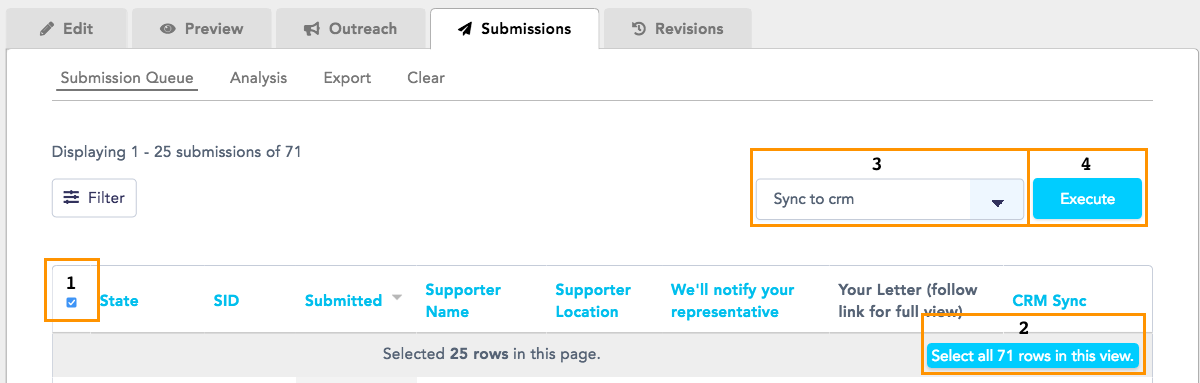
- If the synchronization is successful: Yay! New submissions will sync correctly, and you can manually sync the rest of the existing submissions that failed to sync. Select them all and use the 'Sync to crm' option again as show below. (Make sure to do this with any other actions connected to the same integration).
- If you still get a Synchronization or Miscounfigured error: contact us at support@newmode.net, include a link to the action, and we'll give you a hand!
Last updated: December 15, 2022