A thank you email and thank you page are important aspects of your campaign. Aside from thanking supporters for taking action, these points of contact also provide the opportunity to get your supporters even more involved in your campaign.
Set Up Thank You Message Pages
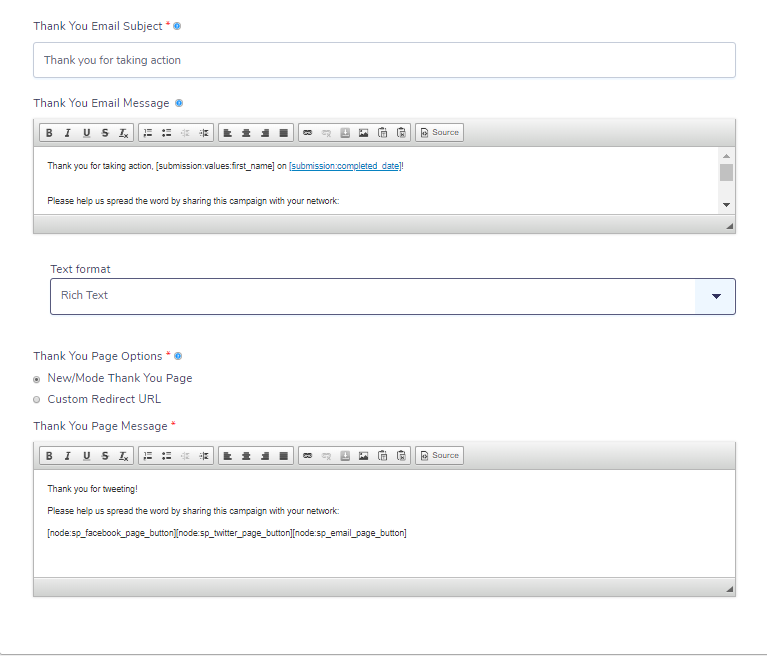
Step 1: Go to the Content screen under the Edit tab and add your content under the Thank You Page Message and Thank You Email Message. If you decide you'd rather send users to a Custom Redirect URL instead of a Thank You Page, you can select that option from the Thank You Page Options menu. Once you've decided on what type of Thank You Page you'd like, you'll see that there's already some great default content supplied by New/Mode:
Step 2: Configure your Social Share buttons. The tokens on your thank you page and email won't work until you set them up.
You're all done! 🎉 Don't forget to thoroughly test your newly set up tool.
If you prefer to disable your tool's thank you email, you can:
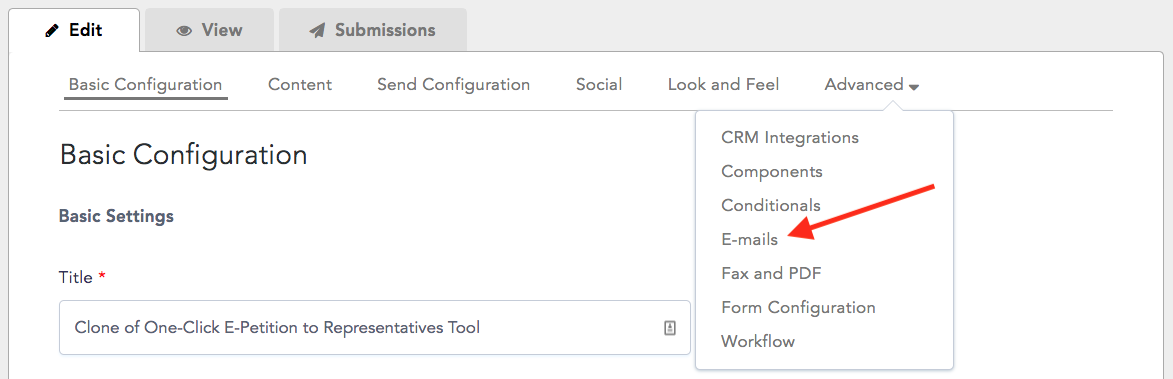
Step 1: Navigate to Advanced -> E-mails.
Step 2: Click Edit on the Thank You E-mail - the one with the Thank You E-mail Subject that you set up on the Content tab.
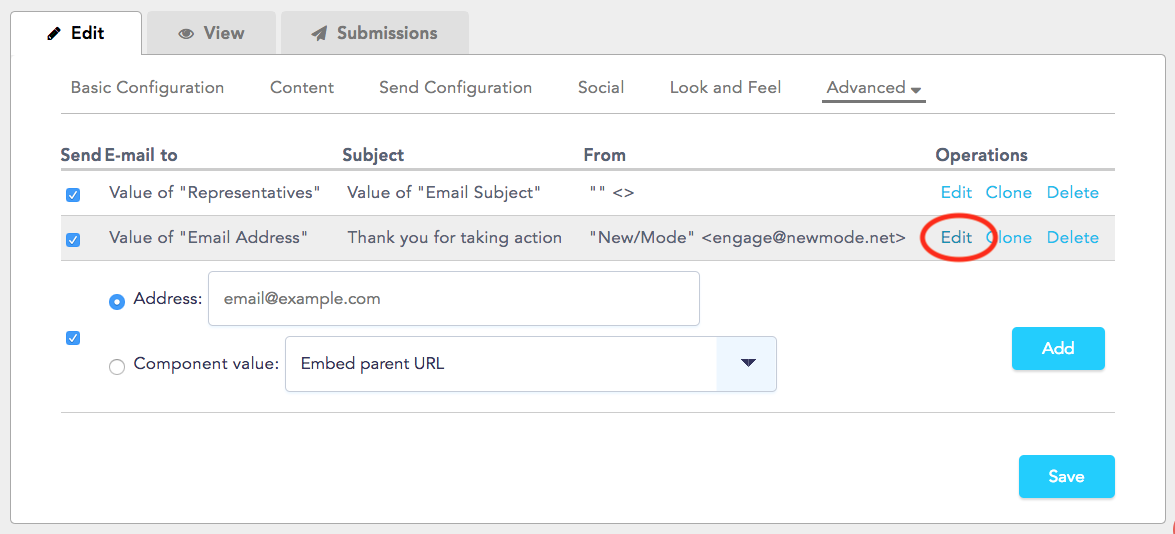
Step 3: Uncheck the Enable Sending and Bypass Queue boxes, then Save your changes.