Test Groups can help you create the most effective campaign by determining which variant of your tools is most effective.
Test groups determine which tool is most effective by pitting multiple versions of your tool against each other, and we'll show which version of the tool is the most effective more than the others. Here we'll guide you through setting up Test Groups. If you'd like to learn more about why to use Test Groups, click here.
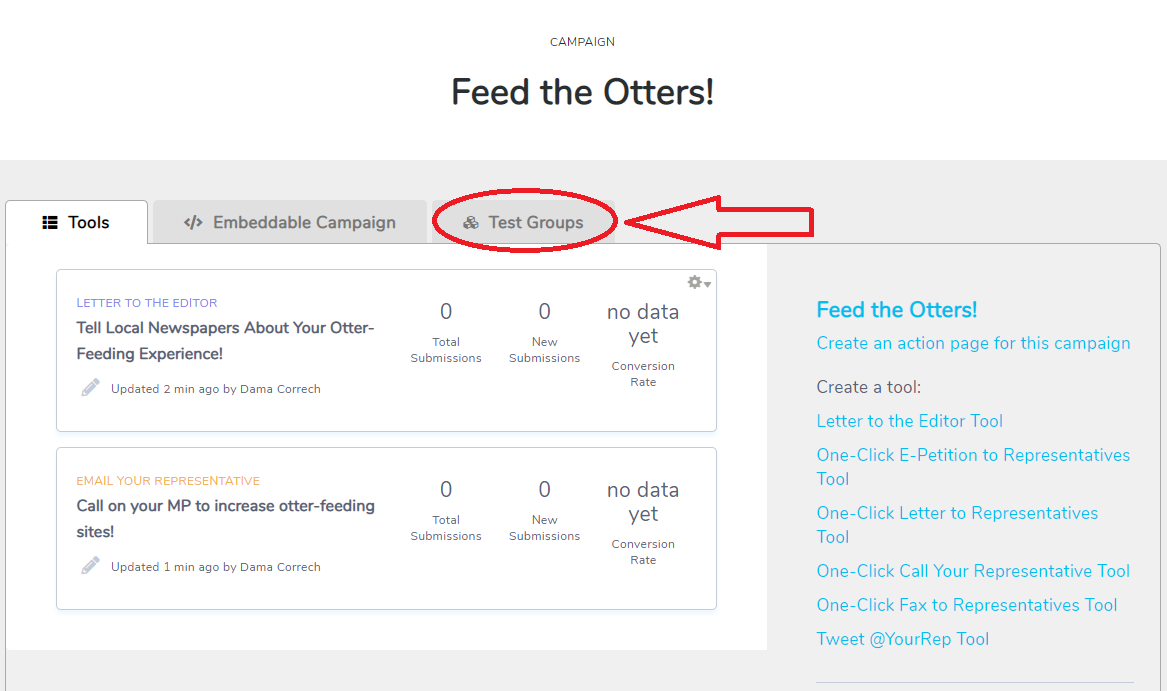
Step 1: When on your Campaign Dashboard, navigate to the Test Groups tab in the top menu bar. Test groups are campaign-dependent- that means you can only create test groups with tools inside this campaign. If you want to pit two tools against each other, they need to be in the same campaign- can’t pick from tools outside of campaign to put in test group.
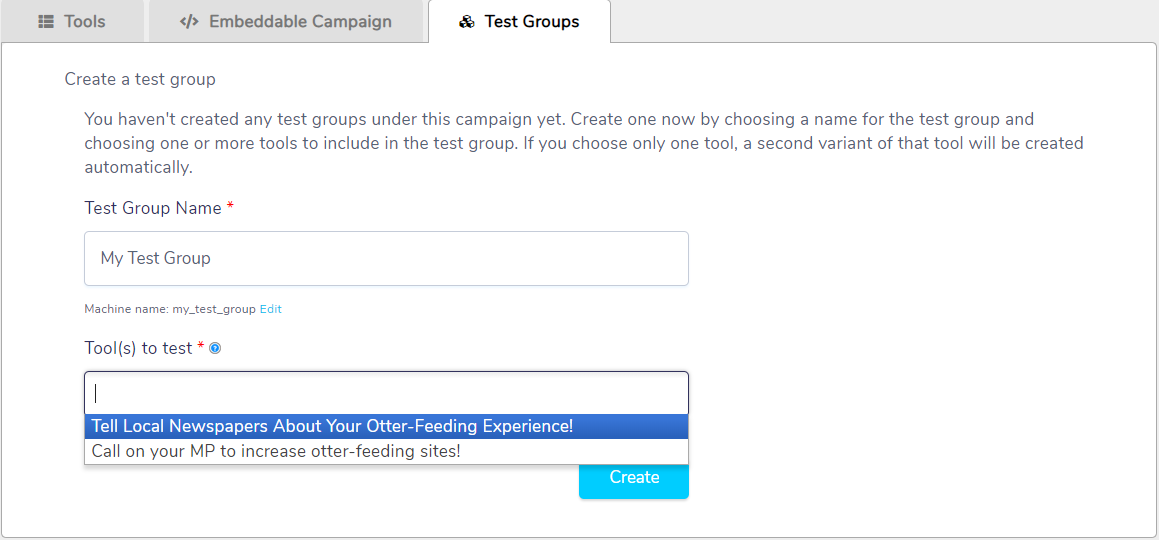
Step 2: You’ll want to create a name for your Test group, and then select which tool(s) you want to test against each other. If you don’t choose multiple tools, a clone of the selected tool will automatically be created for you.
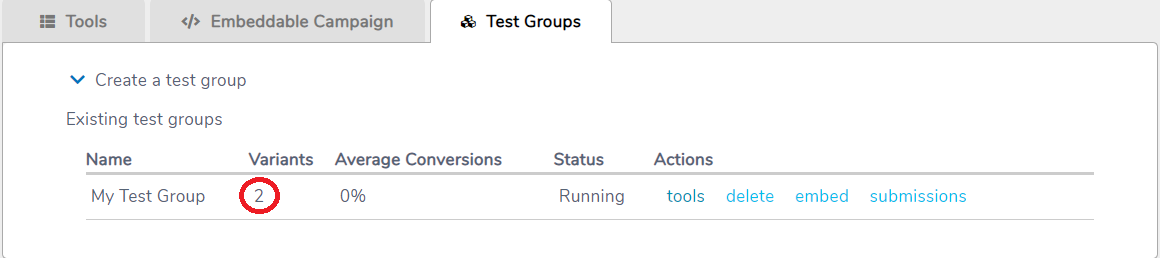
Step 3: Find the test group you'd like to work on (if you're creating your first one, it should be pretty easy!) You can see basic information about your test groups in the Test Groups dashboard, including the number of variants, conversion rate for the test group and status.
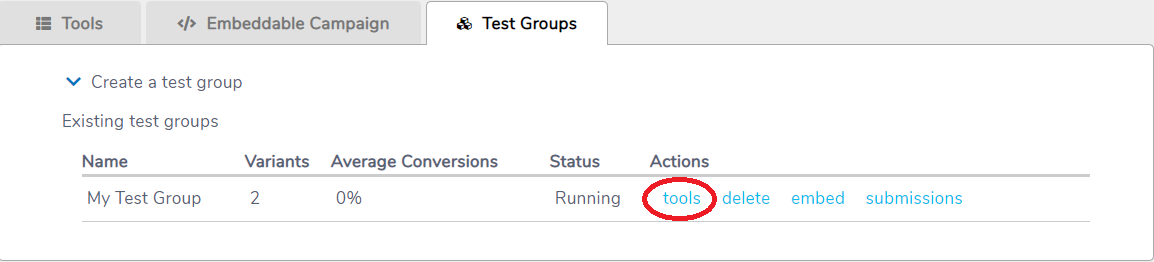
Step 4: Next, you'll want to click tools to see the tools included in the test group.
Step 5: Edit each variant to add the small variations you want to test. If you didn't select multiple tools in step 1, you'll see the clone created here. When you press edit, it'll take you to the standard Tool Setup page. If you need a reminder on how to edit tools, articles can be found here.
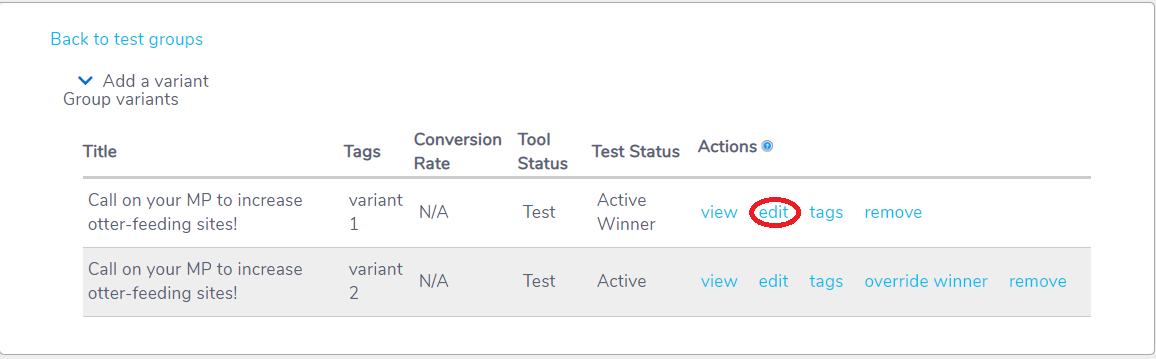
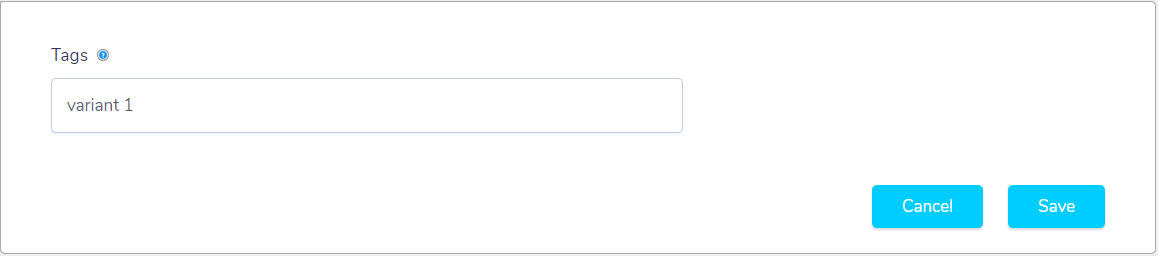
Step 6: Once you've edited your tools to your liking, you'll want to ensure you have the appropriate tags setup. This will help you search for your tool later.
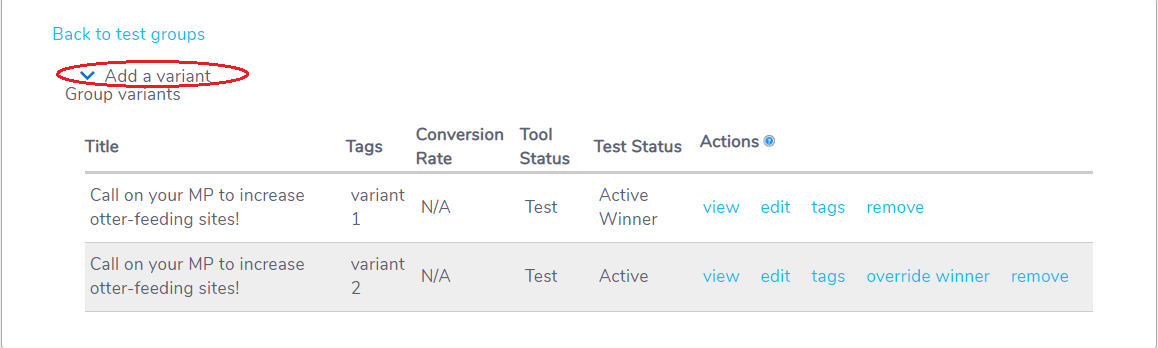
Step 7: Now that you've completed two variants of your tool, you might want to add a third. This can be done by selecting "add a variant" in the top right corner.
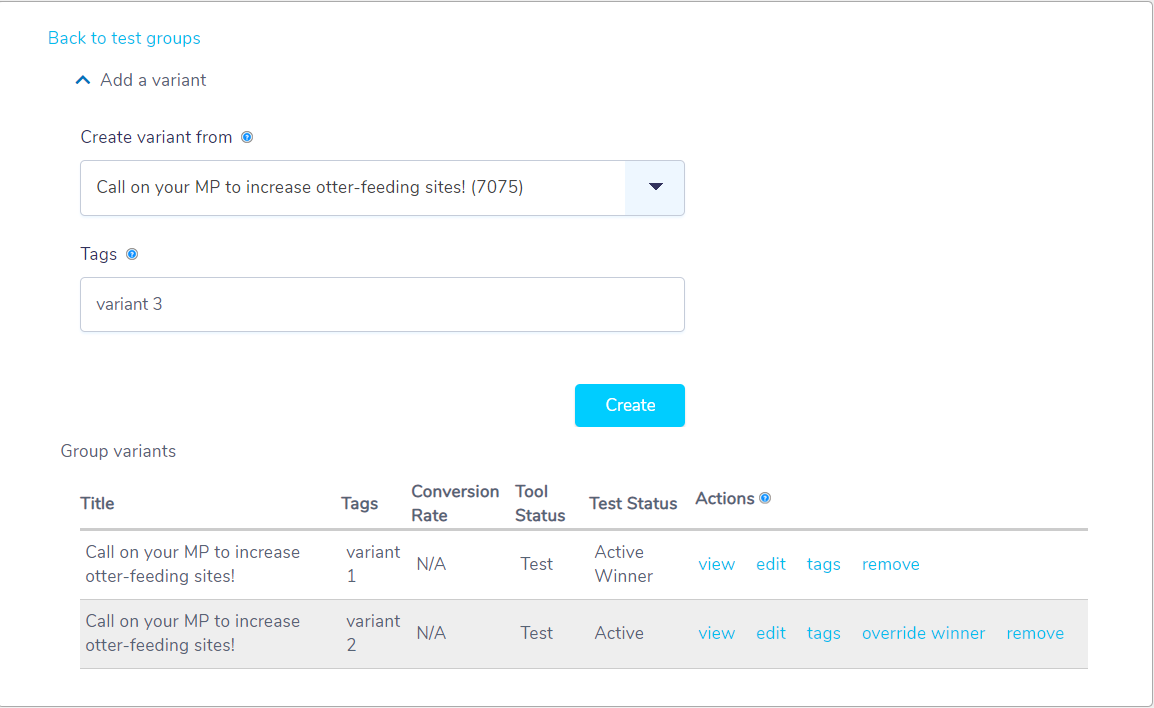
Once clicking this, you can create a new variant for the test group. You can select which tool you'd like to base it on, and create the relevant tags. After that, press create to add the new variant to the test group.
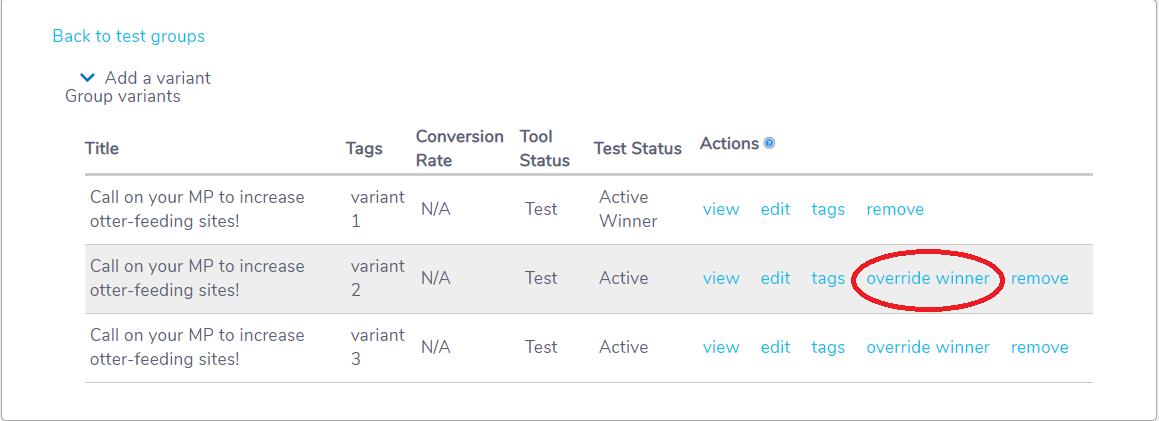
Step 8: If you've been running your campaign for awhile, and decide you'd like to use one version of the tool over the others, you can select Override Winner. This will disable all other versions of the tool, and only display the overriding variant. If you decide you want to re-enable testing, simply press "enable" on any variant of the tool.
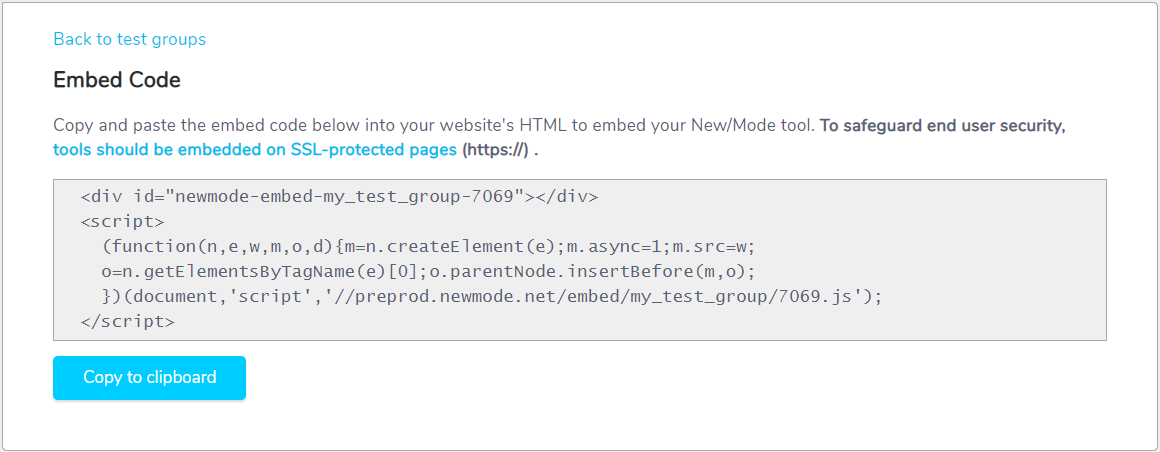
Step 9: Congratulations, you've now set up your test group and you're onto the final steps. You'll want to head back to the Test Group main page to grab the Embed Code for your tool. This works the same as any tool’s embed code - put it in your action page’s HTML and it will automatically pull from one of the tools in your test group - once you have an active winner, it will appear more often than the others. If you override the winner, only that one will show up.
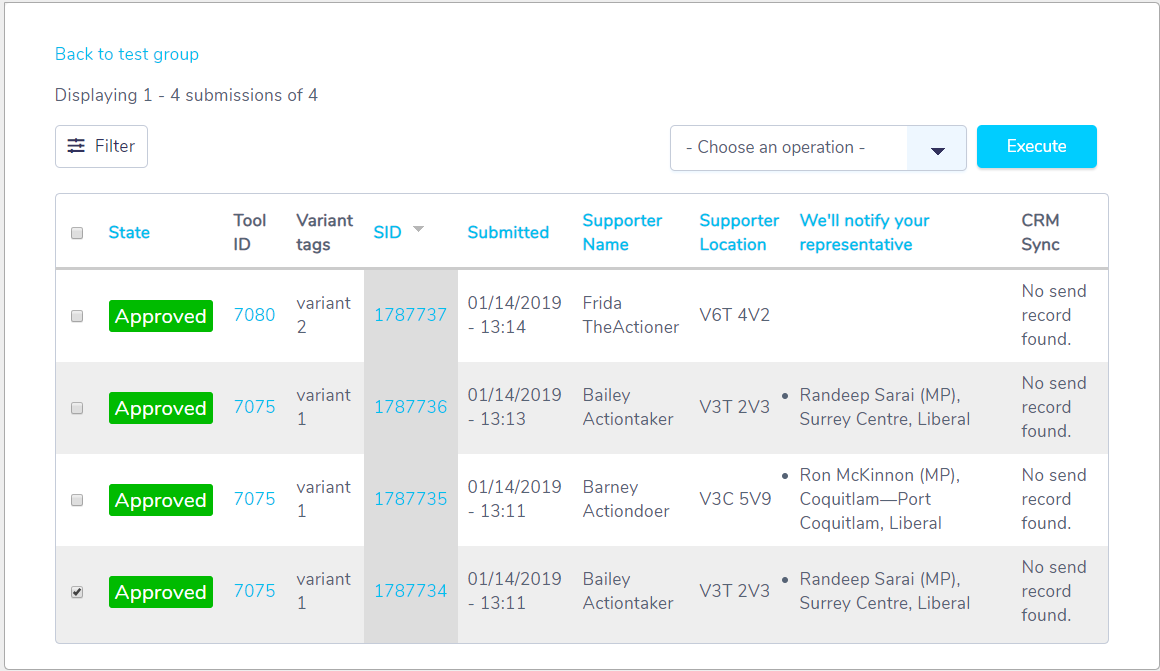
Step 10: Finally, you can also view the submissions for the whole test group by selecting Submissions from the Test Group main page. The Variant Tag tells you which variant the submission was made for. You can change status of submissions just as in the tool-specific submissions queue.
Once all this is done, the Test Group set up is complete!