This is a quick guide to syncing your New/Mode actions to Salesforce, from creating an integration in your organization to customizing field mapping on individual actions.
Adding a Salesforce integration to your organization
Connecting your Salesforce integration with an action
Connecting your New/Mode Action with an existing Salesforce Campaign
Syncing the fields in your action to your CRM
Syncing Address field data to Salesforce
Configure Salesforce API Targeting
How do I resolve the 'Error acquiring OAuth2 Token' on my Salesforce integration?
Adding a Salesforce integration to your organization
1. Follow the steps to Create an Integration.
2. Once you select Salesforce as your CRM, you'll be asked to enter your Salesforce Host. Make sure that the Host URL ends in a forward slash or it won’t work!
Your host is the URL excluding the path when you log in to your Salesforce account. For example https://na40.salesforce.com/ or https://yourDomain.salesforce.com/.
Salesforce Host URLs ending in ‘lightning.force.com' aren’t supported.
If you normally sign in with a 'lightning.force.com' URL, try opening that URL in a private browsing window. Once the page loads, copy that 'salesforce.com' URL and use it as your Host.
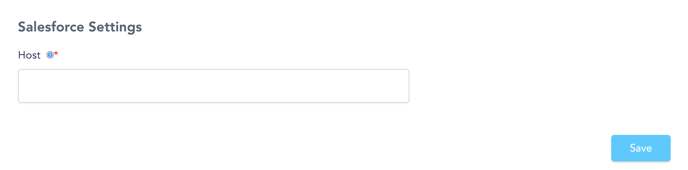
3. Click Save at the bottom of the page.
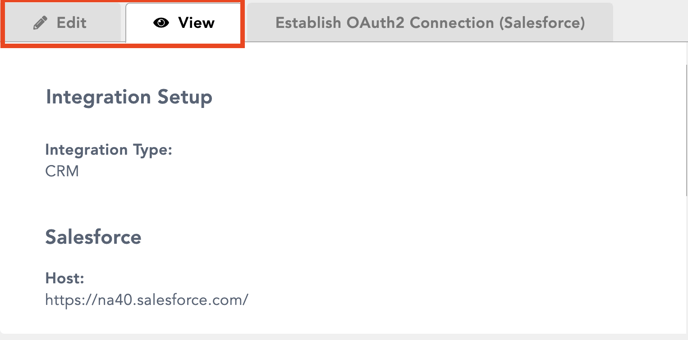
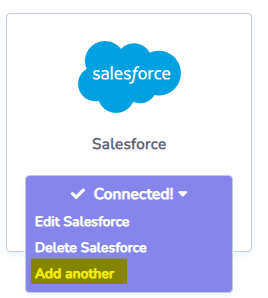
You will be taken to your new Integration Setup page, where you'll be able to View or Edit it later:
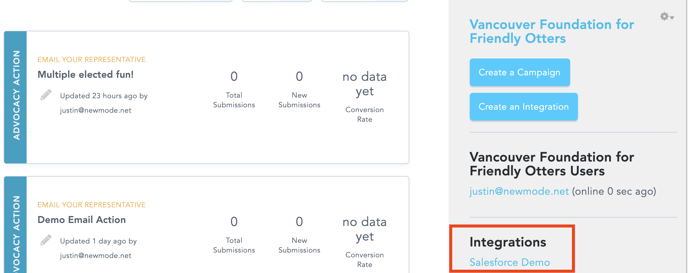
If you wish to edit your Integration at a later point, you can access it from the right sidebar on your dashboard:
Connecting your Salesforce integration with an action
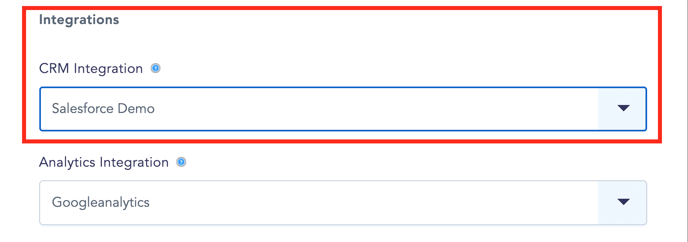
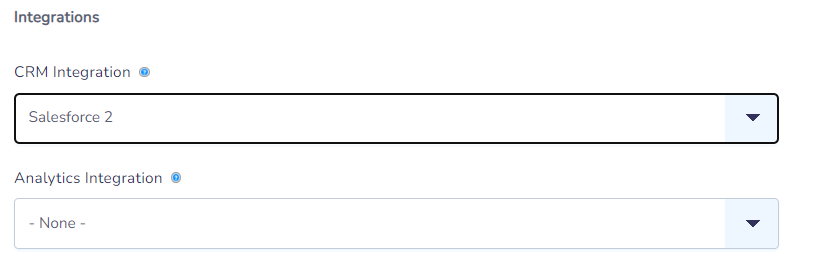
In your New/Mode action, open the Edit tab, and scroll down to the Integrations section of the Basic Configuration page. Select your Salesforce integration from the 'CRM Integration' menu and click on 'Save & Next' to complete the process.
Connecting your New/Mode Action with an existing Salesforce Campaign
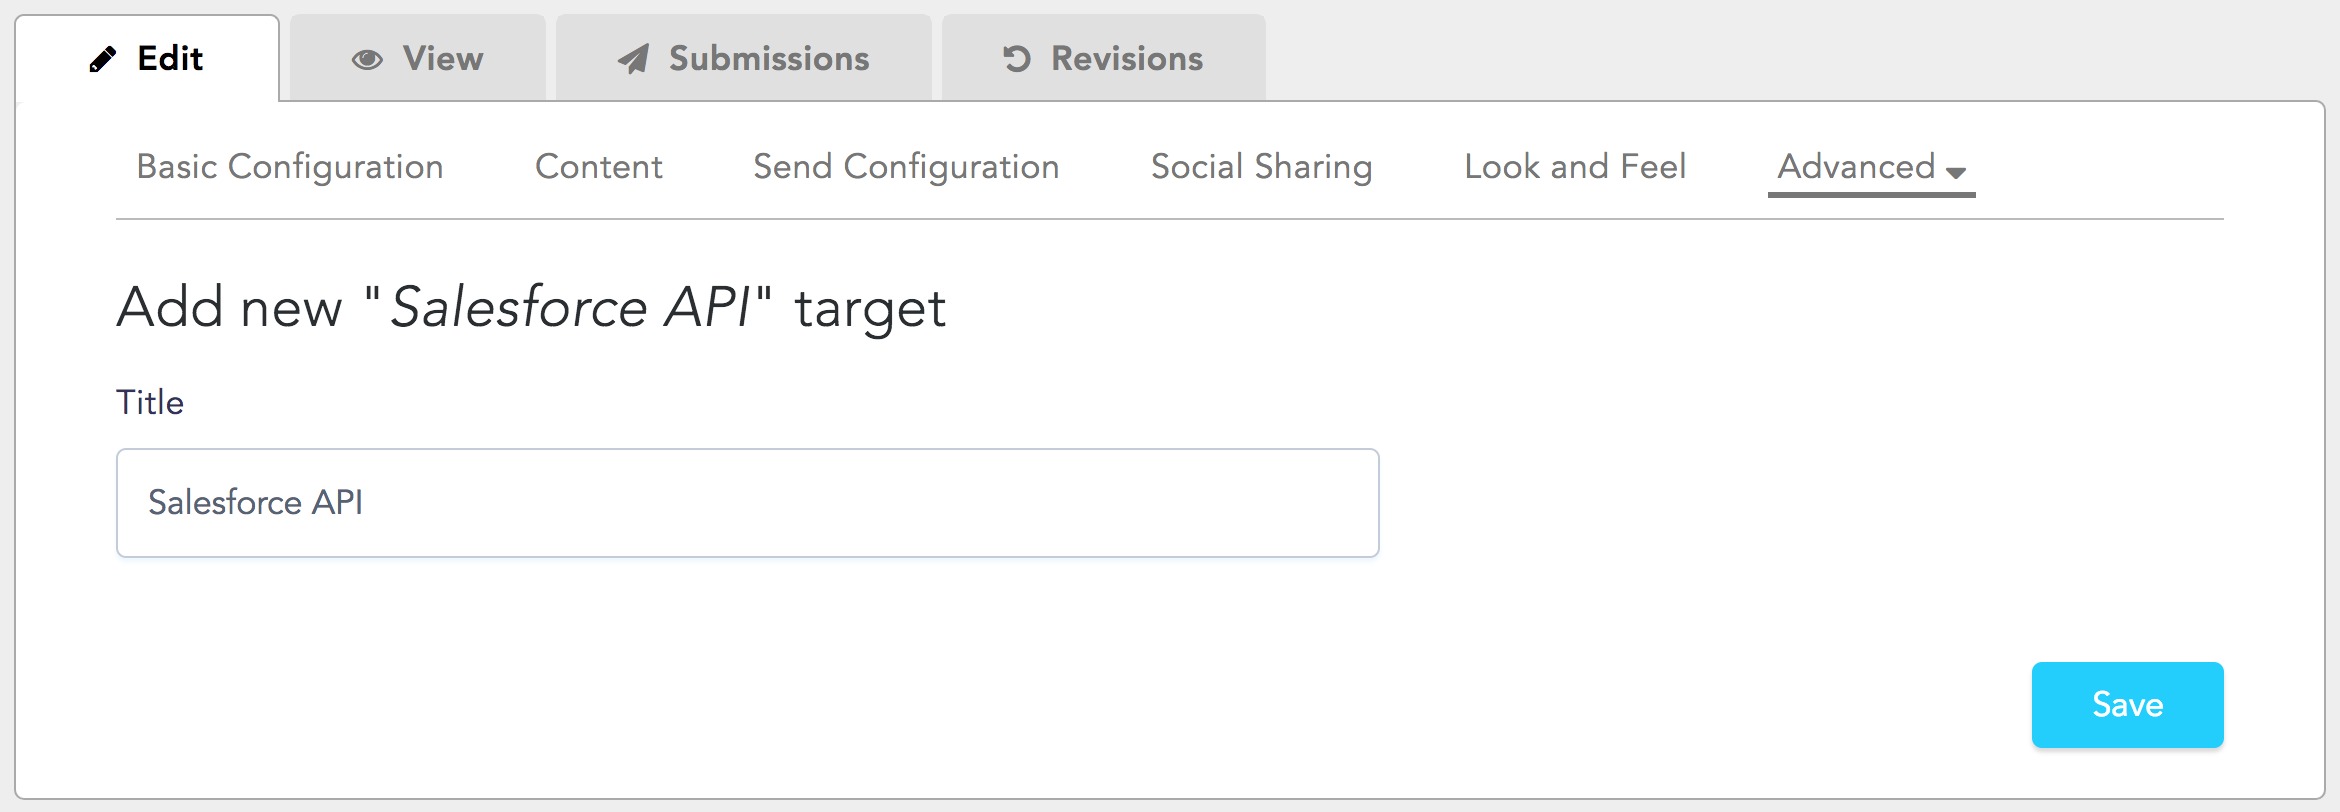
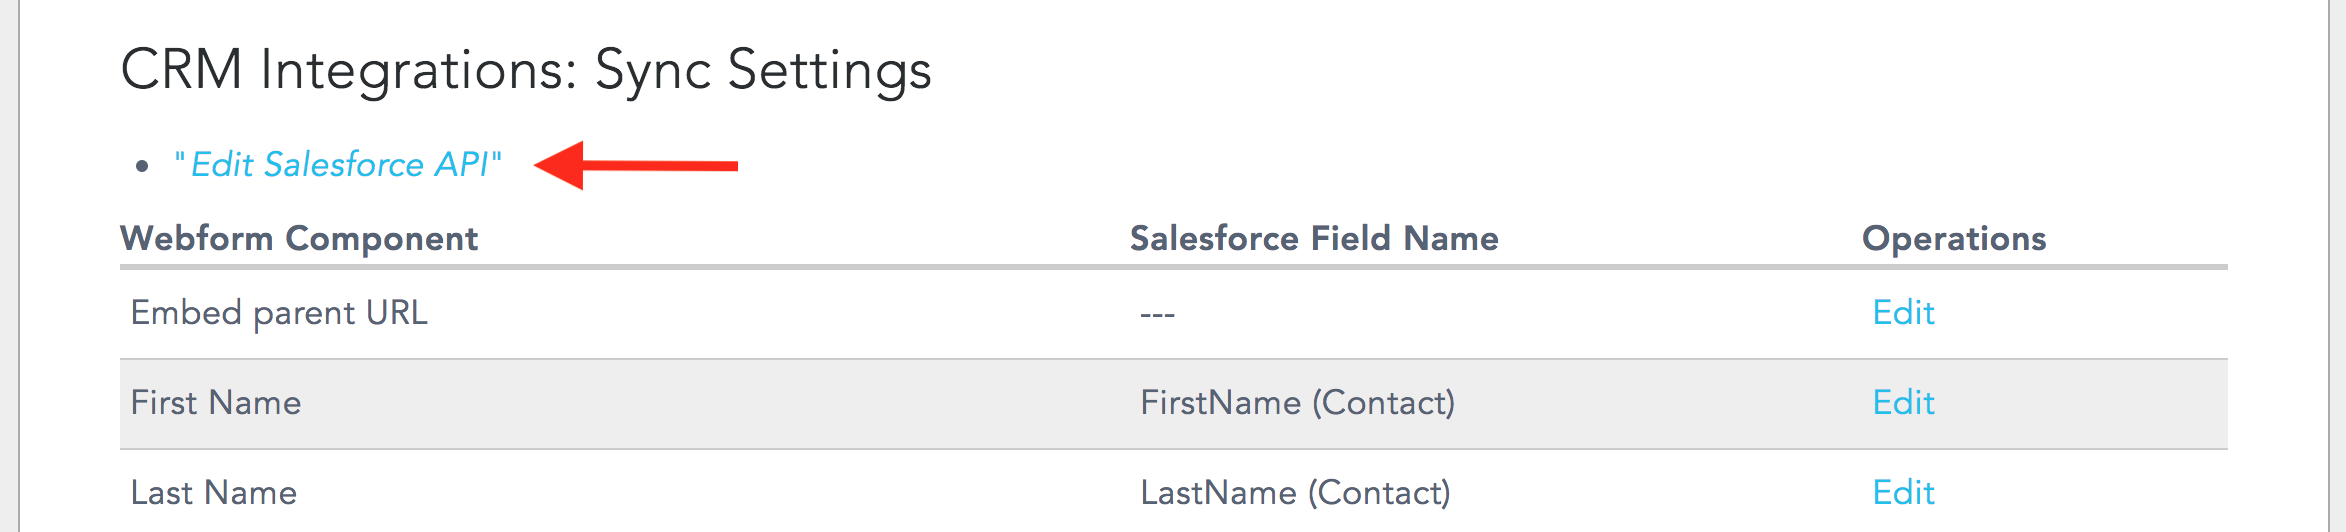
1 . If you'd like to connect your Action to one of your Salesforce campaigns, navigate to Advanced -> CRM Integrations. Next, select Edit Salesforce API.
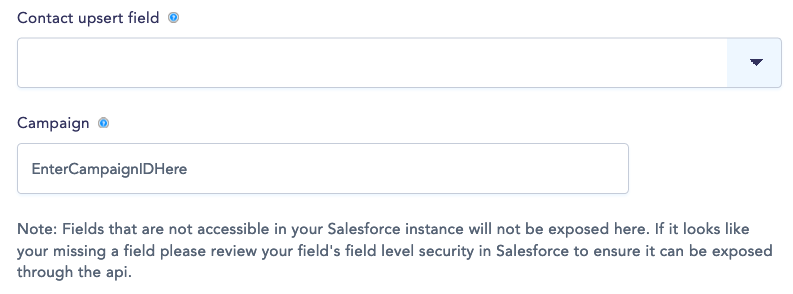
2. Scroll down to Campaign. Enter the ID of the Salesforce campaign that you wish to associate Contacts generated from your New/Mode action with.
3. Press Save! Your Action will now associate contacts with the Salesforce campaign you specified.
Configure Salesforce API Targeting
To sync data from New/Mode actions with your Salesforce records, you need to configure some settings through the Edit Salesforce API on your CRM Integrations page:

This link will take you to your Add new Salesforce API target page, where you can configure the data being sent to Salesforce and how it is sent. Before you can see these configuration options, you may need to Save your new Salesforce API target:
You will then see a series of configurable options:
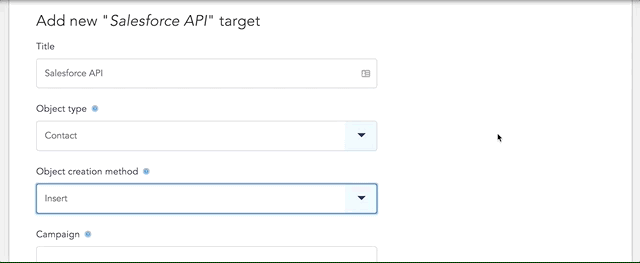
Object Type
Select whether you want data sent to Salesforce to be designated as a Contact or as a Lead.
Object Creation Method
- Insert: create a new object.
- Upsert: update or create an object in Salesforce. You will have to specify a field by which to define the object (i.e. by Email address). If data from the selected field matches up to an existing object, you can choose which fields should be overwritten on an individual basis.
- Multi-value upsert: enter multiple values for defining the Contact/Lead object to be updated. If the values match, the record will be updated, and if all the values do not match, a new record will be inserted.
When selecting any of the options above, please make sure that they do not conflict with your Salesforce duplicate management rules. You can learn more about Salesforce duplication management here.
Campaign
Salesforce Campaigns makes it easy to organize individual contacts or leads into specific campaigns. You can associate data from your New/Mode action with one of your existing Salesforce campaigns by entering the Salesforce Campaign ID into this field.
Syncing fields in your action to your CRM
We can sync data to the following field types:
'texarea', 'string', 'email', 'boolean', 'picklist', 'phone', and 'date'.
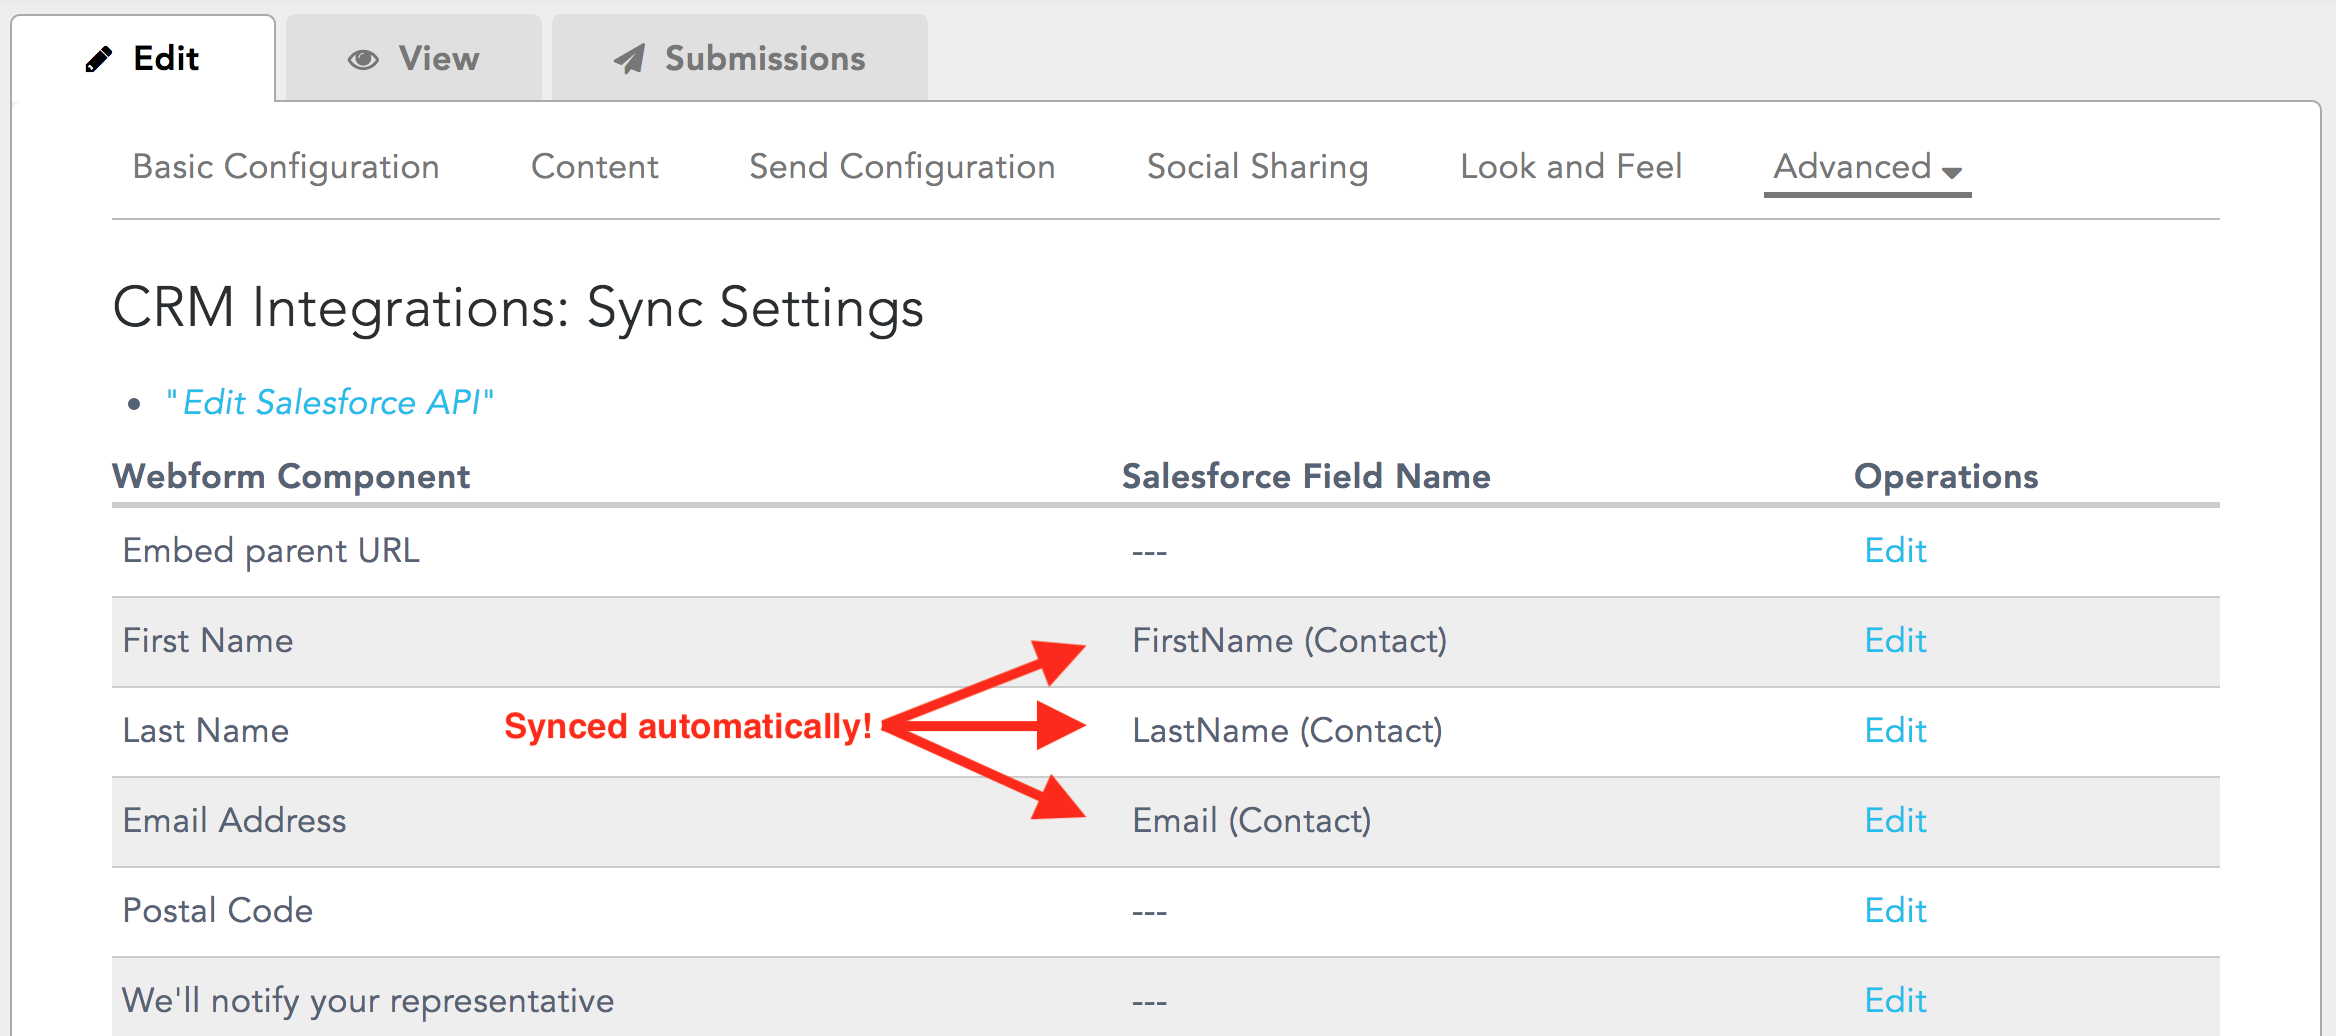
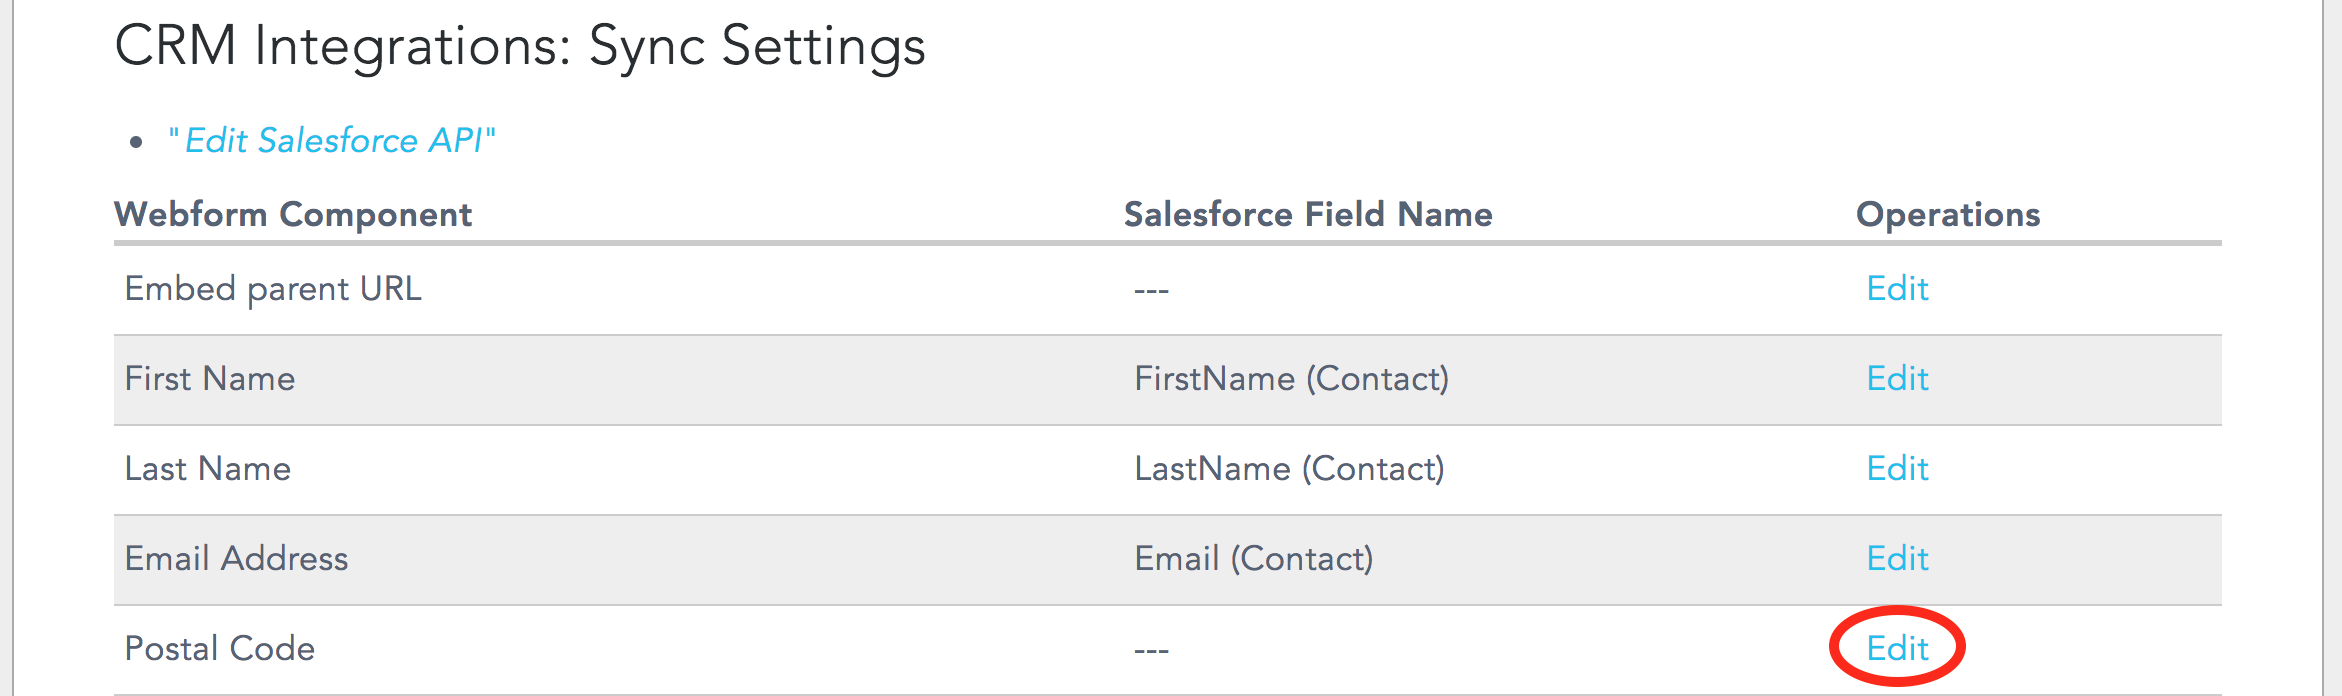
1. Go to the CRM Integrations screen under your action’s Advanced dropdown menu. You'll see that First Name, Last Name, and Email Address have automatically mapped on to their associated Salesforce fields:
From this screen, you have a few options for syncing action components to Salesforce fields:
2. Click the blue Edit link in the right-hand column next to any component:
This link will take you to a page where you can edit the component and sync it to an associated Salesforce field under the Send to Salesforce API dropdown:
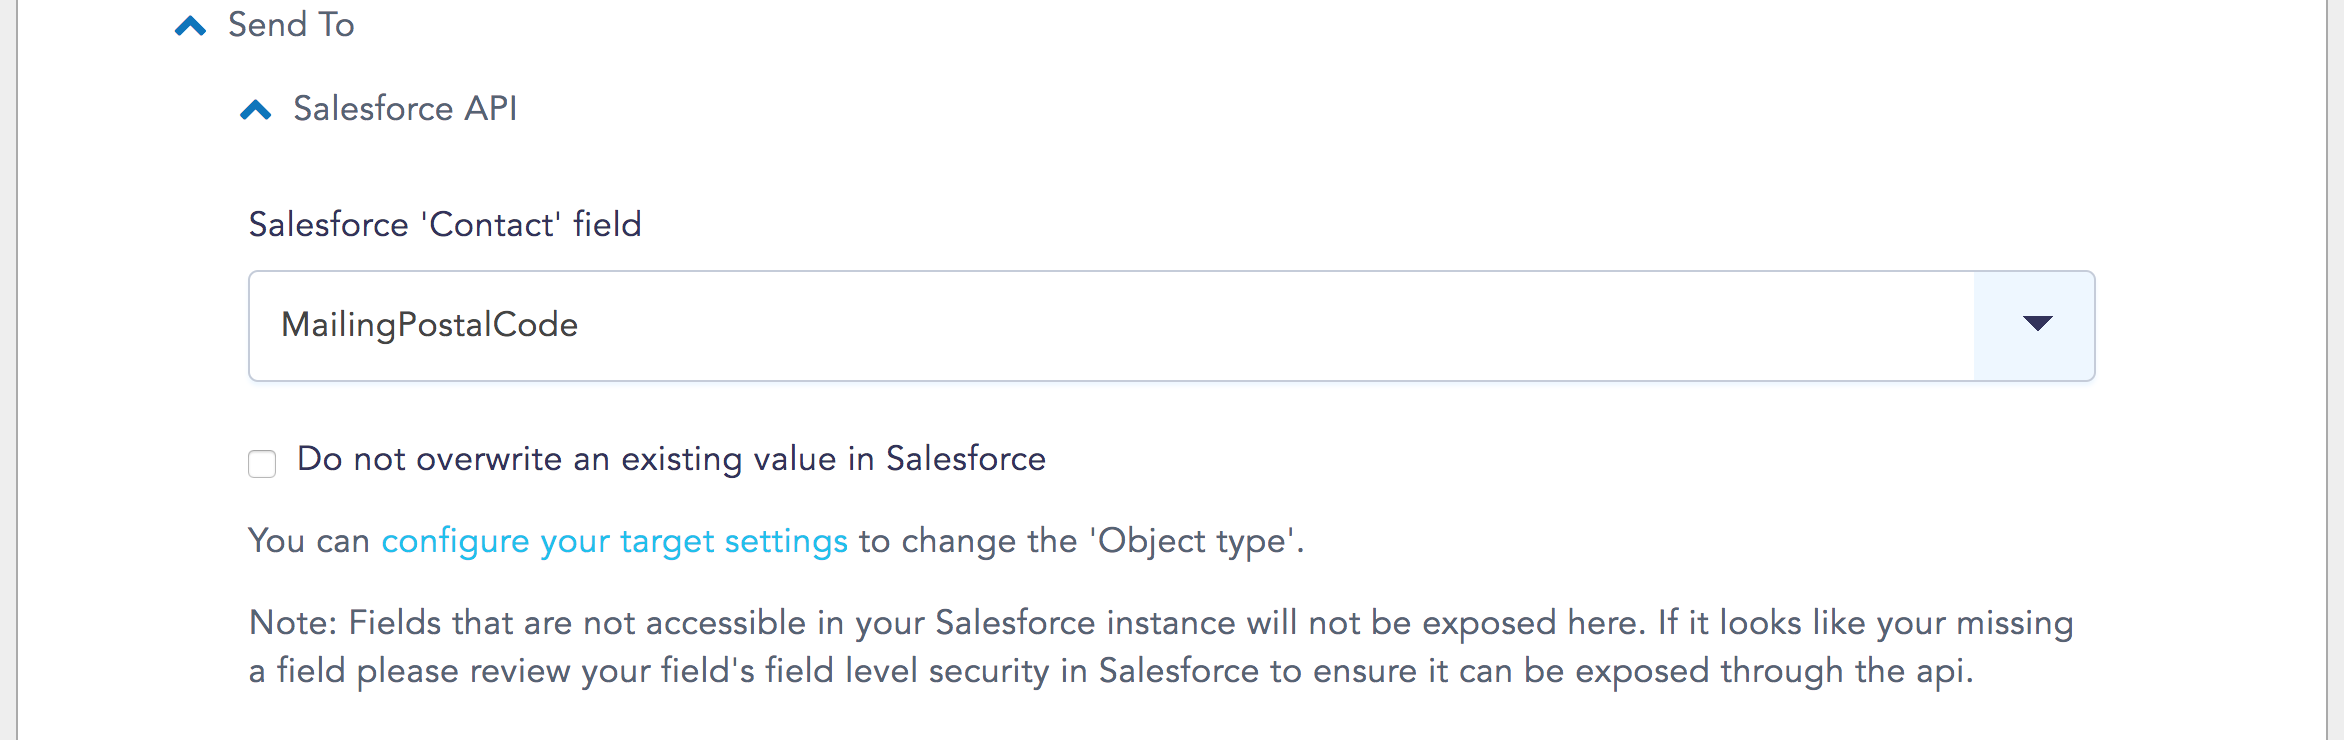
Although you will be given the option to select a Contact field, you can change the Object Type from a Contact to a Lead on your Edit Salesforce API page.
Under the Salesforce field that you're selecting, you can opt to not allow the data from your campaign to overwrite an existing value in Salesforce. By selecting this option, upserts will only send values to Salesforce if it's inserting a new record.
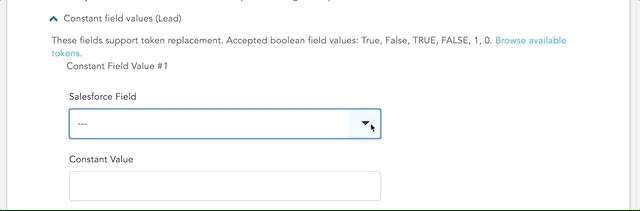
Syncing constant values
1. You can add additional custom fields to map from your New/Mode action to Salesforce by clicking the Edit Salesforce API link under CRM Integrations:
Once you've configured the Salesforce objects you're working with, these settings will apply to all the data sent by your action.
You can now configure additional Salesforce fields by selecting from a list of fields that you're using in Salesforce and applying a constant value to associate with each field (i.e. True, False, TRUE, FALSE, 1, 0):
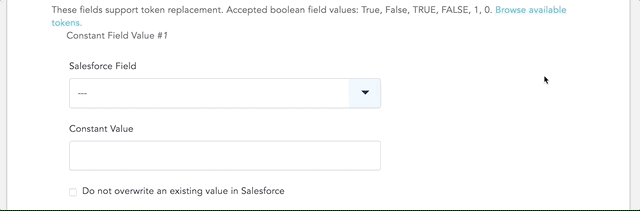
For each new field value that you create, you can opt to overwrite an existing value in Salesforce, as we discussed above in Step 2.1.
2. Salesforce fields can also be mapped onto metadata generated by supporter actions using our custom tokens. Again, this can be done under the Edit Salesforce API page. Under Salesforce Field, select from a list of fields that you're using in Salesforce and add an associated token from the browse available tokens link accessible at the top of the Constant Field Value dropdown on this page:
You may need to use these tokens if you're running an address-based targeting campaign.
Syncing Address field data to Salesforce
Choosing the default address mapping field ('MailingAddress - Full') will split address data into the correct fields in Salesforce.
Alternatively, you can follow the steps below to customize the mappings and send each piece of address data to a specific field in Salesforce ('MailingStreet', 'MailingCity', 'MailingState', 'MailingPostalCode', and 'MailingCountry').
Customize address data sync
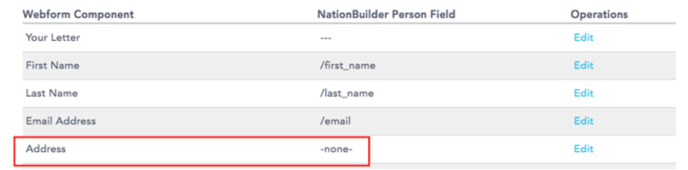
1. Start by opening Advanced > CRM Integrations, and ensure that the Address component is not mapped to a field in Salesforce.
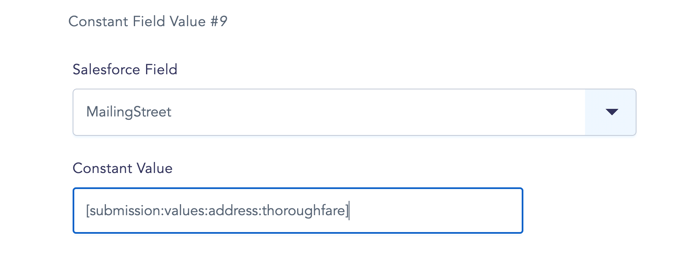
2. Next, familiarize yourself with our five handy address tokens. Each of these tokens is associated with an address field filled out by your supporters:
- [submission:values:address:thoroughfare]
- [submission:values:address:locality]
- [submission:values:address:administrative_area]
- [submission:values:address:postal_code]
- [submission:values:address:country]
Because our tokens are mapped to Google’s international standards, they might seem a bit unfamiliar. Here are a few quick translations:
- thoroughfare = street
- locality = city
- administrative area = state or province
- postal code = postal or zip code
- country = country (ok, that one’s a bit too easy…)
3. Now that you know the tokens, on the CRM Integrations page click the Edit [CRM] API link:

4. You’ll be taken to a page entitled Add new “[CRM] API” target. This is the page where all the real syncing magic happens. Of course, you've already set up your CRM API target, you're just going to tweak it a little now. Scroll down to the Constant field values section of the page.
5. Use the CRM Field dropdown menu to find the field that you want associated with a related address token value.
6. Repeat this process until you’ve included all the fields relevant to your CRM and mappable via the five constant value address tokens discussed above. Click Save. Addresses will now be sent to Salesforce.
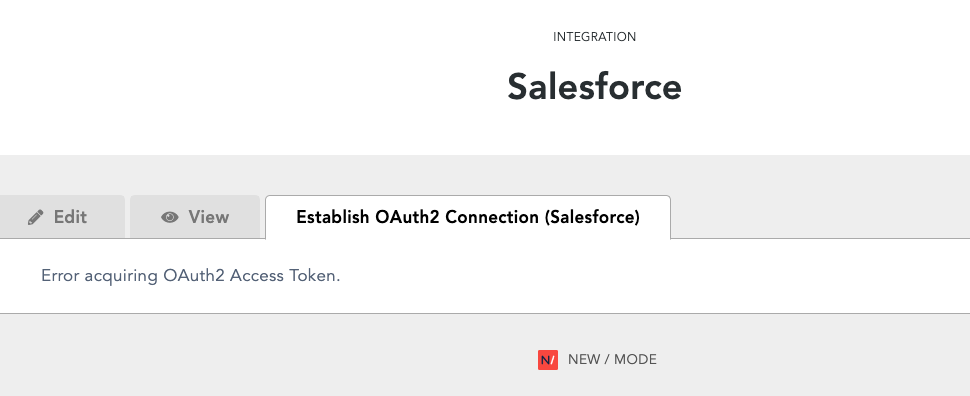
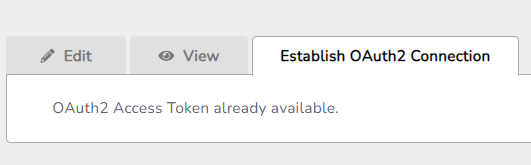
How do I resolve the 'Error acquiring OAuth2 Token' on my Salesforce integration?
This section will run you through the process of fixing the 'Error acquiring OAuth2 Token' issue you may run into on the 'Establish OAuth2 Connection' Tab for Salesforce. This issue can occur when there is a problem authenticating the connection between the New/Mode platform and your Salesforce instance.

Last updated: May 31, 2023