You can use Custom Targets when you want all of your supporters to contact the same targets regardless of their location, or targets who are not in our database.
Custom Targets are available for all actions except Letters to the Editor, as those target newspapers near the supporter.
Choose specific targets from New/Mode datasets:
Import from a CSV File
You can find a detailed walkthrough for importing CSV data here.
A CSV file is a file of organized data. The kind of data we’re looking for on your custom target CSV is stuff like names and contact information for the decision-makers that you want to target:

- ‘full name’,
- at least one form of contact information - 'phone', 'fax', 'twitter', or 'email',
- 'jurisdiction', which helps the action differentiate between targets that have the same names in your custom data.
Beyond these data fields, you can define as many lookup columns as you like to make it easy for your supporters to connect with the most relevant targets.
We’ve provided a link to a Google Sheets template that you can work from if you don’t already have one set up.
To import a CSV file, enter the URL for a web-reachable CSV into the URL for Custom CSV Data Source field, make the elections that appear, and click Save & Next at the bottom of the page:
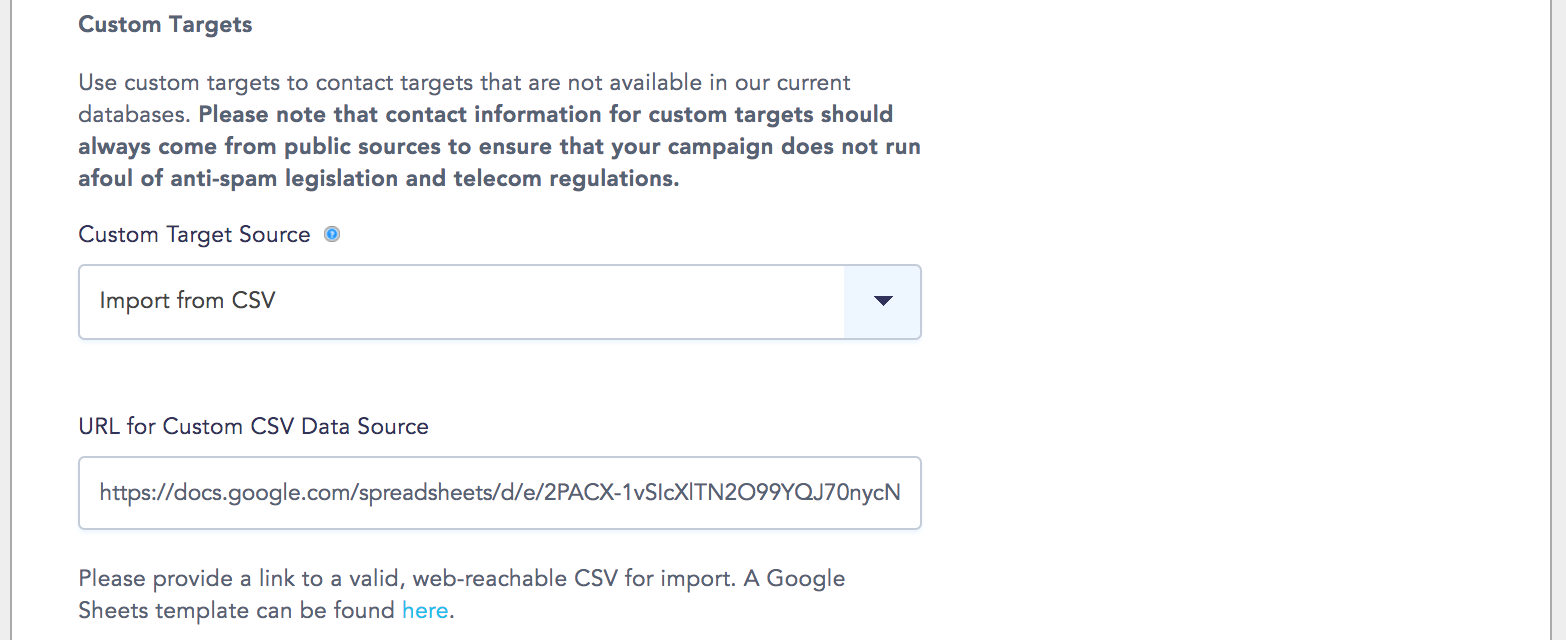
You will also return to this section of your Basic Configuration page when you need to make updates to your CSV file or import a new file. Note that importing a new file will replace the old CSV file.
Not sure how to create a web-accessible CSV file? Check out our walkthrough here.
Define Custom Targets
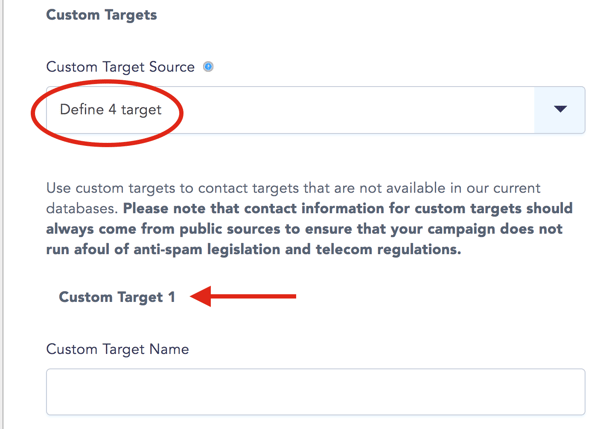
To define custom targets manually, first select the number of targets you want to define under the Custom Target Source menu. Text fields for entering custom target information will then appear below the menu:
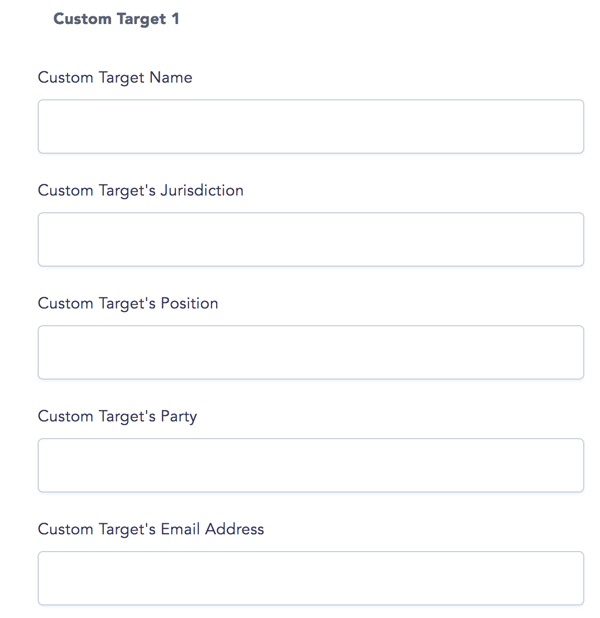
For each custom target, you will have to enter the full name, jurisdiction (optional), position, party, and email address (or Twitter handle, or phone/fax number):
Using custom targets from multiple countries? Find out how to add countries to your postal code/zip code validation field here.
Choose specific targets from New/Mode datasets
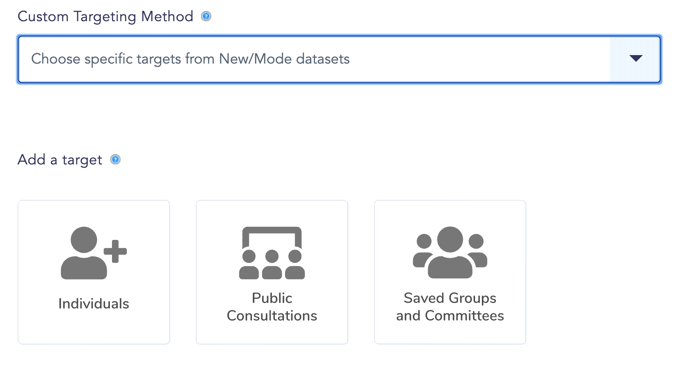
To begin, select "choose specific targets from New/Mode datasets" from the custom target method drop down menu.

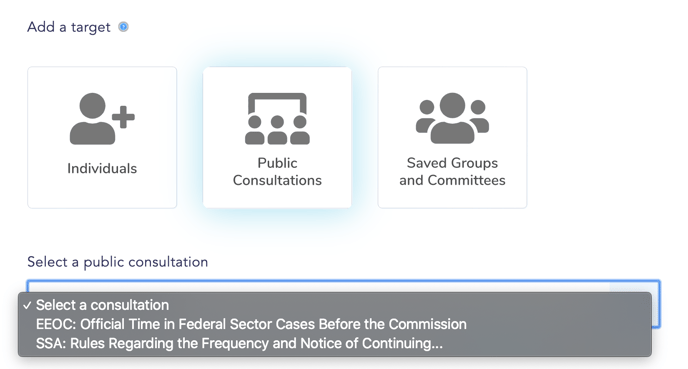
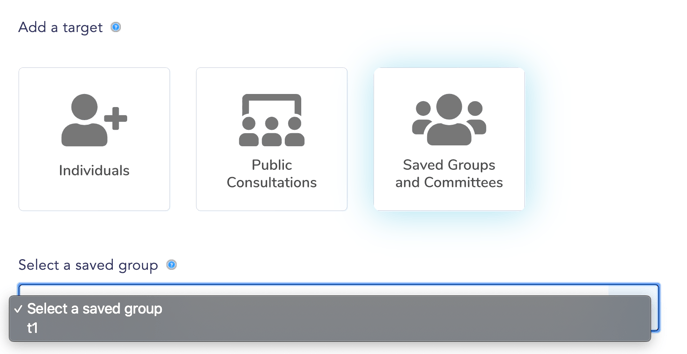
Then, choose if you'd like to target Individuals, Public Consultations, or Saved Groups and Committees. We'll go over each of these below.
Individuals
Type in your target's name in the search for a target textfield. If your target is in our dataset, they'll generate in the dropdown menu below. Simply select their name to add them to the action.

If you have multiple custom targets chosen from our datasets you'd like to use again in the future, simply add a group name to save as a group for future use.

Public Consultations
Select Public Consultations from the Add a target menu. Then, from the select a public consultation dropdown menu, choose your desired public consultation. The targets in the public consultation will automatically generate.
Saved Groups and Committees
If you've saved a group for future use, select saved groups and committees from the add a target menu. Then, select your desired saved group from the select a saved group dropdown menu. Your saved group will then automatically populate.
Don’t forget to click Save & Next at the bottom of the Basic Configuration page to save your custom targeting choices! This is particularly important after you’ve successfully uploaded a CSV file or entered a bunch of custom target data!
Interested in setting up Location-based Targets? Find out more here!
Last updated: February 3, 2021
