This is a complete guide to syncing your New/Mode actions to iMIS 2017, from creating an integration in your organization to customizing field mapping in individual actions.
Adding a iMIS integration to your Organization
Connecting your iMIS integration with an Action
Syncing the fields in your Action to iMIS
Additional configuration options: upsert criteria, constant field values
Adding an iMIS integration to your Organization
1. On your organization's Dashboard, open the Integrations tab.
2. Find iMIS on the list and click on '+ Add integration'.
3. Once you've selected iMIS as your CRM Service, you'll be asked to enter your iMIS account details under iMIS Settings:
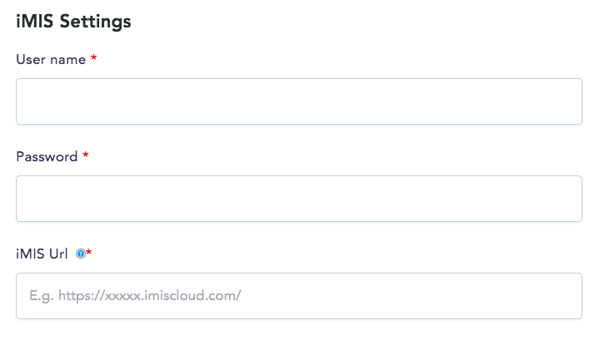
- Username: the username you use to log into your iMIS account.
- Password: the password you use to log into your iMIS account.
- iMIS URL: the URL you use to log into your iMIS account, in the format
https://<org-name>.imiscloud.com/
4. Click the Save button to complete the process.
Note that we support iMIS 2017 and not iMIS Cloud.
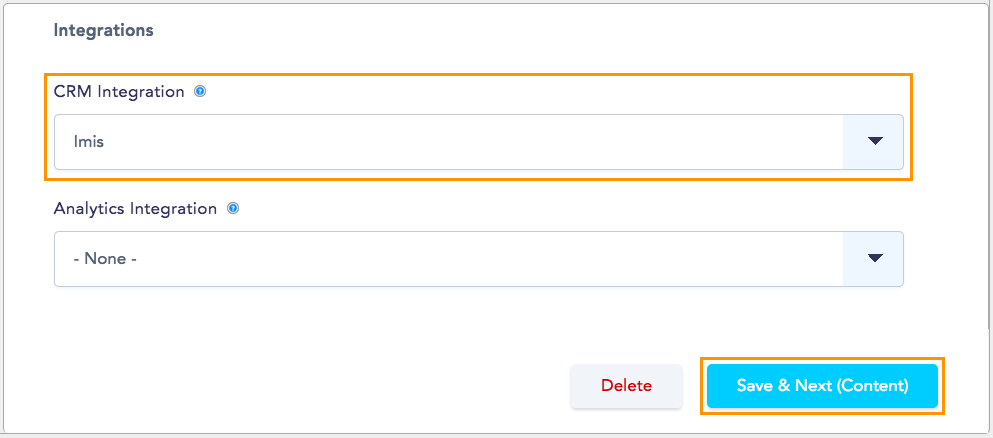
Connecting your iMIS integration with an Action
In your New/Mode action, open the Edit tab, and scroll down to the Integrations section of the Basic Configuration page. Select your iMIS integration from the 'CRM Integration' menu and click on 'Save & Next' to complete the process.
Syncing the fields in your Action to iMIS
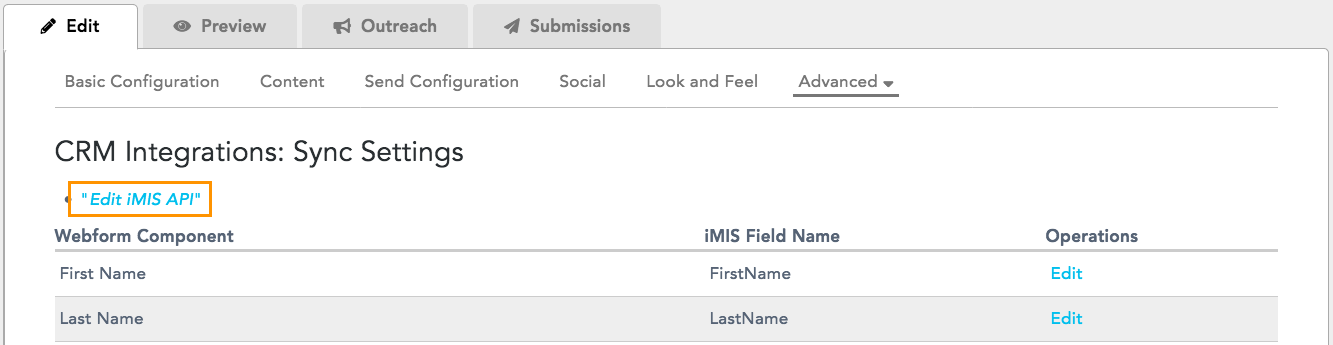
1. Start by opening Advanced > CRM Integrations to arrive at the Sync Settings page:

The Sync Settings page has three columns:
| Webform Component | iMIS Field Name |
Operations |
|
A list of the fields that supporters fill out on your action. |
A list of the user fields in iMIS where the data from your action will be sent. |
Where you can edit your action's field to change the iMIS field they're linked to. |
If any of your action fields listed on the left-side column are not pointing to the field you want on the iMIS field column, follow these steps:
2. Click on Edit.
3. Find the iMIS API section and, under 'iMIS field', select the right user field from the drop-down menu.
4. Scroll down to the end of the page and click on the Save button to complete the process.
Additional configuration options
Start by opening Advanced > CRM Integrations to arrive at the Sync Settings page, then click on 'Edit iMIS API':
On the next page you'll see a few different optional settings:
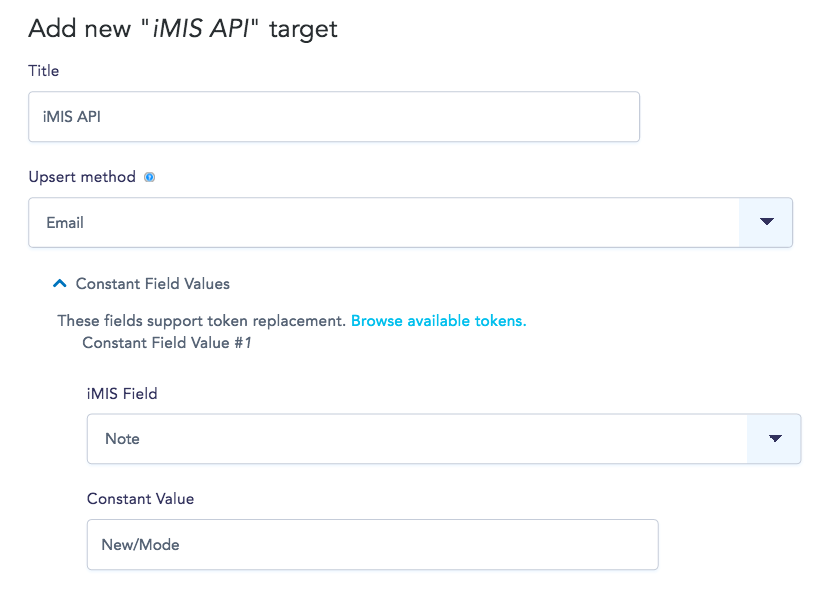
- Title: you can change the name of the integration here.
- Upsert method: choose how iMIS will match the data we sync to it against existing data to determine if we're sending new information:
- Email: matches supporter data based on email address alone (default setting)
- Email, first name and last name: matches supporter data based on email address as well as first and last name
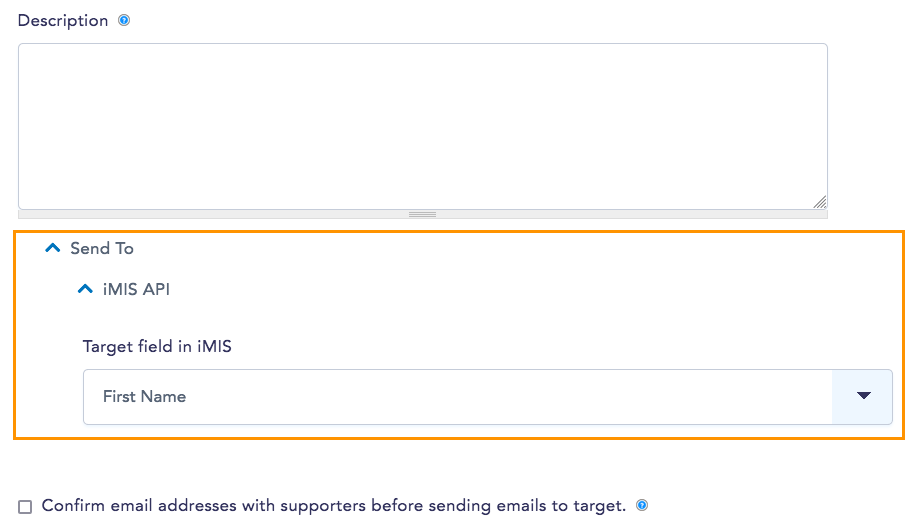
- Member ID: matches supporter data based on Member ID, which requires syncing Member ID along with other supporter data. This can be done by setting up constant values as explained below, or by adding a tracking component.
- Constant Field Values: these are separate fields that allow you to attach other information to your supporter data:
- On the iMIS Field drop-down menu, select the field in iMIS that this data should go to. (If you create custom fields in iMIS you'll see them listed in this menu along with the default fields).
- Under Constant Value, enter the value that you'd like to be added to each Person and sent to the field you selected above. (You can also use tokens to send metadata from submissions to iMIS).
If you make any changes here make sure to save them!
Last updated: July 1, 2021