With a Petition, you will be asking supporters to deliver a clear list of demands to their representatives instead of a letter, so you'll want to keep your content as powerful and concise as possible.
If you're looking to have your subscribers send a more personalized letter, consider creating an Emailing Action!
Once you’ve got the Basic Configuration of your Petition Action set up, you can start creating content for your campaign on the Content screen under the Edit tab:

Images
- Header Image: Manage how the image and title of your Petition Action will look on your campaign landing page. You don't want too much clutter at the top of the action to distract from the action button, so use it wisely!
- Header Display: Decide how you want the title of the action and the header image to appear on the action.
Supporter Content
The Supporter Content section of your action Content screen is where you'll add the content that will guide your supporters through the process of taking action, and define how you'll thank them for doing so. It looks like this:

- Introductory Text: This is your Call to Action! By default, it appears below the header of your campaign action. Tell your supporters what they can do to make a difference, and include key points if you'd like.
- Thank You Page Message: After they complete an action, your supporters will be taken to this page. Tell them they’re great, and offer them a chance to share your campaign with our social sharing buttons. You'll also have the option to send them to a Custom Redirect URL instead of a thank you page.
- Thank You Email Message: After your supporter completes an action, they’ll receive a thank you email from your organization.
Form elements settings
- Action Button Label: Inspire your supporters to share their voice with an inspiring Action Button Label. We've provided you with an awesome default message, but you can customize it to make it perfect for your audience.
Target Content Settings
There are two options you can toggle in this section:
- Disable editing of message content. This is very important in Petitions, as it ensures that your supporters don't need to edit or change the message sent to their representatives.
- Show the opening and closing salutation on the form. If you check this, they'll appear on the action itself instead of in the message to targets.

Target Content
Do you want your Petition to send emails to targets?
- Yes, as soon as supporters take action: disable editing of the message content, then create it as described below like you would with an email or fax action. Make sure you test your action thoroughly to get those petition emails to targets looking just right!
- Yes, but not right away: create the target content as described below. Then go back to the Basic Configuration page, find the Optional Settings section, and uncheck the box for 'Auto Approval'. Now you can approve submissions manually to send the messages to targets associated with them.
- No: create the target content as described below. Then go back to the Basic Configuration page, set the Petition's 'Target Type' to Custom Targets, the 'Custom Targeting Method' to Add custom targets, and add an internal email address as a custom target. Now every submission will send an email to that email address. You can then export submissions as PDF, print them, and deliver a hard copy to your target!
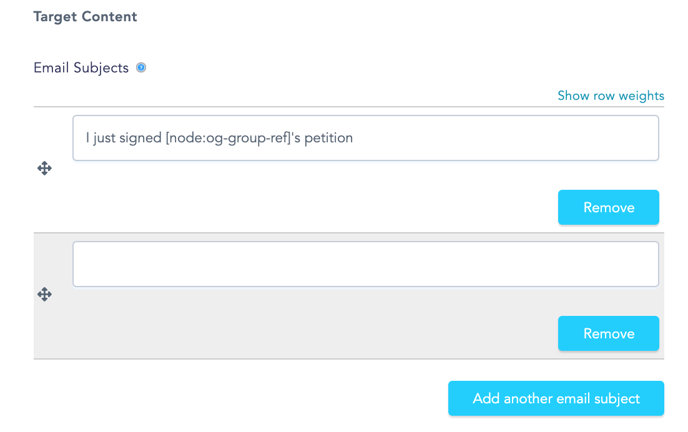
Email Subjects: Here, you can edit your email subject. You have the ability to add multiple subject lines if you'd wish to do so with the add another email subject button. By default, your subject line will say "I just signed [your organization's] petition"  Opening Salutation: This is where you enter the greeting for your target. By default, we suggest using a Token to personalize the greeting.

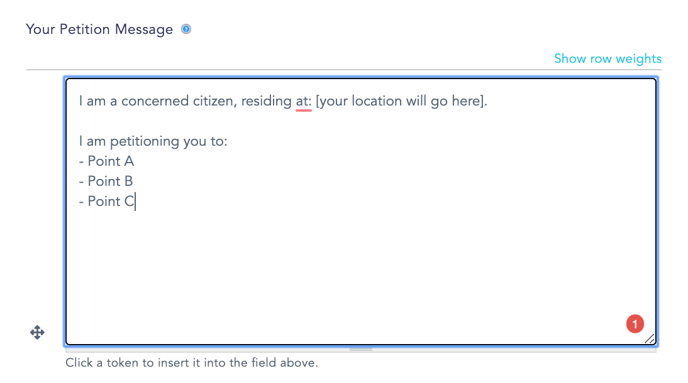
Your Petition Message: This is where you write your petition message. This will be delivered to your targets, so ensure your petition asks are clear and concise.

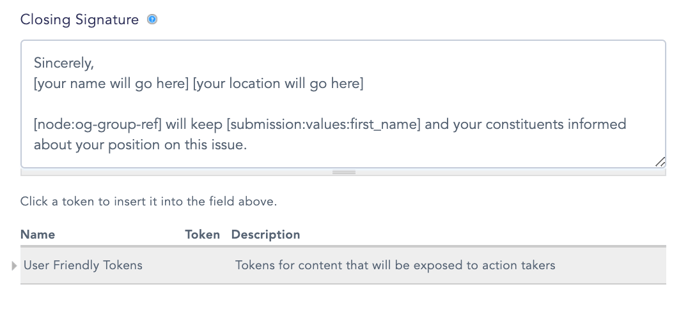
Closing Signature: This is where you sign off the message. Just as the opening salutation, we recommend using tokens to personalize this message.

And that's everything! Click save and next to move onto send configuration!
Last updated: January 26, 2022
